Twix Cheesecake Bars
These luscious Twix Cheesecake Bars are a tasty way to get your homemade cheesecake fix without all the calories of one slice of a traditional cheesecake. Of course, you’ll probably want to go back for seconds!
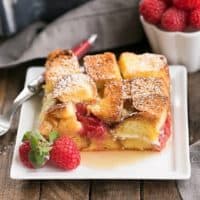
My Cheesecake Recipe starts with a graham cracker crust, then a rich, sweet cheesecake batter filled with chunks of chocolate, caramel and cookie filled Twix bars, then topped with a glossy chocolate ganache. Are you drooling yet??? Scroll down for the recipe or click on the Jump to Recipe button below.

Why You Should Make these Cheesecake Bars
- Much as we love a decadent cheesecake recipe around here, it’s a lot for our family to consume. Cheesecake bars to the rescue!!
- With a graham cracker crust, perfectly luscious vanilla cheesecake filling plus numerous options for add-ins, then a glossy ganache topping make an extremely enticing dessert!
- Chopping Twix mini bars were a delicious addition to the filling and either chopped or crushed candy are added to the ganache topping for an extra bit of crunch and yumminess!
Are you unfamiliar with the Twix bar? They have a shortbread base topped with a caramel layer before being encased in chocolate. They come in stick form, so they’re narrower than your typical candy bar. My Twix Cheesecake is one of the most popular posts on the blog, so if you’re a Twix lover, you’ll want to bake one up for a special occasion.

Tips for How to Make Cheesecake Bars
- If you’re out of graham cracker crumbs but have graham crackers at home, you can easily make some in your food processor. Break up the graham cracker sheets into smaller pieces and pulse in the food processor until crumbs are formed.
- Use the bottom of a measuring up to pat the crumb mixture into the pan. This helps keep the layer level.
- Always use room temperature cream cheese and eggs for the silkiest filling. They incorporate much better than if cold from the refrigerator.
- Use the paddle attachment to mix the filling to keep it dense and delicious! The whisk attachment will add too much air into the batter.
- For plain cheesecake bars, just leave out the Twix bits in the filling and on top of the ganache. Or add some mini chocolate chips instead!

More of the Best Cheesecake Recipes
- Cannoli Cheesecake Bars from Snappy Gourmet
- Triple Chocolate Cheesecake
- Instant Pot Cheesecake
- Hot Fudge Brownie Cheesecake
- White Chocolate Cheesecake
- Blackberry Cheesecake Bars
- Chocolate Peanut Butter Cheesecake Bars
- More Tips and Cheesecake Desserts
This recipe is part of a series with my dear blogger friend, Danielle, of Hugs and Cookies. Check out her take on this recipe and follow her on social media!!
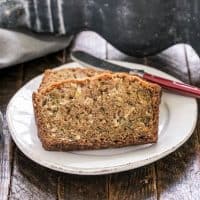
Twix Cheesecake Bars
Luscious Ganache Topped Cheesecake Bar studded with bits of Twix Bars
Ingredients
Crust
- 1¼ cups graham cracker crumbs
- 5 tablespoons butter, melted
- 5 tablespoons sugar
Cheesecake
- 24 ounces cream cheese, at room temperature
- 1 cup sugar
- 3 tablespoons flour
- 1 cup sour cream
- 4 eggs, at room temperature
- 1 teaspoon vanilla
- 1 package of Twix mini bars, smashed or chopped (9.7 ounces), about 2 cups when measured
- 3 extra mini bars to crumble for top garnish
Ganache
- ½ cup heavy cream
- 6 ounces semi-sweet chocolate bars, chopped
Instructions
- Preheat oven to 325°.
- Mix crust ingredients and press into sides and bottom of 9x13 inch pan lined with nonstick foil. Bake for 10 mins and let cool.
- Lower oven temperature to 300°.
- Using the paddle attachment of your mixer, if you have one, beat the cream cheese and sugar on low to combine. Scrape the bottom of the bowl with a spatula a couple of times during the process.
- Add flour and mix, then add the sour cream and mix.
- Then add one egg at a time, mixing until combined before adding the next. Then add the vanilla. Fold in the Twix pieces and pour over the crust.
- Drop the pan gently on the counter to release air bubbles. Then place it in the oven
- Bake for 1 hour. When the timer goes off, turn the oven off, but leave the pan in the oven for 30 more minutes. Do not open the door.
- Remove from over to the cooling rack. When cool, chill.
- When chilled, make the ganache.
- To make the ganache, microwave cream until almost at a boil in a microwave-safe bowl.
- Remove and add the chopped semisweet chocolate. Cover the bowl with a plate or paper towel for 2 minutes, then whisk until smooth.
- Pour onto the cold cheesecake bars and use an offset spatula to smooth across the top if needed. Sprinkle with reserved
- Return to the refrigerator until set.
- Sprinkle candies on while the top is still tacky.
Notes
Make sure the cream cheese and eggs are at room temperature for the best results.
Use the paddle attachment for the creamiest cheesecake.
Recommended Products
As an Amazon Associate and member of other affiliate programs, I earn from qualifying purchases.

Nutrition Information:
Yield:
24Serving Size:
1 barAmount Per Serving: Calories: 362Total Fat: 24gSaturated Fat: 15gTrans Fat: 0gUnsaturated Fat: 7gCholesterol: 79mgSodium: 183mgCarbohydrates: 34gFiber: 1gSugar: 27gProtein: 5g
Thatskinnychickcanbake.com occasionally offers nutritional information for recipes contained on this site. This information is provided as a courtesy and is an estimate only. This information comes from online calculators. Although thatskinnychickcanbake.com attempts to provide accurate nutritional information, these figures are only estimates. Varying factors such as product types or brands purchased can change the nutritional information in any given recipe. Also, many recipes on thatskinnychickcanbake.com recommend toppings, which may or may not be listed as optional and nutritional information for these added toppings is not listed. Other factors may change the nutritional information such as when the salt amount is listed “to taste,” it is not calculated into the recipe as the amount will vary. Also, different online calculators can provide different results. To obtain the most accurate representation of the nutritional information in any given recipe, you should calculate the nutritional information with the actual ingredients used in your recipe. You are solely responsible for ensuring that any nutritional information obtained is accurate.


10 Comments on “Twix Cheesecake Bars”
A favorite childhood candy bar! These are the perfect treat to satisfy a sweet tooth!!
How did you know this is my favorite candy?? These bars are a dream come true.
These bars made staying in for the weekend a lot more fun! The cheesecake layer is so creamy and then this candy bar layer takes it to a whole ‘nother level! Make these, ASAP!
These are our favorite stay home treat. Going to make another batch this week.
Twix is one of my absolute favourite chocolate bars, so putting them into a cheesecake bar is my kind of heaven! I need to make these xo
I don’t know how you stay so skinny with recipes like these. Who could resist these luscious chocolate Twix cheesecake bars!
Oh geez these look fantastic! What a treat. I wish we were neighbors and I’d share some of mine, if you’d share some of yours – haha. Perfection!
Pretty clever use of a great candy bar, Liz! The chocoholics here will love this and want seconds for sure. Printed this, thanks for sharing!
These cheesecake bars with Twix sound and look incredibly delicious. My husband is going to love this since he loves chocolate 🙂
OMG Liz, Twix is one of my favorite bars, and you turned into an amazing cheesecake…looks delicious, I so wish for a square of this cheesecake. Thanks for the recipe…have a great week!