Best Baking Tips: The Ultimate Guide for Home Bakers
These are my Best Baking Tips from decades of making sweet treats in my kitchen to help make you successful in the kitchen.
Make sure to share this baking for a beginner’s resource with any friends who are new to baking! Plus check out some of my most used easy baking substitutes below.
Baking Basics: General Baking Tips
These are baking basics, things you may have learned along the way if you like to play around in the kitchen. But hopefully, I’ll have some new baking tips and tricks for you.
- PRO-Tip: Have your eggs at room temperature. You can hurry this along by setting them in a bowl of very hot tap water. Not too hot, though, as you don’t want to cook the eggs.
- PRO-Tip: Have your butter at room temperature unless your recipe calls for cold butter. Your stick of butter should bend slightly when you hold it up. You don’t want it so warm that it looks greasy.
- For cheesecakes, both cream cheese and sour cream should be at room temperature as well. Blending cold cream cheese often leaves little specks throughout the batter.
- PRO- Tip: Read through your recipe thoroughly before you begin. Some doughs may require some chilling time in the fridge, and if you want cookies immediately, you may want to select another recipe.
- Set out all your ingredients before you start. This will ensure you don’t forget a necessary ingredient.
- Salt may seem odd in a dessert recipe, but don’t leave it out. Baked goods will taste flat without a bit of salt.
- Use quality ingredients for the best results.
- PRO-Tip: Make sure your baking powder, yeast, etc. are not expired. The use-by date is often a general guideline, but I would never use expired baking powder or yeast.
- Baking soda has a much longer shelf life than baking powder. These two ingredients are not the same and are not interchangeable.
- PRO-Tip: Use an oven thermometer to ensure your oven is calibrated properly. When a recipe says to bake for an hour at 350º, you’ll want your oven to actually be at 350º. Many newer ovens will allow you to calibrate the temperature. Read your manual for your specific model’s instructions.
- If you notice that your oven has hot spots (for example, if the cookies at the back of the baking sheet brown before the cookies at the front), make sure to rotate your pans at the halfway point.
Measuring Tips
- Make sure you have a set of both dry measuring cups and liquid measuring cups. Baking is a science and measurements need to be accurate. These are not interchangeable.
- PRO-Tip: Spray your measuring cup with non-stick cooking spray, like Pam, when measuring sticky ingredients such as peanut butter, molasses, syrup, and honey.
- To measure flour, gently scoop out a generous cupful with your measuring cup, then use a flat utensil, like an offset spatula, to level off the top. Or spoon flour into your measuring cup, then level off the top with an offset spatula.
- Most recipes that call for brown sugar will want you to pack it into the measuring cup for the most accurate measurement.
- When baking, the BEST way to measure is with a Digital Kitchen Scale. It’s also a wonderful tool to divide bread dough into equal halves, ensure your three cake pans contain the same amount of batter and more. It’s worth the investment.
More Baking Basics: Prepping Pans
- If you don’t want a cake or quick bread to stick to the pan, use a cooking spray that combines oil and flour, like Baker’s Joy.
- Line cookie sheets with Parchment Paper Baking Sheets to prevent sticking and make for easy cleanup.
- Line bottoms of loaf pans and cake pans with greased parchment cut to size to prevent chunks from sticking to the pan during removal.
- Line baking pans with Non-StickFoil when baking cookie bars for easy removal. Parchment paper works well, too.
Testing Baked Goods
- For most cakes and quick bread, inserting a toothpick or long wooden skewer is a good way to test for doneness. Insert it into the center of the baked good and when it’s clean when removed, the baked good is done. Follow recipe instructions, though, as some recipes call for a few moist crumbs to be left on the toothpick for proper consistency.
- When I bake cakes and muffins, I often use the touch technique. Carefully push down on the baked item with your finger. If the item is done, the indented area will bounce back. If it is not finished baking, the indentation will remain.
- When baking bread, use an instant-read thermometer to check the internal temperature. For yeast bread, a 200º internal temperature means the loaf is done baking. You can also use your knuckles to knock on the loaf. A loaf that’s done will sound hollow.
- Brownies are tougher to judge, but they will often pull away slightly from the sides of the pan when done. Again, check the recipe for tips on what works for that particular baked good.
- For cookies, check them after the minimum baking time. They should look just set in the centers unless the recipe states otherwise. Under-baking slightly will give you a chewier cookie while over-baking slightly will give a crisper cookie.
- Let cakes and quick bread cool for 10-15 minutes before removing them from their pan to finish cooling. Let cookies cool a few minutes on their baking sheet before removing to a wire rack to finish cooling. Sometimes with more delicate cookies, they will need a longer cooling period before the transfer. As always, if the recipe states otherwise, follow those instructions.
- And, last but not least, I’m always asked how I cut my bars so evenly. First, I chill my brownies or cookie bars thoroughly. Then use a sharp, hot, dry knife to cut them into squares. If eyeballing doesn’t work for you, break out a ruler to ensure your cuts are evenly dispersed. I find cutting an 8 x 8 pan into 16 bars so that each is 2 x 2 inches works best. For a 9 x 9 pan, divide the pan into nine 3 x 3-inch bars (or 36 1½-inch bars if that works better), and so on.
- Check out this post on How to Cut Perfect Cookie Bars for details.
Use Quality Ingredients
Buying the cheapest brand is OK sometimes, but with butter, for example, some generic brands have water added and the results may be less than ideal. Here are some brands I recommend. Look for sales so you can stock up.
- Flour – I use the King Arthur brand of All-Purpose and Cake Flour.
- Sugar – I use the Domino brand.
- Butter – I use Land ‘o Lakes. I use salted butter and decrease the salt in a recipe when it calls for unsalted butter.
- Eggs – I use large eggs in the majority of my recipes. Have them at room temperature for easy incorporation. Typically I purchase Eggland’s Best as it is readily available.
Easy Baking Substitutions
There are two baking substitutions I’ve used over and over, for buttermilk and cake flour. I’ll add a few more that could help if you’re in a pinch.
- Buttermilk: Put 1 tablespoon of lemon juice or neutral-flavored vinegar like white or cider vinegar into a one-cup liquid measuring cup. Add milk to the one-cup mark, stir, and let rest for a few minutes. Measure and use as directed.
- Cake Flour: Measure out a cup of all-purpose flour, then remove two tablespoons. Measure out 2 tablespoons of cornstarch and add to the cup of flour. Sift two or three times to evenly disperse the cornstarch. Repeat for each cup of cake flour needed and use as directed in your recipe.
- Baking Powder: Mix ¼ teaspoon baking soda, ½ teaspoon cream of tartar, ¼ teaspoon cornstarch as a substitute for 1 teaspoon baking powder.
- Baking Soda: Use 2 teaspoons baking powder for ½ teaspoon baking soda
- Butter: Use an equal amount of margarine
- Brown Sugar: Add one tablespoon of molasses to 1 cup of granulated (white) sugar. Mix and use.
- Dark Brown Sugar: Add one tablespoon of molasses to 1 cup of light brown sugar. Mix and use.
- One Large Egg: Mix 1 tablespoon of ground flaxseed with 3 tablespoons of water. Let rest until the mixture thickens.
- One Large Egg: 3 tablespoons of mayonnaise
More of the Best Baking Tips and Tricks:
- 100 Best Baking Tips from Sommer of A Spicy Perspective!
- Bon Appetit’s 11 Baking Tips
- Baking Tips and Techniques from King Arthur Flour
- Baking Tips for Layer Cakes from Barbara Bakes
Disclaimer: I am not a trained pastry chef. These baking tips and tricks come from years of home baking experience, but not every tip may work for you. If you have any other suggestions for baking tips I didn’t mention, please share them in the comments.





28 Comments on “Best Baking Tips: The Ultimate Guide for Home Bakers”
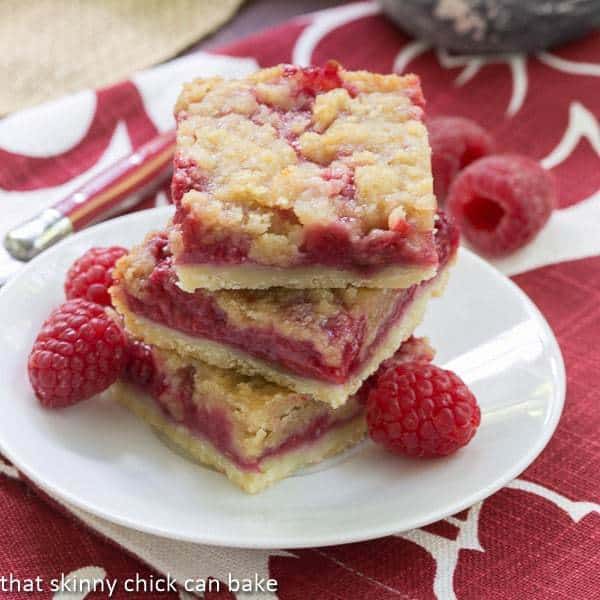
Always helpful to hear how successful bakers do it! Thanks for sharing your experience, and… I’ll have a slice of the raspberry bars please:@)
If I had one wish it would be to be in your kitchen for just one day! Thanks for the tips. May God bless you.
Great tips and reminders! There is nothing worse than making a beautiful cake or loaf only to have it stick to the side of the pan! One tip I have is to use the residue from your butter wrapper to help grease your sheets/pans. Every bit helps! Happy holiday baking! Thanks Liz!
Nice tips, Liz. I just read through them quickly. I always line my loaf pans with the paper high…but now I think I will try your method. Thanks! 🙂
Great tips for novices and vets alike! I always think of you when I have to cut bars.
Great tips! Thanks so much for sharing… xo
What a wonderful job! I hoe this is part o your cookbook, Liz!
Grrrreat tips from a grrrreat baker! =)
What a great list, I forwarded the post to several young ladies who are just starting out in baking and I know they will appreciate having so much experience recounted in one easy list. I added a few for them on pies and tarts. I should do a bread one as well…lol. You are so clever to get it all in print!
I’ve never used Baker’s Joy- will have to try it! Thanks for sharing the secret of how you cut your bars (and pie and cake) so perfectly. 🙂
Adding this to my resources page! So helpful!
These are one of the best baking tips Liz, especially for those who are new to baking.
These are EXCELLENT tips, I particularly like the one about measuring cups and the scale! So often I see these young ones make instructional videos using the wrong measuring cups, now that they no longer teach home ec in schools, they have no idea.
Recently I saw a great tip on bringing butter to room temperature on America’s Test Kitchen (I often forget to take it out if the fridge): place the measured butter into a zip lock baggy, close and begin to beat with your rolling pin. Not only is it therapeutic, the kinetic energy from the beating warms the butter to the perfect temperature!
Lizzy! You are so smart! Great tips!
Thanks Liz! I can use all the baking tips I can get!
Oh! Liz! Everything looks incredible… and amazing tips that I could def. use in the future! Thanks for sharing my friend!
Lizzy,
You have great tips. I follow your bar cutting tips but I don’t have the skill you do. Though my cuts have gotten cleaner.
Annamaria
Great tips, Liz! It’s no wonder you are the baking queen :).
Thank you so much for these helpful tips, Liz!!!! In Europe we always measured with a kitchen scale and it is a lot more accurate 🙂
These are fantastic tips, Liz. If only I could be even 1/10th as great of a baker as you are! I just had a horrible cake catastrophe this past weekend that really made me question why I bake at all (ok, I’m being a wee bit melodramatic 🙂 And seriously, you have mad cutting skills – your slices and bars are always perfect!
Thank you SO much for taking the time to post this! I’ve always loved cooking in every form but baking is most definitley not my strong point. Pinning this for frequent use. :}
Dear Lizzy, so many wonderful tips here. Thank you for sharing. xo, Catherine
Bookmarked, saved.. printed and stapled to my forehead. Thank you for doing this. I know I can definitely use all the baking tips I can get. 🙂
What a handy list. Its funny what I do as short cuts when I am rushed. I should know by now that it doesn’t end well.
Great tips from the baking queen. We disregard these bits of wisdom at our baking peril. 🙂
Great tips. I am so happy to read about how to test for bread doneness. I am always knocking on my bread and now I know I can just take temp!
You have amazing desserts and tips here! I especially loved your cutting tips.
Tips from the School of Life are always the best:@) My first can of Baker’s Joy worked perfectly and I was so glad I tried it! The last two cans have gotten gloppy and don’t spray out, I’m wasting too much money on it… Wonder if anyone knows what that’s all about?