Triple Layer Chocolate Cake
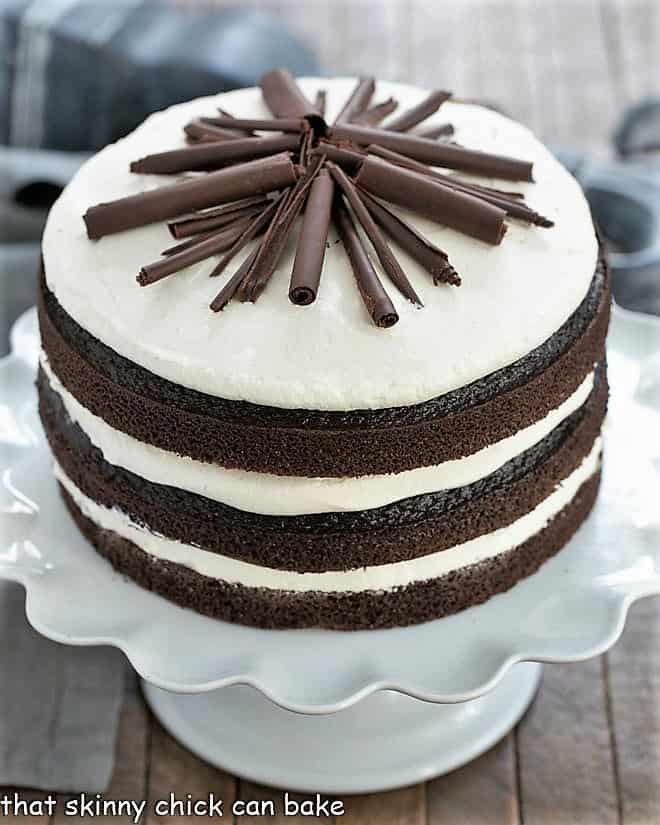
I pointed out a photo of a magnificent Triple Layer Chocolate Cake in an old Fine Cooking Magazine as a potential birthday cake for my oldest. Some tweaking was in order, like filling it with cream cheese whipped cream frosting and dialing down the espresso powder.
A Three Layer Cake is always a showstopper and this was a huge hit with my whole family, especially the birthday boy.
Why You Must Make
- This was one perfect chocolate cake. The layers were moist and tender with the perfect amount of cocoa and sweetness.
- Paired with a light cream cheese frosting was a dreamy match made in heaven.
- The birthday boy was pleased, in fact, the whole darn family loved this!
- This was a Gale Gand Recipe! She is a fabulous Chicago-based pastry chef with her own Food Network show. I trust her recipes implicitly, so when I saw her name under the by-line for a recipe for a gorgeous chocolate Irish whiskey cake, I took the bait. As a stunning cover photo for a December 2012 Fine Cooking magazine, it was beckoning me to bake it!
But I wasn’t sure how a whiskey cake would fly with my crew, so that was the first ingredient to go. Then the tablespoon of espresso powder in the whipped cream was next on the chopping block. I can sneak a little Kahlua or instant coffee/espresso powder into a recipe, but it has to be very subtle to keep the picky hubby happy.
Recipe Tips
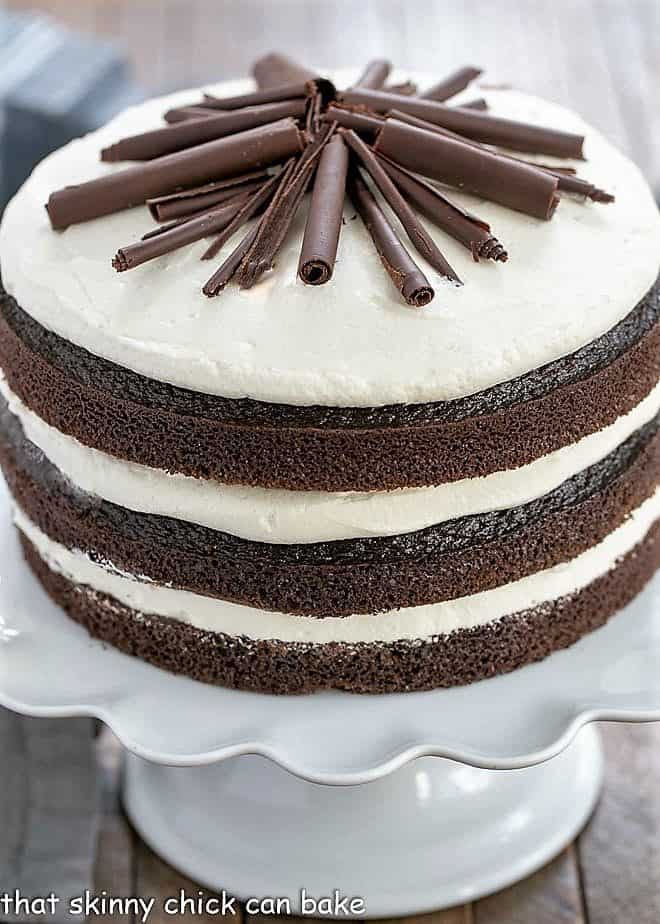
This splendid cake turned out better than I imagined. A quality recipe ensured that. The cake layers were moist and flavorful and the frosting was light and decadent.
- You’ll need three 9-inch cake pans. Most kitchens are stocked with one or two, so you may need to borrow (or buy) what you need before you start the recipe.
- PRO-Tip: Try to divide the batter equally between the cake pans so your layers are the same height. I like using my kitchen scale. This is easiest if all 3 pans are from the same manufacturer and, therefore, the same weight.
- Another option is to weigh your mixing bowl empty, then again when it’s full of the cake batter. Subtract the weight of the bowl from the weight of the filled bowl and divide it by 3. Each pan needs about 1 pound and 1 ounce of batter. Or just take the easy route and eyeball it!
- PRO-Tip: Though I love the flavor of butter in baked goods, the addition of oil in the batter makes for a super moist cake.
- PRO-Tip: Adding coffee enhances the chocolate flavor without turning this into a mocha cake. Incorporate some espresso powder or instant coffee into the batter if you want a stronger coffee flavor. Mix either of the options into the milk before adding it to the batter; about a teaspoon will dial up the chocolate intensity.
- When making the frosting for this chocolate cake, have your cream cheese at room temperature, so it will blend smoothly.
- When spreading the filling on the bottom two layers, do not go all the way to the edge. Instead, stop at least ½-inch from the edge, so that the pressure from adding the additional layers does not push the filling out too far. If you own an offset spatula, it’s a terrific tool for the job.
Frequently Asked Questions
Besides the cream cheese whipped cream filling used in this recipe, chocolate buttercream frosting, chocolate ganache, or chocolate mousse would all be delicious alternatives.
First, do not overbake. Check your cake early to see if it’s done using a toothpick. All ovens bake a little differently, so the time in the recipe gives you some guidelines, but your cake may take more or less time to be perfectly baked.
You can also brush a simple syrup on each cake before layering. Simple syrup is made by simmering equal parts sugar and water until the sugar is dissolved. This will add moisture to the layers.
You May Also Like
- If you are a fan of chocolate cakes, this fabulous Black Magic Snack Cake is a terrific option for a smaller dessert.
- This Torta Caprese is ideal if you or one of your guests is gluten-free.
- And this Mocha Chocolate Chip Cookie Icebox Cake is the best no-bake dessert you’ll ever try!
- Plus, if you haven’t made this retro Chocolate Mayonnaise Cake, it’s out of this world!!
- To make a chocolate garnish, check out how to make chocolate curls and chocolate shards (with a video).
- I also love this Easy German Chocolate Cake from Barbara Bakes

Triple Layer Chocolate Cake Recipe
A magnificent Triple Layer Chocolate Cake with a whipped cream cheese frosting.
Ingredients
Cake:
- 2 ¼ cups all-purpose flour
- 2 cups granulated sugar
- ¾ cup unsweetened cocoa powder
- 1 ½ teaspoons baking powder
- 1 ½ teaspoons baking soda
- 1 teaspoon salt
- 2 eggs
- 1 cup whole milk
- ½ cup canola oil
- 1 ½ teaspoons vanilla extract
- 1 cup hot coffee
Cream Cheese Whipped Cream Frosting:
- 8 ounces cream cheese at room temperature
- 1 cup sugar
- 3 cups heavy cream
- 2 teaspoons vanilla extract
- Chocolate shavings or curls to garnish, optional
Instructions
- Preheat oven to 350°. Grease and flour three 9-inch round cake pans. Line bottoms with parchment rounds, and grease parchment. Set aside.
- Whisk together sugar, flour, cocoa, baking powder, baking soda, and salt in a large bowl.
- Add eggs, milk, oil, and vanilla. Beat with a mixer for about 2 minutes.
- Carefully, stir in hot coffee. The batter will be very thin.
- Divide the batter evenly between the 3 cake pans. I like using a kitchen scale to make sure the layers are even.
- Bake for 20-23 minutes or until a toothpick inserted in the center comes out clean. Cool for 10 minutes. Remove the cakes to cooling racks. Cool completely.
- To make the frosting, whip the cream cheese with a mixer until smooth and creamy, then mix in the sugar. Add the whipping cream and vanilla and beat to medium peaks.
- To assemble the cake, place the first layer on a serving plate and top with ⅓ of the frosting. Leave some space (about ½-inch) around the perimeter as the weight of the cake will cause the frosting to expand.
- Repeat by adding the second layer, another ⅓ of the frosting, and finally top with the last layer and spread on the rest of the frosting.
- Garnish as desired.
Notes
Adapted from Fine Cooking.
Nutrition Information:
Yield:
12Serving Size:
1 sliceAmount Per Serving: Calories: 680Total Fat: 39gSaturated Fat: 19gTrans Fat: 1gUnsaturated Fat: 17gCholesterol: 119mgSodium: 492mgCarbohydrates: 75gFiber: 2gSugar: 54gProtein: 8g



38 Comments on “Triple Layer Chocolate Cake”
It says buttermilk in number 3? I see regular milk in recipe?
Hi, Ashley! Thanks for catching that. Use regular milk, not buttermilk. I used whole milk. Hope you enjoy!
Is the sugar in the frosting supposed to be powdered sugar?
I used granulated sugar, but powdered sugar will work well, too.
Where is the cream cheese? The cake pictured has a chocolate filling and a cream cheese frosting neither are in the recipe?
Oh, my gosh, that is definitely the wrong recipe. I will track the proper one down and respond again when it’s fixed. My apologies!
Doreen, the proper recipe is in place. Let me know if you have any questions. Thanks so much for letting me know!!
wow! this looks so delicious and tempting.
So pretty and perfectly simple!!! YUM
This looks and sounds incredible. You could always put some chocolate chips on top 😉
This is making me drool! Looks so good!
This is a cake for a royal birthday celebration! Your son is so lucky to have you as mum. Why do you add baking powder and baking soda? I thought it was almost the same, just the soda is minus the cream of tartar. Maybe I have got it wrong
Good question, Helene! Baking powder is measured in an amount that will neutralize the acid in the cake ingredients. If that amount isn’t enough to leaven the cake properly, then some baking powder can be added (it has acid as part of its ingredients!). I didn’t know this either until I did a little research, but found it very interesting. The data is from Fine Cooking magazine.
Such a gorgeous cake, there’s nothing better than triple chocolate!
How can this gorgeous cake be so simple to make – it minds me of a tuxedo!!! I need to try it asap!
OMG THIS CHOCOLATE CAKE IS AWESOME LOVE IT !
We love coffee, so I increased the amount and it was delicious!
Chocolate cake never looked better. Your tips were really helpful too. Thanks for sharing.
This is totally irresistible! SO good!!
What a gorgeous birthday cake ! Love this! xo
IMHO in the 8 years I have been reading your blog, this is one of the most gorgeous cakes you have baked. I really liked your Pro Tips. I use my scales more and more in my cooking but not sure I would have thought to do that with these three layers. You never use cake flour? When I get home this Spring I have several birthdays coming up. If I could lay this cake on my friends, they would be most impressed.
This cake looks BEAUTIFUL, Liz! And who could say no to anything with the words “triple chocolate” in the name? Save me a slice, please!
Such a great cake – I love the chocolate curls on top!!
A huge hit at my house too.
Lizzy How beautiful looks this triple chocolate cake, the twins would love this!
Happy new year!
Triple layered addiction more like it! This cake is the best!
Definitely a showstopper. The shavings on top make it super pretty too!
This cake is not only stunning to look at but, delicious, too!
Oh my goodness, that is chocolate cake perfection! I want one for my next birthday 🙂 PINNED!
Gorgeous! It would be hard to eat just one slice of this wonderful lookng cake!
Gosh! This will definitely send chocolate lovers to heaven! Happy 2019, Liz! xoxo
This looks so tough to make!! But deliciouss
I’m really bad at baking but really good at eating haha.
I love cakes <3 especially chocolate ones
Wowza!!! My boys would fall off their chairs if I served something this pretty! Bet it was amazing:@)
what a gorgeous cake! I love a great layer cake like this and its so elegant to serve!
This certainly is stunning and I like the changes you made!
That is a gorgeous chocolate cake! I want one for my birthday too!
This looks absolutely stunning! What kind of cocoa powder did you use, natural or dutch processed?
Natural cocoa powder, Angie. It was one of the best tasting cakes ever!!! xo