Devil’s Food Cake
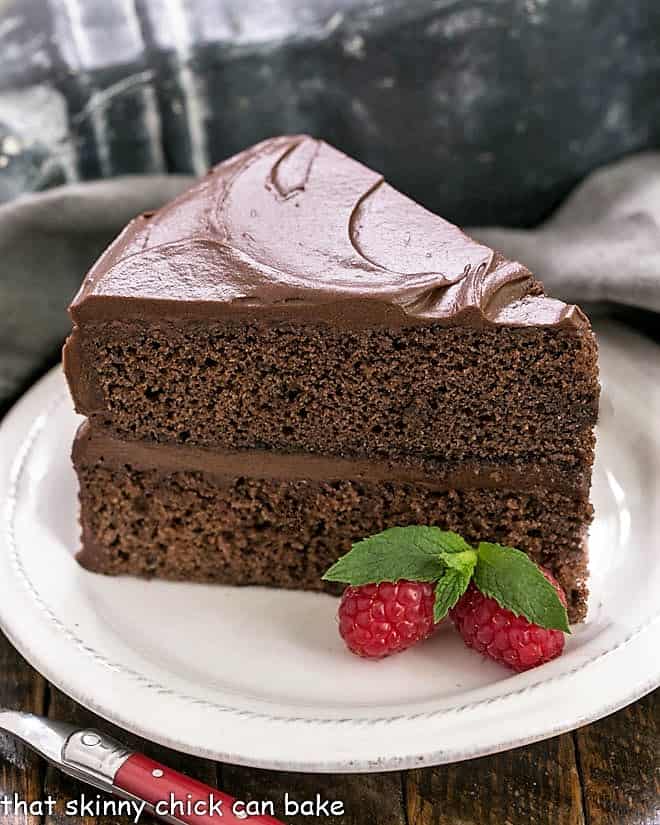
One of the most luscious, traditional chocolate cakes, this Devil’s Food Cake is rich and iced with chocolate buttercream frosting.
Super moist and fluffy, this chocolate layer cake was an enormous hit with my family. We were practically wrestling with each other for the last slice! It’s one of the best chocolate cake recipes I have ever made.
Why You Must Make
- A chocolate layer cake is perfect for any celebration, especially for birthdays!
- Devil’s food cake is dark and dense and a classic chocolate cake that’s been popular for over a century!!!
- Paired with a rich, glossy chocolate buttercream frosting makes every bite irresistible!!
Ingredient Notes:
- Kitchen Staples – Butter, Sugar, Eggs, All-Purpose Flour, Baking Soda, Salt, Milk
- Vanilla Extract – Make sure it’s real vanilla, never imitation
- Cocoa Powder – I use Ghirardelli brand. Always sift before using.
- Baking Powder – Often expires in your pantry. Check the expiration date, and if you’re unsure if it’s active, pour some in a bowl of very hot water. If it’s active, it will bubble vigorously. If it doesn’t, toss and buy a new tin.
- Buttermilk – The acid in the buttermilk helps make a tender cake. If you don’t have buttermilk on hand, you can make a substitute by putting a tablespoon of lemon juice or a neutral-colored vinegar in a one-cup liquid measuring cup. Fill to the one-cup mark with 2% or whole milk. Stir and let stand for a few minutes. It will curdle slightly and can be used cup for cup for buttermilk. You will need more than 1 cup for this recipe.
- Powdered Sugar – Sift before using.
How to Make a Four-Layer Version
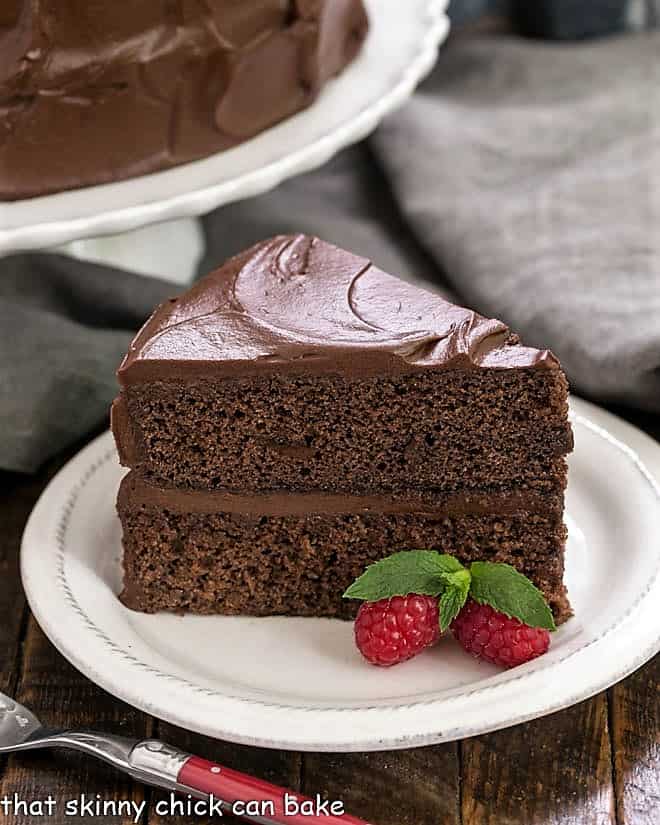
- I’ve made this cake with 2 layers and with 4 layers. To make a 4-layer cake, just bake up the two layers and when they’re cool slice them in half horizontally, then stack, adding frosting before adding the next layer.
- PRO-Tip: To cut the layers in half, insert toothpicks around the perimeter of the cake, a little more than halfway down the sides. This helps guide the knife while cutting the layers in half. Maybe not my best effort but it definitely helps!
I normally can leave sweets alone, but this cake is probably one of the best chocolate cake recipes I’ve made in years. Even Katie, the picky daughter, ate her fair share. When the whole family loves one dish, especially one dessert, it’s noteworthy. This cake needs a pedestal…it’s earned it.
Tips for Frosting a Layer Cake
- Start the process even before baking by making each layer the same height. You can do this by weighing the batter in the pans or checking the depth of the batter with a ruler or even a toothpick.
- Make sure you have enough frosting. This recipe for frosting adds a thin coating between the layers. If you keep this as a two-layer cake, the frosting will be thicker.
- Real Simple suggests putting a dab of frosting on the cake stand to secure the bottom layer.
- Next tuck strips of parchment or wax paper under the perimeter of the cake. This will help keep the cake stand or plate clean.
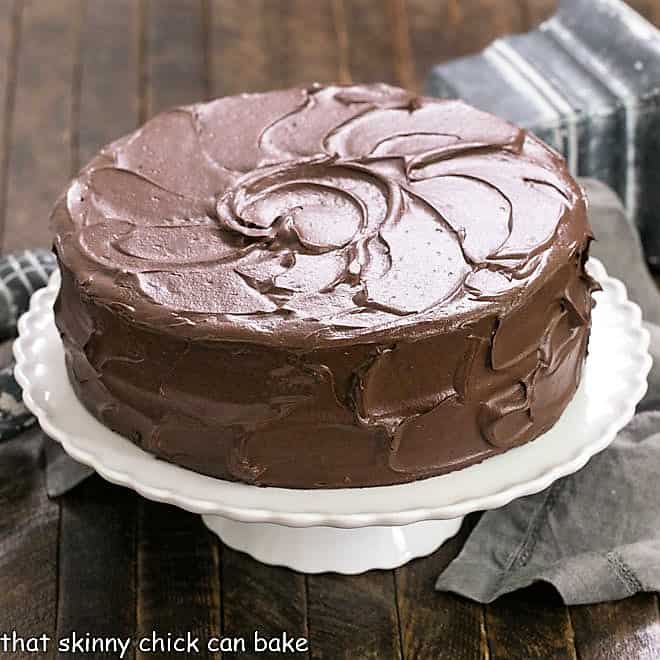
- Start with the first layer, flat side down. Eyeball the frosting and add just enough to make a relatively thin layer across the surface to the edges. Use an offset spatula to spread.
- Repeat with the remaining layers, saving enough to frost the sides. Use your offset spatula or even a bench scraper to smooth or make a textured pattern with the frosting.

Frequently Asked Questions
According to The Food Lover’s Companion, Devil’s Food Cake is a dark, dense baked chocolate item. On the opposite end of the spectrum is the airy, white angel food cake. With cocoa powder instead of melted chocolate and extra baking soda or leaveners, this cake is richer, darker, and fluffier than other chocolate cakes.
In the early 1900s, cakes were often given fancy names, but there’s only speculation on how a devil’s food cake got its name. One thought was that the dark rich color was totally the opposite of an angel food cake, playing off the angel and devil opposition. Or that it was “devilishly” rich compared with other chocolate cake options!
Although a red velvet cake has cocoa powder as one of its ingredients, its red hue is quite different from the deep, dark brown of a Devil’s food cake. Plus, red velvet is frosted with vanilla buttercream or cream cheese frosting instead of chocolate buttercream.
But adding red coloring to a devil’s food cake would make it into a red velvet cake, albeit one with a more muted red appearance.
You May Also Like:
Typically reserved for birthdays at our house, a layer cake is worthy of any celebration. Though chocolate seems to be most requested at our house, and we LOVE this Devil’s Food Cake Recipe, it’s nice to shake things up from time to time!
- Best Banana Cake Recipe from Saving Room for Dessert
- Death by Chocolate Cake
- The Best Red Velvet Cake
- Perfect Yellow Cake
- Best Chocolate Layer Cake
- Classic White Layer Cake
- Lemon Layer Cake
- More of the Best Cake Recipes

Devil's Food Cake Recipe
A terrific celebratory cake you can make with 2 or 4 layers sandwiched with rich chocolate buttercream frosting.
Ingredients
For the cake:
- ⅔ cup butter, at room temperature
- 1 ¾ cups sugar
- 3 eggs
- 1 teaspoon vanilla
- 2 cups all-purpose flour
- ½ cup unsweetened cocoa
- 1 teaspoon baking powder
- ¾ teaspoon baking soda
- ½ teaspoon salt
- 1 ½ cups buttermilk
For the frosting:
- ¾ cup butter
- 1 cup cocoa powder, sifted
- 4 ½ cups powdered sugar, sifted
- ½ cup milk
- 1 ½ teaspoons vanilla extract
Instructions
- Preheat the oven to 350°.
- Grease and flour two 9-inch cake pans.
- In a stand mixer fitted with the whisk attachment, beat butter, sugar, eggs, and vanilla until fluffy.
- In a mixing bowl, whisk together flour, cocoa, baking powder, baking soda, and salt.
- Switch to the paddle attachment and add flour mixture alternately with buttermilk to butter mixture, mixing just until smooth. Make sure to scrape the bottom of the bowl partway through the mixing time.
- Pour batter into prepared pans.
- Bake for 30 to 35 minutes or until a wooden pick inserted in the center comes out clean.
- Cool for 10 minutes; remove from pans to wire racks. Cool completely.
- Then slice each piece in half horizontally if you plan to make a 4-layer cake or leave them whole for a standard 2-layer cake.
- When the cake is cool, make the frosting.
- Melt the butter in a large microwave-safe bowl. Stir in the cocoa powder.
- Alternatively add part of the powdered sugar and part of the milk, beating to spreading consistency.
- Use immediately or cover and store in the refrigerator.
Notes
The cake recipe is adapted from Hershey's.
To make a buttermilk substitute, simply add a tablespoon of lemon juice or a neutral vinegar like white or cider to a one-cup liquid measuring cup. Fill the cup with milk to the one-cup mark. Stir and let rest for a few minutes while the mixture thickens. Measure and use as directed. If you need more than one cup, repeat.
If you make a 4-layer cake instead of a 2-layer cake, make a batch and a half or a double batch of frosting. This depends on how much of a frosting lover you are!
Nutrition Information:
Yield:
12Serving Size:
1 sliceAmount Per Serving: Calories: 621Total Fat: 25gSaturated Fat: 15gTrans Fat: 1gUnsaturated Fat: 7gCholesterol: 106mgSodium: 462mgCarbohydrates: 95gFiber: 3gSugar: 72gProtein: 7g
Thatskinnychickcanbake.com occasionally offers nutritional information for recipes contained on this site. This information is provided as a courtesy and is an estimate only. This information comes from online calculators. Although thatskinnychickcanbake.com attempts to provide accurate nutritional information, these figures are only estimates. Varying factors such as product types or brands purchased can change the nutritional information in any given recipe. Also, many recipes on thatskinnychickcanbake.com recommend toppings, which may or may not be listed as optional and nutritional information for these added toppings is not listed. Other factors may change the nutritional information such as when the salt amount is listed “to taste,” it is not calculated into the recipe as the amount will vary. Also, different online calculators can provide different results. To obtain the most accurate representation of the nutritional information in any given recipe, you should calculate the nutritional information with the actual ingredients used in your recipe. You are solely responsible for ensuring that any nutritional information obtained is accurate.
I was planning to make beef tenderloin for yesterday’s Beef Checkoff post, so decided to invite Tom, our oldest, over for dinner, to celebrate his birthday 20 days early. A fabulous chocolate birthday cake was definitely in order. Being the wise guy that he is, Tom posted a photo of this chocolate layer cake to Instagram with this comment: My birthday cake 20 days early because my parents are bad at calendars. Or maybe it’s for Pearl Harbor Day, I dunno. The best response: You can be bad at calendars when you’re that fabulous at baking.
Tom does have nice friends. But there was definitely a rational reason for the premature b-day bash. We will be boarding an early flight (yawn) to LA on the morning of his birthday, and most likely eating Christmas leftovers from the day before, so if he wanted a day all about him, this was the best I could do! I don’t think he had a single complaint.





39 Comments on “Devil’s Food Cake”
Absolutely beautiful layers. I’d celebrate with this Devils Food Cake any day! 🙂 ~Valentina
Such beautiful and moist layers of chocolate cake! Happy Mother’s Day!
I don’t care what day it is I will never turn down a chocolate layer cake. This looks fabulous and I hope someone made it for you for Mother’s Day! Happy Mother’s Day, Liz. Hope you and yours are doing well.
This is my favorite go-to cake for any celebration. It’s perfection each and every time!
It does look like an awesome cake! Chocolate is definitely a favourite over here. I love the tip about weighing the batter. I had thought about weighing all of my bowls and recording their weights on the bottom because I always forget to weigh the empty bowl!
Chocolate can solve a lot of problems! 4 layers of deliciousness. Your cake is gorgeous and so even. Happy Mother’s Day to you. Hope your family saved you a slice or too of cake.
Oh my goodness, this looks delicious! I’m definitely making this! thanks for sharing!
Happy Birthday, Tom and an early cake is way better than a late cake, especially when it looks like this.
I am still dying over this cake. Love!
your kids are soooo lucky!!! This cake is extra chocolatey and delish!!!
Lizzy, your cake looks lovely. I love Devil’s Food Cake. Merry Christmas to you and yours 🙂 And have a very happy, healthy, joyous New Year. Sending holiday hugs your way~ xoxoxoxo
Looks Lovely!! Wishing you and your family a very Merry Christmas!! All the Best! xo Ramona 🙂
Liz!! you had me at quadruple layered Devil’s Food Cake!!! whoa!!! Looks so good!! and totally makes sense why you had to celebrate early. . and wow, what a great response!: You can be bad at calendars when you’re that fabulous at baking. That’s so awesome! 🙂 Merry Christmas, Liz!!
You and I are both thinking along the chocolate line, I love it 😀
Beautiful cake!
Happy Holidays!
Choc Chip Uru
What a great birthday cake. I hope you have a fantastic holiday and enjoy getting away from the cold for a few weeks. Safe travels and a Merry Christmas to you, Liz and all your family xx
It looks rich and beautiful!
I need to try this with carob powder. It looks scrumptious!
Tom cracks me up! I LOVE a 20 day birthday celebration. 🙂
Kudos for a cake that everyone devours and Merry Christmas. Travel safely!
That looks absolutely delicious!!
I have just finished work for the holidays and am waiting at the airport for my flight. I could really, really use a slice of this decadent cake right now.
Who can resist the devil 😉
Your kids are funny, I must say. I salute Katie for hanging in there with those brothers. The cake looks delicious (they are still talking about mine at the front office – nothing wrong with a packaged mix, heh?) and, yes, would have looked even better on a pedestal. Have a fabulous time in New Zealand. Long flight. Sleep!
Your Devil’s Food Cake does indeed look and sound Divine, Liz! And you’re traveling to LA?! Please do give a ring! I presume you’ve got a busy schedule but would love to see you! Maybe coffee? Can’t promise the same quality cake as your chocolate wonder tho’ =)
A gorgeous cake, Liz… wishing you and your happy holidays xox
Sometimes you just cant go past a big ole’ piece of chocolate cake. This looks wonderful! Love all the layers!
Impressive cake Liz, Wow! 4 layers.
Oh, oh my What a wonderful looking cake! I do hope that you managed to get that last piece. I know I would have trampled all in my way to get to it.
That is a really nice response! and a very happy birthday to your son.
The cake looks amazing!
What an incredible cake, Liz! The layers are absolute perfection!
A total classic done so beautifully. Wow if Katie like did it must be amazing.
Liz, this cake is so devilicious and Tom is so hilarious. Happy early birthday to him! I’ll be sure to celebrate his birthday with a slice (or more) of this cake.
This cake is just gorgeous, Liz!! Love all those rich and decadent layers!
This cake looks fabulous! Chocolate cake is one of my favorite desserts.
What a great cake recipe! It is just gorgeous. Have a wonderful holiday season!
Agree with the others…heavenly indeed. Drool!
Nothing like celebrating birthdays early – especially as no doubt, it will be celebrated again on the day, and after …. especially if it’s with this wicked cake. Looks wonderful!
Enjoy the birthday celebrations en famille and wishing you and the family a deliciously cosy Christmas. Cheers x
Such a fab looking cake! I would be more than happy to have this cake for my birthday. 20 days early or late!!! Merry Christmas Liz to you and your family 😀
*Sigh… This devil’s food cake looks heavenly:@) Merry Christmas Week Liz-enjoy!
PS-Now that the birds have officially been plucked all I can say is “Go Pack!!!”.
This cake looks so deliciously good and with 4 layers of buttercream frosting. I hope you were the winner of the wrestling match to get the last slice , after all you were the bakery chef.