Cookie Dough Ice Cream
A smooth and luscious brown sugar ice cream filled with bits of cookie dough, this Cookie Dough Ice Cream was a huge hit with my family!
I am a cookie dough lover and safer versions, without raw eggs, are perfect for a rich, irresistible Cookie Dough Dessert.

Why You’ll Love this Cookie Dough Dessert
- If you like cookie dough, this is a safe way to eat it.
- Little bits of cookie dough in vanilla ice cream tastes incredible.
- It’s a delicious way to cool off on a hot day!
Driving home from Wisconsin, I had a captive audience in the car. A 10-hour drive is always grueling. I’m hoping our next family vacation involves a direct flight! I posed the question of what ice creams I should make for Ice Cream Week. I knew the first answer I’d get; they are a predictable bunch. But besides chocolate, they gave me a nice list of options. Cookie dough ice cream was Nick’s idea, and from the first taste, he confirmed that it was a winner.

How to Make Cookie Dough Ice Cream
Of all the ice creams I made this summer, this was the clear winner. Over and over again, the family extolled its wonders. Sweet, creamy, perfect. It’s probably the richest, most decadent ice cream I’ve ever tasted! Yeah, I’m going to have to make another batch really soon…there are toes a tapping in anticipation of the next go-’round. I found this recipe on Baked Bree.
- First, make the cookie dough. It’s made without eggs, so no worries about contracting salmonella.
- I found the ratio of cookie dough to ice cream was quite high…but there were no complaints. This is a very, very sweet dessert, so feel free to hold some of the cookie dough bits back if that’s your preference.
- PRO-Tip: Since I first shared this recipe in 2013, raw flour has become a source of e-coli. I’ve added a step to cook the flour, to kill any potential pathogens. It can be done in the microwave or oven, as long as the flour is brought up to 160 degrees.
- To make the rich custard base, you’ll need to drizzle the hot cream into the egg yolk and sugar mixture, whisking constantly. There is always a chance of scrambling some tiny bits of the yolk, so this must be done slowly, while whisking constantly. Then the custard base is cooked until it is thick enough to coat a spoon.
- PRO-Tip: To test this, dip a wooden spoon into the custard, then draw a line with your finger across the backside of the spoon. If the line remains, it’s thick enough!
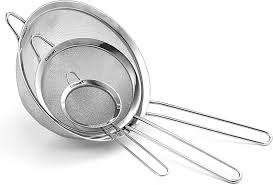
- PRO-Tip: Also, you’ll strain the mixture through a wire sieve to remove any egg bits to make the ice cream ultra-creamy.
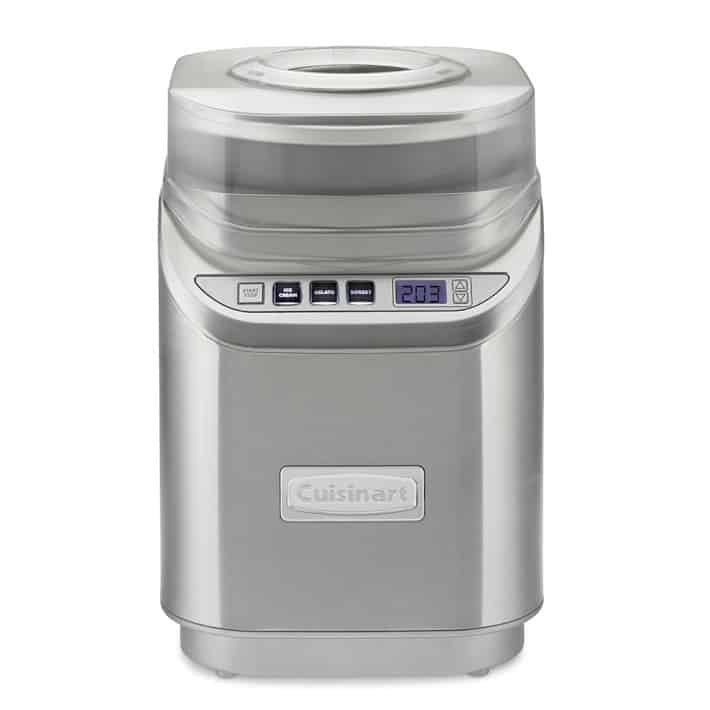
- Cool the custard at room temperature, then place it in the refrigerator to chill for at least 2 hours, but I prefer overnight. Then it goes in your ice cream maker, and when it’s done churning, yet still soft, mix in your cookie dough bits. Return to the freezer until firm.
- PRO-Tip: After placing the ice cream in a container to freeze, press some plastic wrap over the surface. This will help prevent ice crystals from developing across the surface.
- There is a LOT of cookie dough in this ice cream which can make it difficult to scoop. Feel free to only use part of the cookie dough (remember, it’s safe to snack on if you cook the flour!).

How to Make Raw Flour Safe to Eat
As I mentioned above, it’s relatively new that raw flour has become a potential source of foodborne illnesses, specifically E. coli. But by heating the flour up to 160º, you can eliminate the risk. There are two methods from which to choose:
- Cook it in the oven! Preheat the oven to 350º. Spread the amount of flour needed in your recipe (plus some extra) on a baking sheet and cook for 5 minutes, stirring occasionally. Check the flour’s temperature with an Instant Read Thermometer (affiliate link), to make sure it’s all heated to more than 160º.
- Zap it in the Microwave! Place more flour than needed for your recipe in a heatproof bowl. Some of the flour will stick to the inside of the bowl, so you’ll need a little extra. Microwave for a full minute, stopping to stir at 15-second increments. As with the oven method, check a few spots in the flour after the last stir and make sure the flour has reached 160º, the temperature needed to kill any E. coli bacteria.
- Make sure to cool the flour to room temperature before using.
Frequently Asked Questions
Store it in an airtight container in your freezer. I like to press plastic wrap over the surface before putting the lid on to prevent ice crystals from forming across the surface.
Since there are no preservatives in your homemade ice cream, its shelf life will be shorter than store-bought ice cream. It will keep well for up to 2 months if kept airtight.
Besides preservatives, store-bought ice cream may add guar gum, lethicin, and even milk powders to keep ice cream soft. They bond with free water so it doesn’t crystalize. For home cooks, note that sugar, corn syrup, liquor, fats, and gelatin can also keep ice cream soft and minimize ice formation. When you freeze your ice cream, press some plastic wrap over the surface before putting the lid on the container so it’s airtight. This will minimize frost development.
You can also pull your carton of ice cream out of the freezer 10-15 minutes before you plan to serve it so it softens slightly before it’s time to dish it out.
More Frozen Dessert Recipes You’ll Love:
- Root Beer Floats by Cravings of a Lunatic
- Coconut-Almond Fudge Ripple Ice Cream {No Machine Needed} by The Kitchen is My Playground
- Chocolate Mint Swirl Ice Cream by SugarHero!
- S’mores Ice Cream Sundae
- White Chocolate Ice Cream
- Brownie Baked Alaska
- Plus make my Egg White Cookies (meringues) or pavlova with some of the extra egg whites!
- More of the Best Dessert Recipes
This recipe was first shared in August 2013. Photos and text were updated in 2020.
Cookie Dough Ice Cream
Brown sugar ice cream with bites of cookie dough! The perfect way to beat the heat!
Ingredients
Ice cream base:
- 1 ¾ cup heavy cream
- ¾ cup milk
- ½ cup brown sugar, divided
- ¼ teaspoon salt
- 5 egg yolks
- 2 teaspoons vanilla extract
Cookie dough:
- ½ cup butter, room temperature
- ¼ cup sugar
- ½ cup brown sugar
- ¼ teaspoon salt
- ½ teaspoon vanilla
- 2 tablespoons heavy cream
- ¾ cup flour
- ½ cup mini chocolate chips (or more to taste)
Instructions
- In a medium saucepan, mix together heavy cream, milk, ¼ cup brown sugar, and salt. Heat the cream mixture till bubbles form around the edge of the pan. Remove pan from heat.
- In a large glass measuring cup, whisk egg yolks and remaining brown sugar until smooth.
- Slowly drizzle about a cup of the hot cream into the yolk mixture, whisking constantly.
- Pour the yolk mixture into the cream. Cook, stirring constantly until the mixture thickens enough to coat the back of a spoon.
- Strain the mixture to remove any cooked egg bits. Add vanilla. Let cool to room temperature.
- Cover with plastic wrap and refrigerate for 2 hours or overnight.
- To make cookie dough, cream together butter, both sugars, and salt.
- Add vanilla and cream.
- Mix in flour and stir until incorporated. Add chocolate chips.
- Cover and chill for about an hour.
- Line a baking sheet with parchment, and drop dough by half teaspoonfuls onto the sheet.
- Freeze dough bits till ready to use.
- Freeze the ice cream base according to the manufacturer’s instructions. When the ice cream is frozen (yet still soft), stir in the cookie dough bits and freeze until firm.
Notes
Adapted from Baked Bree.
Cook the flour as directed in the post to avoid the chance of e-coli contamination which may cause a food-borne illness (AKA food poisoning).
Recommended Products
As an Amazon Associate and member of other affiliate programs, I earn from qualifying purchases.

Nutrition Information:
Yield:
8Serving Size:
1Amount Per Serving: Calories: 547Total Fat: 38gSaturated Fat: 23gTrans Fat: 1gUnsaturated Fat: 12gCholesterol: 211mgSodium: 264mgCarbohydrates: 48gFiber: 1gSugar: 36gProtein: 6g
Thatskinnychickcanbake.com occasionally offers nutritional information for recipes contained on this site. This information is provided as a courtesy and is an estimate only. This information comes from online calculators. Although thatskinnychickcanbake.com attempts to provide accurate nutritional information, these figures are only estimates. Varying factors such as product types or brands purchased can change the nutritional information in any given recipe. Also, many recipes on thatskinnychickcanbake.com recommend toppings, which may or may not be listed as optional and nutritional information for these added toppings is not listed. Other factors may change the nutritional information such as when the salt amount is listed “to taste,” it is not calculated into the recipe as the amount will vary. Also, different online calculators can provide different results. To obtain the most accurate representation of the nutritional information in any given recipe, you should calculate the nutritional information with the actual ingredients used in your recipe. You are solely responsible for ensuring that any nutritional information obtained is accurate.


53 Comments on “Cookie Dough Ice Cream”
This is the BEST cookie dough ice cream recipe I’ve ever tried. I made it for my nieces party and everyone said it was delicious.
This ice cream is basically my kids’ ice cream dream come true! So tasty! I love cookie dough ice cream!
When it comes to a cookie dough ice cream, I don’t have a clear position. Sometimes I like it, sometimes I don’t. Most commonly, I’m indifferent to this kind. But I must admit that this version looks delightful and inviting. Besides I love brown sugar in any ice cream as it works so wonderfully. My decision: please give me a large spoon! 🙂
What a fantastic ice cream! And thanks for the tip about raw flour – I had no idea.
This ice cream is so dang good! I will be making it often this summer!
My daughter loves this recipe! Any chance she gets she’ll make it for the whole family! It’s so yummy and tasty!
I made the cookie dough ice cream today, Liz. It’s still doing its final freeze, but I did the requisite…um…quality control.
HOLY COW! I haven’t made a custard based ice cream in a really long time, and boy, it does make a difference!
Can’t wait to dig into the final product!
I’m so glad you made this, Kim!! Hope you all enjoy! xo
Lizzy,
Cookie Dough Ice Cream is one of my favorite ice creams, rivaled only by Oreo Ice Cream. I must give this a try. My problem might be having enough cookie dough left to add to the ice cream.
Annamaria
Ahhh… the cookie dough ice cream that I have never tried. I think I would definitely give your version a try. 🙂 Thanks to you and Nick!
Oh my! I can see some peeps making that cookie dough to eat on its own. 😉
This truly is one of my all-time favorite flavors. What’s not to love about any excuse to eat cookie dough?I’ve never made my own cookie dough ice cream from scratch. Time to change that!
I swore I was done with ice cream for the summer. I think I was fooling myself big time. Time to get the ice cream maker back out.
I like your use of brown sugar in both the ice cream base and cookie dough…it sounds yummy. I had to chuckle about the 10 hour drive and wishing for a direct flight next year. 🙂
My daughter, Michele, is a cookie dough fanatic. Since she’s been sick, she hasn’t had much of an appetite but as I look at this recipe Liz, I may just send it along to her best friend, who is also a top notch ice cream maker. I know she’ll make this ice cream for Michele and the kids and they will just LOVE it!
Thank you so much for sharing…
P.S. Next vaca, direct indeed. 10 hours is looooong:)
Cookie dough ice cream is one of my absolute favorites! YUM! It looks so good on your photos.
Cookie dough and icecream, match made in heaven !
Obviously your family is a genius, because cookie dough ice cream is deeeelicious! I’ve made so many cookie dough treats over the years, but never tried ice cream. This post convinced I need to go for it!
Gosh, Lizzy, everything you make is so darn good!! 🙂 And, can never go wrong with cookie dough ice cream. One of my absolute faves!!
Cookies and ice cream in one package…fabulous!
I can certainly see why cookie dough would be a favorite! It would have been my choice too I think! This looks delicious Liz. And thank you for pinning so many amazing recipes. I just started to follow your boards and they are GREAT!
oh yummmmmm,such a fantastic idea…never thought of this ice cream before…it looks so creamy and melt in your mouth, no way we are going to be happy with just one batch…this delicious treat is soon stocking up our refrigerator ,thanks for sharing 🙂
I do like the sound of cookie dough ice cream – two great loves merged! Our family doesn’t do road trips at all well – it seems to bring out the worst behaviour in everyone. I just popped over to Tastespotting and was delighted to see that your corn with basil butter and my vegan protein balls are almost side-by-side! xx
Cookie Dough ice cream is a favorite of in my house. My 8 year old and I will pick it just about every time!
I love ice cream but I love cookie dough more. I guess I’ll have to suffer.
I actually don’t like cookie dough that much, but I love it in ice cream! Looks delicious 🙂
This looks and sounds delightfully delicious! Cookie dough and ice cream all rolled into one…yum!
one of my fave kind of ice creams 😀 YUMMM-O!
First cake mix and now cookie dough, you are concocting a lot of deliciousness these days Lizzy! That melting ice cream is making my mouth melt, oops, I mean drool! 🙂
I should read yourposts while I’m on my exercise bike!
A little cookie dough is good for the soul:@) Sounds like a great list of goodies!
I can totally see why this is the family’s favorite? I’ve been known to pick around the ice cream carton for the cookie dough bits. *hangs head in shame*
Delicious!!! I’d have devoured all the scoops in seconds.
I love cookie dough! In fact making cookies involves much sampling of the cookie dough to make sure it’s “right.” So much sampling that the resulting cookie (singular!) is of course perfect. 😉 This looks terrific. But 10 hours in the car? I’ll do it if necessary, but hope I never again need to!
Lizzy look delicious!!! xxx
With no eggs, this is a VERY interesting ice cream idea Liz! Can imagine so many flavor combinations.
OOOOooo,
I just had a chocolate chip dough-gasm! xx
Homerun! Appreciate the how-to on the ever-popular cookie dough ice cream, Liz.
I admire, too, that you are all speaking together after 10 hours in a car. You are a close-knit family <3
I used to always choose cookie dough ice cream when I went out for ice cream growing up. Love your homemade version!
You have some lucky kids, I hope they know that! Also do agree that a high cookie dough to ice cream ratio is imperative!
I can see why this was a winner with your family! I know it wouldn’t last long in my freezer.
Great idea to make your own cookie dough- isn’t that everyone’s favorite??
Yes, pure bliss indeed! Cookie dough is just the best!
Liz, goodness, your cookie dough ice cream looks like an ice cream lover´s dream come true! I love the idea of incorporating delicious cookie dough into ice cream! Pure bliss!
These scoops of ice cream look perfect Liz…and yes, cookie dough sound yum!
Hope you are having a fun week 😀
Yum love cookie dough ice cream but never had a homemade version. I’ll have to add this to my list of ice creams to make.
Yum…such a great ice cream choice!!
Mmm, cookie dough! I really need to make another batch of ice cream soon!!!
You really can never go wrong with cookie dough!
My daughter has been after me to make a chocolate chip cookie dough ice cream, too. I like that you used brown sugar in your ice cream. I bet it really added to the chocolate chip cookie experience!
Cake Batter the other day now cookie dough, yummo I cant wait to see what else are you going to come up with?
Sounds good, I just made some but nothing like this one mine had no eggs anywhere. Bet this was a creamy dream~!
I never liked cookie dough as a child, but my first summer job at a snack shack/ice cream place where I would sample all the flavors on slow days lead me to discover a secret love for it. Thanks for the at-home version!