Tunnel of Mousse Cake
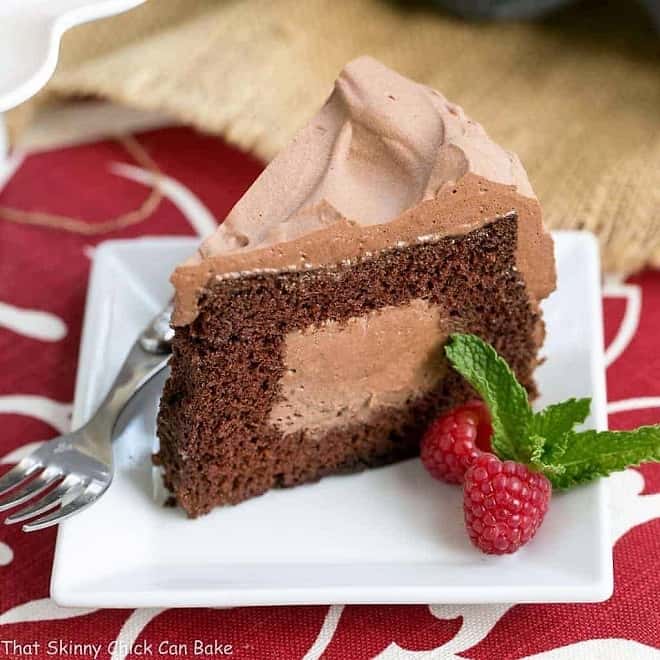
Who doesn’t love a chocolate mousse cake? But even better is a Tunnel of Mousse Cake with mousse used as both frosting and filling!
This Chocolate Mousse Cake Recipe provides a delicious surprise when cutting each slice! It’s perfect for holidays, special company, or a family dinner.
Why You Must Make
- If you love chocolate mousse, this cake will win you over with your first bite.
- Your friends and family will be in awe when you slice into the cake wondering how you “baked” a mousse into a cake.
- It’s the perfect dessert for any celebration from a birthday party to a family holiday gathering.
My friend, Cindee, shared her family recipe for this tunnel of mousse cake after I posted a different mousse cake on the blog last month. When I’ve seen “tunnel” cakes like this Chocolate Tunnel Cake from my friend Maria at Two Peas & Their Pod, my mouth can’t help but water!
So when debating what to make for our Easter dessert, besides the annual fudge lamb, this brilliant dessert came to mind. And what a cake it was. The whole darned family licked their plates clean. The mousse reminded me of soft chocolate ice cream, which isn’t surprising considering it’s made of heavy cream, cocoa, and sugar. Plus, the cake had a delicate crumb without the chocolate intensity that my daughter finds too rich. So everyone was pleased. Score one for the baker.
Ingredient Notes
- Kitchen Staples – Sugar, Salt, Vegetable Oil, Boiling Water, Baking Soda
- Cocoa Powder – For cake and frosting. Sift before using in the frosting for a smoother result.
- Cake Flour – Sifted. Makes a more tender cake since it contains less gluten.
- Egg Whites – Enough to make 1 cup (about 7 or 8). Separate when cold, but beat when at room temperature.
- Egg Yolks – You will need the egg whites, too, so save those while separating. Note that eggs will separate best when cold as the yolk is less likely to break. To be on the safe side, use 3 bowls. The first is to drop the egg white as you separate your first egg, a second to deposit the egg yolks, and you will use the third to break the eggs over to collect each egg white. The second egg white is added to the first egg white. Using the 3rd bowl will catch any yolk if it breaks while separating. This extra step of a third bowl prevents any yolk from getting into the bowl for egg white collection if it happens to break.
- Vanilla Extract – Use real vanilla extract, not artificially flavored. I use the Nielsen-Massey brand.
- Cream of Tartar – Helps to stabilize the whipped egg whites.
- Heavy Cream – 36% Milkfat. For mousse.
- Powdered Sugar – Sift to make a smooth mousse and frosting.
Recipe Tips
- This cake recipe calls for whipped egg whites to help lighten the cake batter. To ensure the whites whip up nice and fluffy, they cannot be contaminated with any oil. This includes grease or oil on the mixing beaters or bowls or even a speck of egg yolk mixed in with the whites.
- Egg whites whip best if at room temperature, but separate best when cold.
- Use a serrated knife to slice off the top of the cake and to make the tunnel. A sawing motion is best when using this type of knife.
- Since the frosting is made with whipped cream it’s best not to leave the cake at room temperature longer than 2 hours. It should be stored in the refrigerator.
Frequently Asked Questions
Mousse is a French culinary term meaning froth or foam. It’s a rich airy dish that can be sweet or savory. They’re made with whipped cream or beaten egg whites to provide the fluffy texture that a mousse is known for.
A mousse cake can be a dessert that’s made only of mousse. The whipped egg whites give the cake its structure instead of the typical flour-based cake. Mousse cakes can also be cakes with mousse fillings, like this cake.
Yes, since the mousses used in desserts are made with either whipped egg whites or whipped cream, they must be refrigerated. Both are perishable at room temperature.
More Mousse Dessert Recipes You’ll Love:
- Chocolate Hazelnut Mousse Cake from Saving Room for Dessert
- Strawberry Mousse Cake from Inside BruCrew Life
- Chocolate Mousse Cake with Truffles from Pint Sized Baker
- Frozen Chocolate Mousse Cake
- Peanut Butter Chocolate Mousse Cake
- Plus, all my Best Homemade Cake Recipes
Tunnel of Mousse Cake
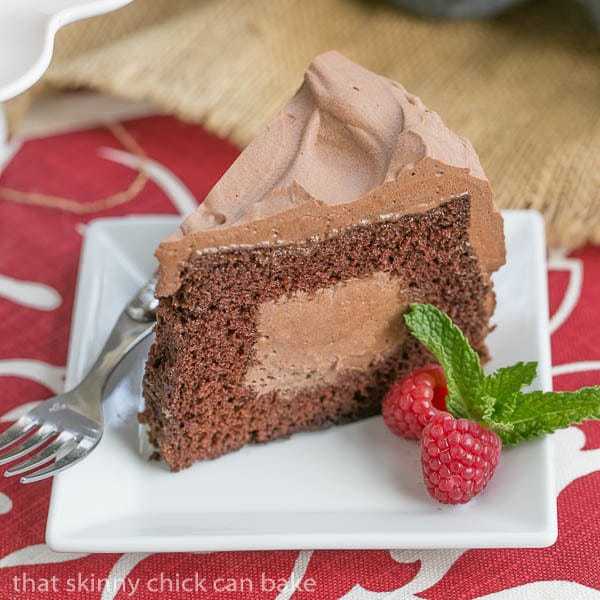
Who doesn't love a chocolate mousse cake? But even better is a Tunnel of Mousse Cake with mousse utilized as both frosting and filling!
Ingredients
For Cake:
- ½ cup sifted cocoa powder
- ¾ cup boiling water
- 1¾ cups sifted cake flour
- 1¾ cups sugar
- 1½ teaspoons baking soda
- ½ teaspoon salt
- ½ cup vegetable oil
- 7 egg yolks, reserve egg whites
- 2 teaspoons vanilla
- 1 cup of egg whites (7 or 8), at room temperature
- ½ teaspoons cream of tartar
For Mousse:
- 4 cups heavy cream
- 1½ cups powdered sugar
- ¾ cup sifted cocoa
- 2 teaspoons vanilla
- ¼ teaspoon salt
Instructions
- Preheat oven to 325º.
- Put cocoa powder into small bowl and stir in the boiling water till smooth. Cool for 30 minutes. Sift together flour, sugar, soda and salt. Make a well in the center and add oil, egg yolks, vanilla and cocoa mixture. Beat till smooth with a hand mixer, scraping sides of bowl as needed. Set aside.
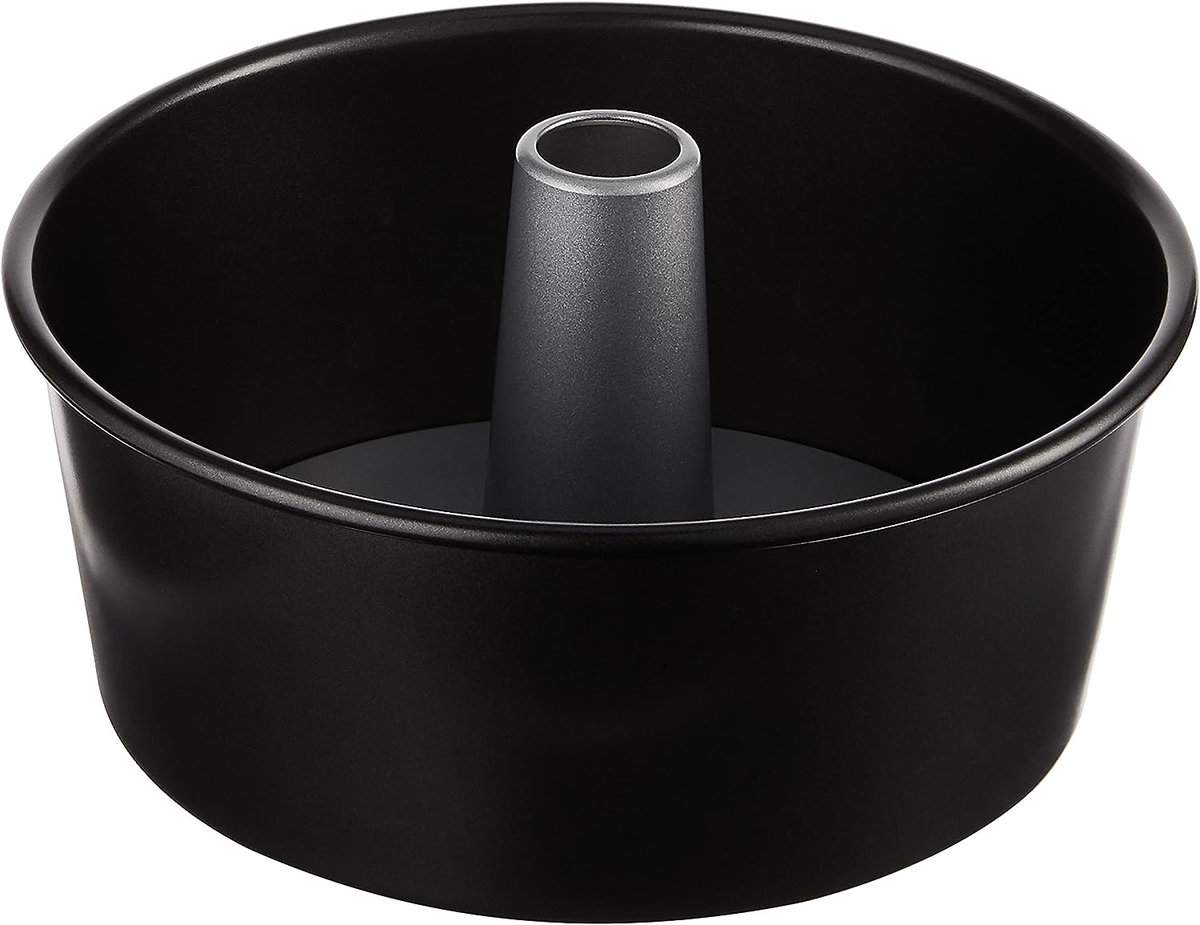
- Put egg whites into the bowl of a stand mixer fit with the whisk attachment. Sprinkle with cream of tartar. Beat until stiff peaks form. Pour chocolate batter over egg whites and gently fold together till blended. Pour into an ungreased tube pan.
- Bake for 50-60 minutes or till the top of the cake springs back when pressed. Cool on rack for at least 1½ hours. Use a straight, thin metal spatula to go around the perimeter of the cooked cake to help loosen, then remove carefully.
- Make the mousse by combining all ingredients. Refrigerate for one hour. Then beat till quite firm. Refrigerate for another hour before assembling the cake.
- When whipped mousse is fully chilled, prepare the cake. With a long serrated knife, carefully slice off the top 1 inch of the cake. As a guide, insert toothpicks one inch below the top spaced around the perimeter. Reserve the top for later.
- Next cut vertically around the perimeter of the cake, one inch from the outside edge and one inch from the inside edge. You will be making a well in the middle of the cake. Be careful not to cut through to the bottom of the cake. Carefully cut the inside into sections and pull out pieces of the cake leaving one inch of cake at at the bottom for the base. Reserve cake pieces.
- Fill the cavity with the chilled mousse. Crumble some of the reserved cake into a bowl and mix in ½ cup of mousse. Fill the hole in the center of the cake with the mousse/cake mixture.
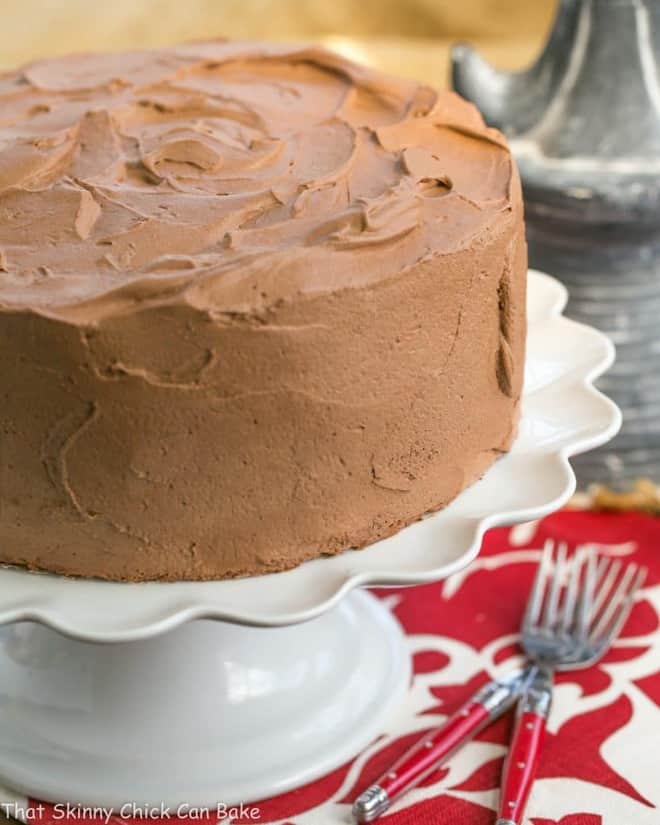
- Replace the top of the cake and frost with the remaining mousse. Garnish as desired. Refrigerate leftovers.
Notes
Snack on leftover cake pieces.
Total time does not include cooling time.
Recommended Products
As an Amazon Associate and member of other affiliate programs, I earn from qualifying purchases.
Nutrition Information:
Yield:
12Serving Size:
1 sliceAmount Per Serving: Calories: 671Total Fat: 41gSaturated Fat: 20gTrans Fat: 1gUnsaturated Fat: 18gCholesterol: 197mgSodium: 356mgCarbohydrates: 66gFiber: 2gSugar: 45gProtein: 10g










35 Comments on “Tunnel of Mousse Cake”
Dutch cocoa or baking cocoa? Does it make any difference?
Thanks, Lee
Regular cocoa powder. In some recipes it will make a difference due to baking chemistry. Hope you enjoy!
Everyone would swoon over this in my house I am already to lick the screen!!!!
Lizzy,
I’ve got to see how you made this cake. My hubby would love this!
Annamaria
Liz, this is looking beyond any description. As a chocolate lover I love everything about this dessert. Wish I could have tasted it too 🙂
I’m in AWE! This looks INCREDIBLE!!!! Heading over to check out the recipe 🙂
I think I would have to make baby versions of this cake, it would be hard to not eat the whole thing. Gorgeous, love that cheeky tunnel of chocolate mousse too. Mmmm! 🙂
Looks awesome! Unfortunately, your friend’s site would not open for me. Latin American internet!
Oh my gosh!!?? I don’t have to share this right? It looks amazing 🙂
Those mandolins are lethal! I haven’t yet lost a finger but I know plenty of people who have really hurt themselves – very painfully! What a gorgeous cake! I must pop over to find out the trick of that square of mousse in the centre xx
This cake look amazing! So nice of you to help your friend Aly. Hope she feels better soon. Mandolines are so scary!
Have to agree that that tunnel of mousse in the middle looks divine.
Hopping over to Aly to check out the recipe.
All I had to do was look at this photo and you had me. I’m a chocolate lover from birth and this literally had me drooling. I can’t wait to try this recipe.
I might have to make this for my husband’s birthday this summer. Chocolate is absolutely his favorite.
Absolutely yes to that!! i just love to have it during my tea time with a cup of coffee
Tunnel of mousse? Tunnel of love if you ask me. I think I need to make this sooner rather than later!
That looks so good with that soft centre. I am sure I could manage a very small piece. That would be such a nice surprise for guests when the cake is first cut.
I am a notorious chocolate lover so that cake is perfect for my addiction!
What? Chocolate mousse which is like chocolate ice cream inside of cake? Er, excuse me. I’ve got an important task to complete….Nabbing your recipe at the Aly’s site!
This is quite a yummy guest post, Liz! Love choc mousse too! xoxo
I am in love with this cake. Love the mousse!
HOLY COW!
This is seriously epic deliciousness. I’m swooning over that tunnel of mousse!
I know Bill must have loved this!
Mouth-watering cake! And it’s perfectly made!
You had me at tunnel of mousse, what a simply divine cake!
the tunnel is awesome idea…..
I’m dying for this mousse right now!! 😀
Liz – thank you SOOOOO much for sharing this divine Tunnel of Mousse cake on Cooking in Stilettos today. I cannot wait to make this!
This cake looks SO FUDGY and super fluffy! Gotta love impressive cakes like this one!
It looks gorgeous! Your friend and you are so talented!
Now, this is a killer dessert. We can eat a whole cake with its softness and creaminess…Not saying no on this, Lizzy!
Julie & Alesah
Gourmet Getaways xx
Oh that’s a coincidence. I had a similar accident 4 days ago. Chef Knife and Thumb! Still not able to do much in the kitchen. Being taking things light and I saw this lovely cake and drooling over it when I read about your Aly!! Can’t wait till I am able to try this. Thanks for sharing.
Liz, oh my gawd, that mousse in the center?!!! Kill me now. . LOVE this cake!!!
Oh I feel (felt) Aly’s pain-literally! This cake looks amazing Liz, I’ve been thinking about filling and “stuffing” different things lately… Mousse sounds great:@)