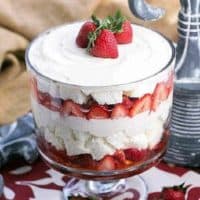
Layered Chocolate Mirror Cake
Perfect for any celebration, this stunning Layered Chocolate Mirror Cake is super moist, tender, and out of this world! Between the tasty cake and beautiful Mirror Cake Glaze, this is one jaw-dropping gorgeous dessert.
The guys in this family must have a chocolate dessert for their birthdays! I was running out of recipes as my youngest’s birthday celebration approached. When I saw my friend Danielle’s Mirror Glaze Cake Recipe, I knew it would be perfect.
Why You Must Make
- If you’re a daring baker and like to try new techniques, this cake is a must-make.
- The result is delicious and a show-stopper.
- It’s one of the moistest chocolate cakes you’ll ever taste! The glaze locks in the freshness.
Ingredient Notes
- Pantry Ingredients – All-purpose Flour, Granulated Sugar, Table Salt, Milk, Baking Soda
- Cocoa Powder – unsweetened and sifted to remove lumps. Do not use Hot Cocoa Mix
- Baking Powder – Unlike baking soda, baking powder does expire quickly. If you’ve had your can for over a year, consider replacing it. Check the expiration date.
- Eggs – Large eggs are standard in most recipes. Bring to room temperature for easier incorporation.
- Milk – I use 2%, but whatever is on hand will work.
- Canola Oil – A neutral oil is best
- Vanilla Extract – always use pure vanilla extract, not imitation
- Powdered or Confectioner’s Sugar – Sift to minimize lumps
- Gelatin Powder – I use Knox brand which you’ll find with flavored Jello
- Heavy Cream – should have 36% butterfat
How to Make
This recipe looks rather daunting. But if you use a shortcut, it will make the process much easier. The homemade chocolate cake is incredibly delicious, but it is so moist that it’s hard to move without spraying your cooling racks and frosting turntable with non-stick cooking spray.
PRO-Tip: Use a box cake mix for your trial run. It will be so much easier, and then your efforts can be focused on making the frosting smooth and making the mirror glaze recipe. The super moist, super delicious cake in the following recipe does tend to stick to the cooling racks, my frosting turntable, etc. Use non-stick cooking spray as needed and a large cake spatula for moving the cakes.
- Make and Cool the cake layers.
- Make the frosting and Frost the cake. PRO-Tip: Freeze the layers to make frosting the cake easier.
- Make sure your frosting is as smooth as possible as the glaze will highlight imperfections. For me, this is a work in progress! It looked impressive despite my amateur frosting abilities!
- Chill the frosted cake.
- Make the glaze and let Cool to the ideal pouring temperature.
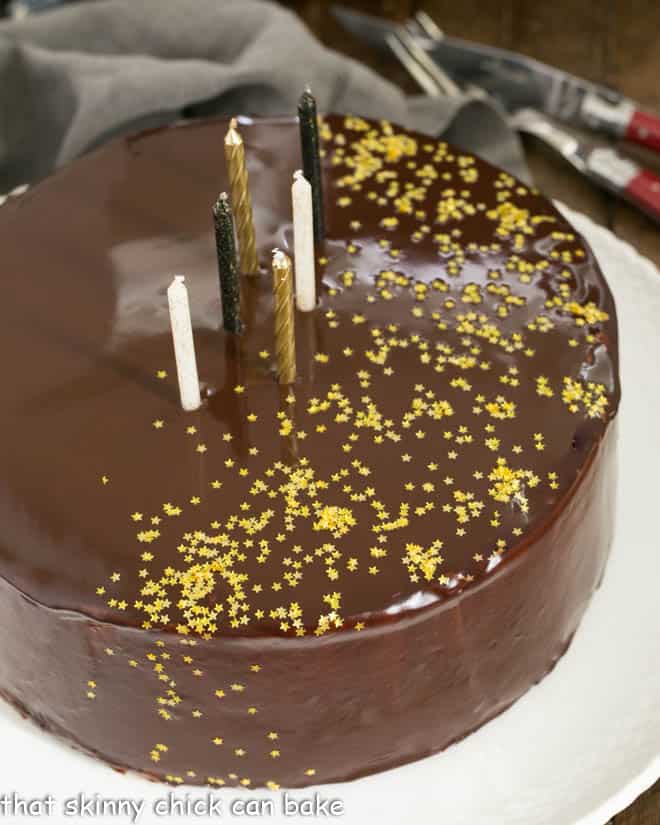
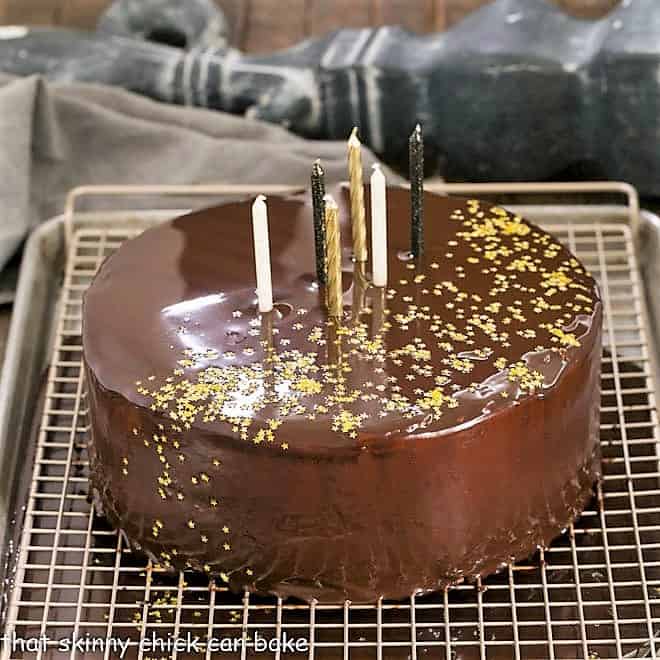
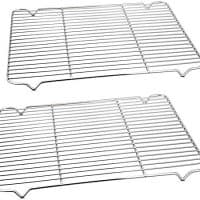
- Place the cake on a cooling rack over a sheet pan to glaze.
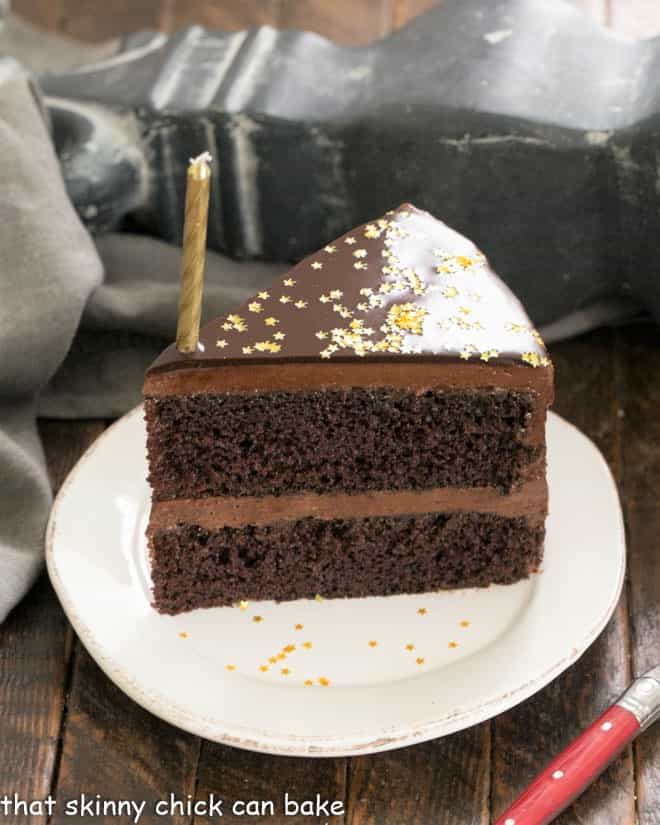
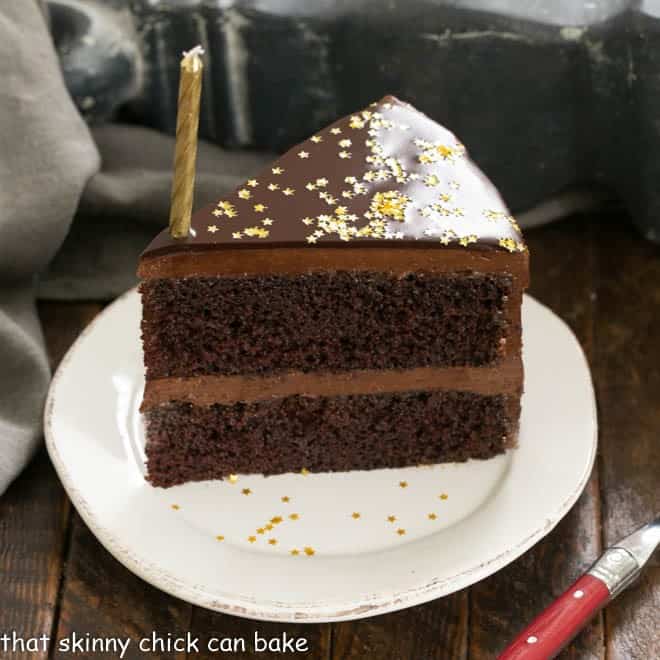
- Starting at the middle of the cake, in a circular motion, Pour the glaze over the top of the cake, then let it run down the sides, making sure all the frosting is covered.
- Apply sprinkles if desired.
- Let the glaze set.
Expert Tips
- Read the recipe once or twice to make sure you have all the proper ingredients and understand the process.
- PRO-Tip: You can make this cake over a few days. Make the cake ahead of time, wrap the layers well in plastic, and store them in the refrigerator.
- Freeze the cake layers to make frosting them easier.
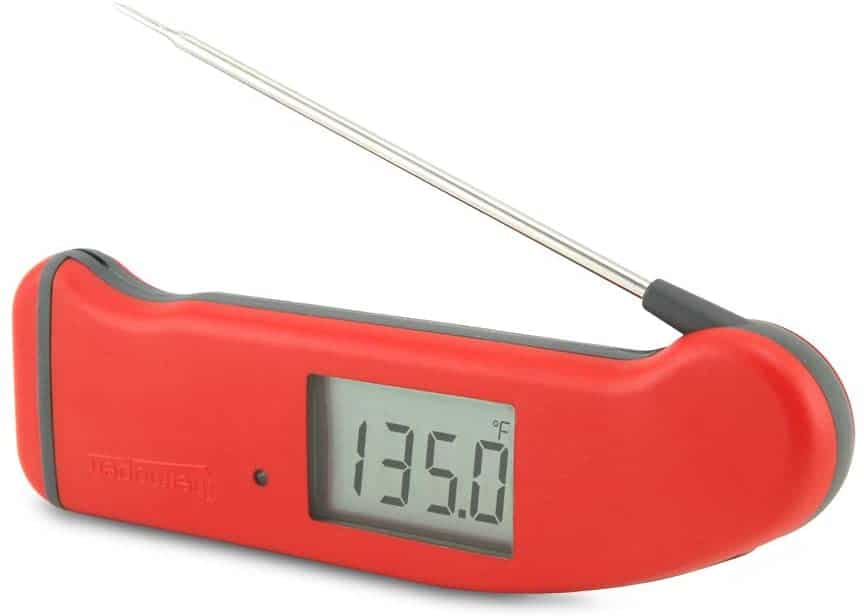
- Make sure your glaze is at the proper temperature (86 degrees F).
- Pour it over a cold cake.
- PRO-Tip: Don’t touch the glaze even after it has set. You will leave fingerprints.
- If you want to use sprinkles, apply them before the glaze sets.
Frequently Asked Questions
It’s any cake that is covered with a special, shiny reflective glaze made with gelatin. The sheen resembles a mirror!
The molecular structure of the gelatin after it gels is the reason for the glossy look of this unique glaze.
No, though it’s become more of a rage for home cooks in the past 5 years. The French have been using mirror glazes on their high end pastries for decades.
86 degrees Fahrenheit is the ideal temperature to glaze the cake. And having a very cold, smooth cake is key for the most impressive results.
Use an instant-read thermometer to monitor the glaze as it cools. A couple of degrees in either direction will be OK.
The glaze will set in 10 minutes or less. But it will still be soft, so don’t be tempted to touch it as you’ll leave a fingerprint.
This cake is fine stored at room temperature unless you keep your home very warm. Once it is cut, cover the exposed cake with plastic wrap. You can also refrigerate this cake.
Freezing is difficult because of the tacky glaze that will stick to any plastic wrap or foil you might use to wrap it.
You May Also Like
- Devil’s Food Cake
- Ding Dong Cake
- Layered Mousse Cake
- Triple Layer Cocoa Cake
- More of my Best Cake Recipes
Layered Chocolate Mirror Cake
A rich, chocolate layer cake with chocolate buttercream and a stunning mirror glaze.
Ingredients
Cake:
- 1¾ cups flour
- ¾ cup unsweetened cocoa powder
- 1½ teaspoons baking powder
- 1½ teaspoons baking soda
- 2 cups sugar
- 1 teaspoon salt
- 2 eggs
- 1 cup milk
- ½ cup canola
- 2 teaspoons vanilla extract
- 1 cup boiling water
Frosting
- 1 1/2 cups (3 sticks) butter, at room temperature
- 5 cups powdered sugar, sifted
- 1 cup cocoa powder, unsweetened
- ½ cup milk
- 2 teaspoons vanilla extract
Mirror Glaze
- 2½ tablespoons cold water
- 4 teaspoons gelatin powder
- ⅔ cup water
- ⅔ cup heavy cream
- 1 cup cocoa powder, unsweetened and sifted
- 1 cup plus 2 tablespoons sugar
Instructions
- Make the cakes.
- Preheat the oven to 350.
- Grease two 9" cake pans with Pam, line with parchment, and grease again.
- Sift flour, cocoa, baking powder, and baking soda into a large bowl.
- Add sugar and salt.
- Whisk in eggs, milk, oil, and vanilla by hand.
- Add water.
- Divide into pans and bake approx 35-38 mins until a cake tester comes out clean.
- Let cool -then freeze so frosting the layers will be easier.
- Make the frosting.
- Place butter in the bowl of a stand mixer fitted with the paddle attachment. Mix until creamy.
- Add the powdered sugar and cocoa and mix until combined. Slowly add in the milk until incorporated, scraping the bottom of the bowl to make sure it's mixed well. Mix in vanilla.
- Layer the cakes with frosting between and frost the entire cake.
- Place cake in the refrigerator for a few hours or overnight.
- Make the glaze.
- Place the 2½ tablespoons of water in a small bowl. Then add in the gelatin and stir to combine. Let sit for 5 minutes (it will turn into a firm gel).
- Whisk cocoa and water together in a saucepan.
- Slowly add cream and sugar: Gently mix with a rubber spatula, not a whisk.
- Turn the stove to medium-high and heat this to a boil stirring gently.
- Once boiling, remove from the heat and add in the gelatin and stir slowly to dissolve it.
- Pour this through a trainer into a glass bowl to remove air bubbles.
- Press plastic wrap on the surface of the glaze and cool for about 2 hours until it reaches 86 degrees.
- Strain it once more at this point.
- Place the cake on a cooling rack over a jellyroll pan to catch the excess glaze.
- Pour glaze on top of your chilled cake.
- Let the glaze set and enjoy!
Notes
The cake layers are super moist and delicious! But they are SO moist that they stick to the cooling racks, etc. Spray any surface that you move them to with a non-stick cooking spray.
For a practice run, you can use a box mix for your layer cake.
Recipe from One Tin Eats via Hugs & Cookies XOXO
Recommended Products
As an Amazon Associate and member of other affiliate programs, I earn from qualifying purchases.
Nutrition Information:
Yield:
12Serving Size:
1 sliceAmount Per Serving: Calories: 537Total Fat: 8gSaturated Fat: 4gTrans Fat: 0gUnsaturated Fat: 2gCholesterol: 48mgSodium: 431mgCarbohydrates: 108gFiber: 4gSugar: 81gProtein: 9g
Thatskinnychickcanbake.com occasionally offers nutritional information for recipes contained on this site. This information is provided as a courtesy and is an estimate only. This information comes from online calculators. Although thatskinnychickcanbake.com attempts to provide accurate nutritional information, these figures are only estimates. Varying factors such as product types or brands purchased can change the nutritional information in any given recipe. Also, many recipes on thatskinnychickcanbake.com recommend toppings, which may or may not be listed as optional and nutritional information for these added toppings is not listed. Other factors may change the nutritional information such as when the salt amount is listed “to taste,” it is not calculated into the recipe as the amount will vary. Also, different online calculators can provide different results. To obtain the most accurate representation of the nutritional information in any given recipe, you should calculate the nutritional information with the actual ingredients used in your recipe. You are solely responsible for ensuring that any nutritional information obtained is accurate.


11 Comments on “Layered Chocolate Mirror Cake”
I was wondering if I wanted to make the mirror glaze ahead of time how long it’s able to sit covered before I use it.
Hi, Alexandria, I think it can sit for a while at room temperature, but I’d make sure to bring it back to the proper temp before using. I’d just set the bowl in a bigger bowl of warm (not boiling) water and let it get back to 86°. I haven’t tested this, but that’s what I would do. Hope that makes sense.
Wow, love the Mirror Cake made with chocolate
Liz, this is truly GORGEOUS! Such a lovely chocolate celebration cake for any festive occasion. I love the stars, and how the candles match them. (I also like your “table of contents” addition to your posts — so organized!) 🙂 ~Valentina
Wow! What a spectacular dessert! I have yet to try making a mirror glaze but it’s definitely on my bucket list.
Hi Lizzy, how are you doing?
I love this layered chocolate cake, looks stunning!!!hugsxo
Picture perfect! Now I want to make it again! Hope you had a wonderful Mother’s Day!
How brilliant idea indeed ! Pinned to do !
I’ve never attempted a mirror glaze myself – I’ve only witnessed it on a few culinary shows before. That’s a really beautiful work Liz! Needless to say, the cake itself looks moist, decadent, and delicious!
Spectacular! I’d like to order one for Mother’s Day dessert today please:@) Happy Mother’s Day Liz-enjoy!
What a magnificent chocolate layered cake! The mirror is shiny and beautifully decorated. Well done, Liz.