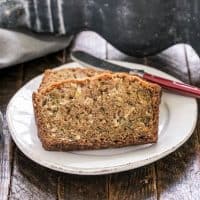
Easy Pie Crust Recipe
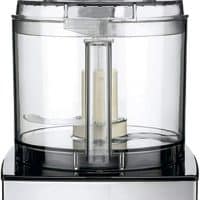
This Easy Pie Crust Recipe is made in a food processor that pulses it to the perfect consistency for a tender crust. The combination of butter and shortening is the ideal way to guarantee wonderful flavor along with flakiness.
Homemade Pie Crust may sound daunting, but you can easily master the technique and it’s so much better than any grocery store crust!

Why You Must Make
- Using a food processor minimizes the mess as all the mixing is done contained in the appliance.
- The combination of shortening and butter provides flavor, texture, and malleability.
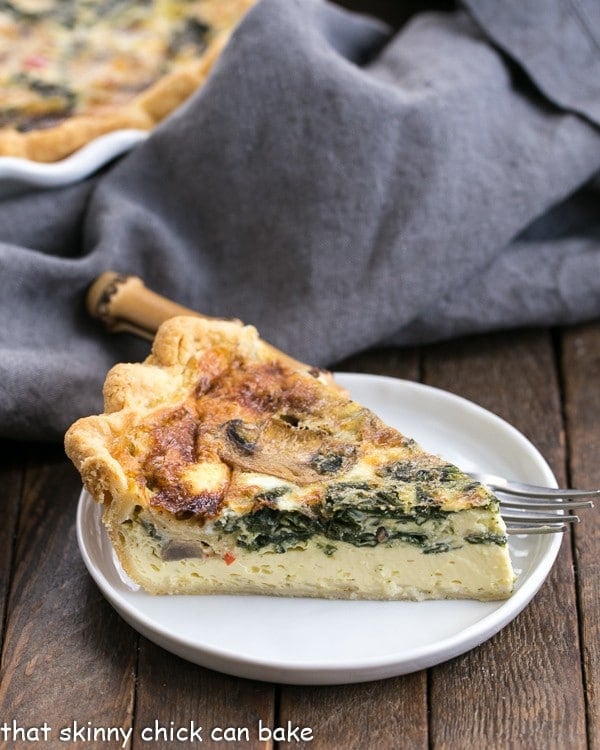
- It can be used in both sweet and savory recipes from fruit pies to quiches. The small amount of sugar can be omitted in savory recipes if desired.
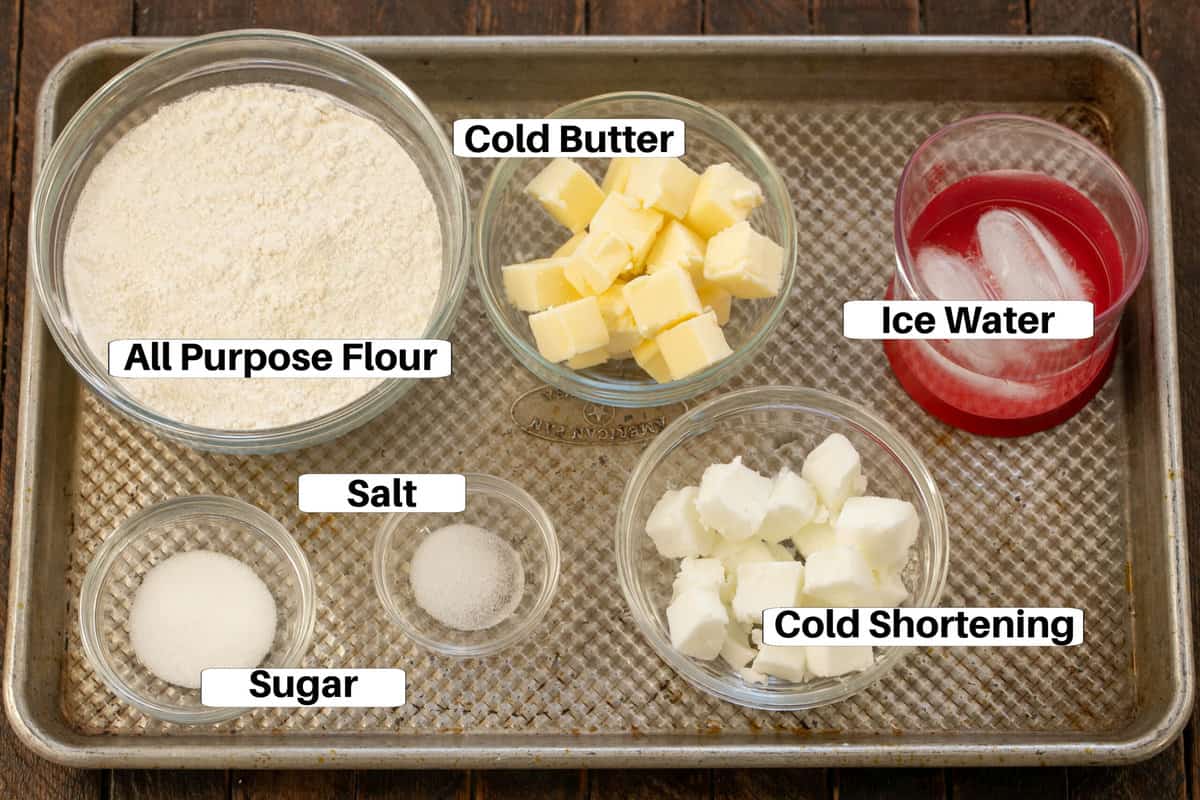
Ingredient Notes
- Kitchen Staples – All-purpose Flour, Salt
- Sugar – Just a touch; may omit if using the crust for a savory pie or quiche.
- Butter – Cold and cubed. Chilled butter will produce steam helping to create a flaky crust.
- Shortening (or Lard) – Cold and Cubed. If you want to use lard, look for leaf lard which is the best for pie crusts. You can find it at Moody’s Butcher Shops in the Indianapolis area.
- Ice Water – The amount used will vary depending on humidity, etc. You want just enough to hold the ingredients together.
Recipe Tips
- PRO-Tip: Use both butter and shortening (or lard). The butter provides delicious flavor and the shortening makes the dough easier to roll and shape.
- PRO-Tip: Make sure the butter is cold. Put the measured amount of shortening in the freezer while prepping the other ingredients so it’s cold, too.
- Keeping the dough cool means the butter will stay chilled. As the pie crust bakes, the tiny bits of cold butter will produce steam which is what makes a flaky crust.
- Don’t use too much flour when rolling out your pie dough. Excess flour can make your pie crust tough instead of tender.
- PRO-Tip: Speaking of flour, make sure you measure it correctly. Spoon the flour into the measuring cup, then sweep off the excess with a straight edge like a knife or offset spatula. This way the flour stays loosely packed and doesn’t get compressed.
- Also, don’t add too much water. You want to add enough that you can form a dough ball, but not so much that you need to add extra flour as that will make a tougher dough.
How to Make


Frequently Asked Questions
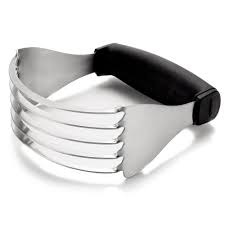
Yes, you can use a hand-held pastry blender or even a couple of knives to cut the fats into the flour.
You can make it 3 days ahead of time. Just keep it tightly wrapped in the refrigerator. Or if you want to freeze it, it will keep well for up to 3 months in the freezer if it’s wrapped well. It’s best to wrap the dough for a single crust in plastic wrap, then slide it into a freezer-quality Zip-loc bag to minimize any chance of freezer burn. Defrost overnight in the refrigerator before using.
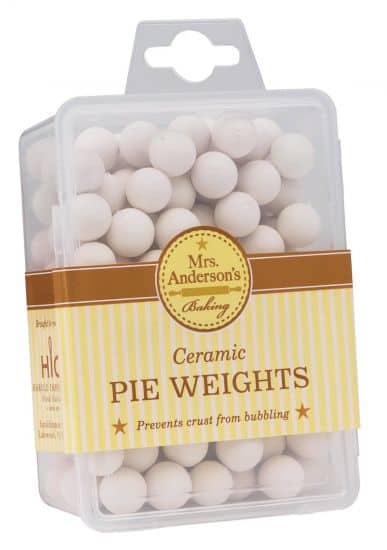
Blind baking is when you bake a crust without any filling. If the filling is something like a pudding or a mousse, you want a cooked and cooled crust before adding it. To blind bake, you “dock” the crust by poking holes across the surface with a fork. This minimizes the bottom crust from blistering or rising off the bottom of the pan.
An alternative is to add pie weights or dried beans (my mom used Navy beans) to weigh down the bottom of the crust as it bakes. Put them on some parchment paper so they can be removed easily before the crust is done. This allows the bottom of the crust to finish baking. You can reuse the beans. Just store them in an airtight container until you need them again.
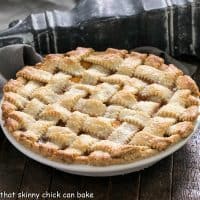
Fluting or crimping a crust is making a decorative edge with the crust that rests on the rim of the pie plate. I use two fingers from one hand pressing the crust from the outside and one finger from the other hand pressing between the other fingers from the inside. They will be on opposite sides of the edge of the crust and will make a traditional edge. You can also use a fork to make simple grooves using the tines to make linear indentations around the perimeter.
I’ve also made cutouts of small leaves with mini cookie cutters (using any scraps of leftover dough) and attached them to the edge with an egg wash (egg mixed with water or milk).
Make sure your pie dough is chilled, and keep your rolling surface dusted with flour. After the first pass with your rolling pin, lift up the dough, give it a turn, roll, and repeat. Make sure the surface still has a light coating of flour. Anytime the dough starts sticking, add a touch more flour.
Marble is known to be good for rolling out pie dough because its surface is cool. But even marble will need a coating of flour to minimize sticking.
This pie crust is also known as Pâte Brisée which is French for a “short pastry.” It’s a rich, flaky dough used for pies, tarts, and quiches. Pâte Sucrée is a rich, sweet pastry used for desserts including pies, tarts, and filled cookies.
You May Also Like
- Strawberry Cream Pie
- Fresh Peach Pie
- French Silk Pie Recipe
- Blueberry Peach Custard Pie
- Plus check out all my Best Pie Recipes

Homemade Pie Crust Recipe
A homemade pie crust made with butter for flavor and shortening for malleability.
Ingredients
Crust:
- 2 ½ cups flour
- ½ teaspoon salt
- 1 tablespoon sugar
- 12 tablespoons cold butter, and cut into ½ inch pieces
- 8 tablespoons lard, leaf lard preferred, cold, and cut into pieces similar size to the butter or shortening (Crisco)
- 6-8 tablespoons ice water or enough till crust just holds together when pinched between your fingers
Optional glaze for the crust:
- 1 egg yolk
- 1 tablespoon of cream
Instructions
- In a food processor, pulse together flour, salt, and sugar to mix.
- Add butter and shortening and pulse 3-5 times, till the mixture resembles cornmeal, with a few chickpea-sized chunks of fat.
- Add ice water one tablespoon at a time, pulsing until the dough just holds together. You may not need all the water.
- Form the dough into a round. Wrap in plastic and form into a disk.
- Refrigerate for one hour or longer.
- Roll and fill the pie tin with dough. Flute the rim and dock (poke fork holes across the bottom of the crust) if blind baking.
- Place in refrigerator till filling is made.
- Make the glaze if desired and carefully brush on the exposed crust before baking.
- Bake as directed in your pie recipe or blind bake by putting parchment in the bottom of the crust, adding pie weights or dried beans to keep the bottom crust flat, and baking until the crust is golden brown.
Notes
How to Blind Bake your pie crust (when making a pie with a baked crust with a no-bake filling):
- Chill your fluted pie crust.
- Line with parchment or foil (non-stick foil is nice), covering the edges so they don't get too dark.
- Fill with pie weights or dried beans.
- Bake at 375° for 25-30 minutes, remove the parchment/foil and bake for 10-12 minutes or until golden brown.
Recommended Products
As an Amazon Associate and member of other affiliate programs, I earn from qualifying purchases.

Nutrition Information:
Yield:
8Serving Size:
1Amount Per Serving: Calories: 471Total Fat: 36gSaturated Fat: 19gTrans Fat: 1gUnsaturated Fat: 15gCholesterol: 89mgSodium: 283mgCarbohydrates: 32gFiber: 1gSugar: 2gProtein: 5g
Thatskinnychickcanbake.com occasionally offers nutritional information for recipes contained on this site. This information is provided as a courtesy and is an estimate only. This information comes from online calculators. Although thatskinnychickcanbake.com attempts to provide accurate nutritional information, these figures are only estimates. Varying factors such as product types or brands purchased can change the nutritional information in any given recipe. Also, many recipes on thatskinnychickcanbake.com recommend toppings, which may or may not be listed as optional and nutritional information for these added toppings is not listed. Other factors may change the nutritional information such as when the salt amount is listed “to taste,” it is not calculated into the recipe as the amount will vary. Also, different online calculators can provide different results. To obtain the most accurate representation of the nutritional information in any given recipe, you should calculate the nutritional information with the actual ingredients used in your recipe. You are solely responsible for ensuring that any nutritional information obtained is accurate.


4 Comments on “Easy Pie Crust Recipe”
Thank you for all your tips. I always want pie crust to be simple but it never really seems so. Tips like yours really help.
What a perfect weave on pie crust love this. I just bought a tool to use and going back to by hand nothing like it and your’s is perfection!
Although my mother baked cakes and cookies, she never made pie . So consequently, I never really learned to make pie either. Thank you for this easy to follow tutorial and recipe. Looks great.
Love those helpful and practical tips. I usually use lard….love healthy animal fat.