Homemade Bagels
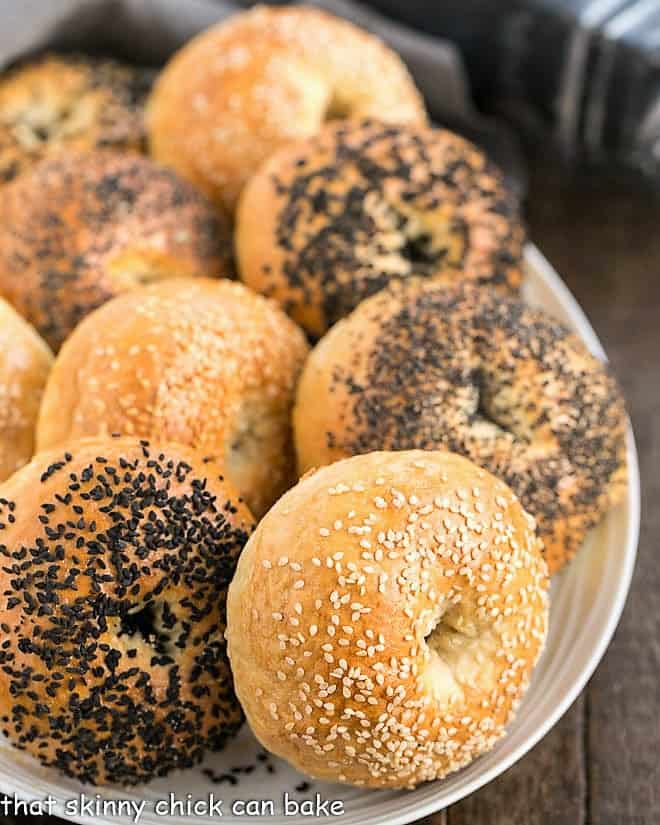
Dense, chewy Homemade Bagels sprinkled with seeds make for a marvelous breakfast or brunch treat smeared with cream cheese, butter, or jam.
Making Bagels from Scratch will make you feel like an accomplished baker, plus your house will have a most enchanting aroma as you bake up this Bagel Recipe in your oven!
Why You Must Make
The last time I took the time to make these homemade bagels was in 2012. The dough recipe was easy enough, but by the time all was said and done, the kitchen was a disaster with many dirty baking sheets, bowls, utensils, counters, and tea towels. But when absolutely everyone who tasted the final result raved about them, I realized it was worth the mess.
- There’s nothing better than the smell of yeast bread baking in your kitchen!
- These will be the freshest bagels you’ll ever eat!!!
- Bring out all your favorite toppings and savor every bite.
Back then, I was cooking along with a lovely group of bloggers who were baking from one of Dorie Greenspan’s cookbooks, Baking with Julia (affliate link). The recipes in this tome are from the best of the best of American bakers. Contributing baker, Lauren Groveman, provided this recipe and technique for making these terrific bagels from scratch.
Ingredient Notes
- Kitchen Staples – Sugar, Baking Soda, Salt, Shortening (Crisco)
- Butter – Melted
- Active dry yeast – I use Red Star Yeast
- Tepid Water – Two parts cold water to one part boiling water or 105° F or 40° C. Should feel slightly warmer than your body temperature.
- Bread Flour – Has a higher amount of gluten with 99.8% hard wheat flour, a small amount of malted barley flour plus either Vitamin C or Potassium to assist with rising. May also use unbleached All Purpose Flour.
- Salt – Necessary for flavor; without it, the bread will taste flat.
- Eggs, Seeds – For glazing and topping.
Tips for Making Bagels from Scratch
My New York-raised friend and a few others were over to visit one Friday morning. She did mention that I was missing the New York City water that some say makes New York bagels impossible to replicate. For Indiana, these were darn tasty! Here are some tips for making these soft and chewy homemade bagels.
- PRO-Tip: Though you can use all purpose flour, bread flour or another high-gluten flour will provide a better texture for your bagels.
- PRO-Tip: High-gluten flour is what many pizzerias use for their pizza dough, so if you have a local restaurant that you frequent, they might sell you some.
- PRO-Tip: Make sure your yeast is fresh. Check the date on the package before you start. When you mix the yeast with the water and sugar, it should get creamy (warm water will cause the yeast to have a more obvious reaction, but this recipe calls for tepid water). Tepid water is about 105 degrees F., slightly warmer than body temperature. Most yeast bread uses water that’s 110-120 degrees.
- After all the work of making, shaping and baking the bread, you definitely want a yeast that’s at 100% of its capacity.
- An egg white wash gives your bagels a nice sheen, plus it is the glue to help your seed toppings stick.
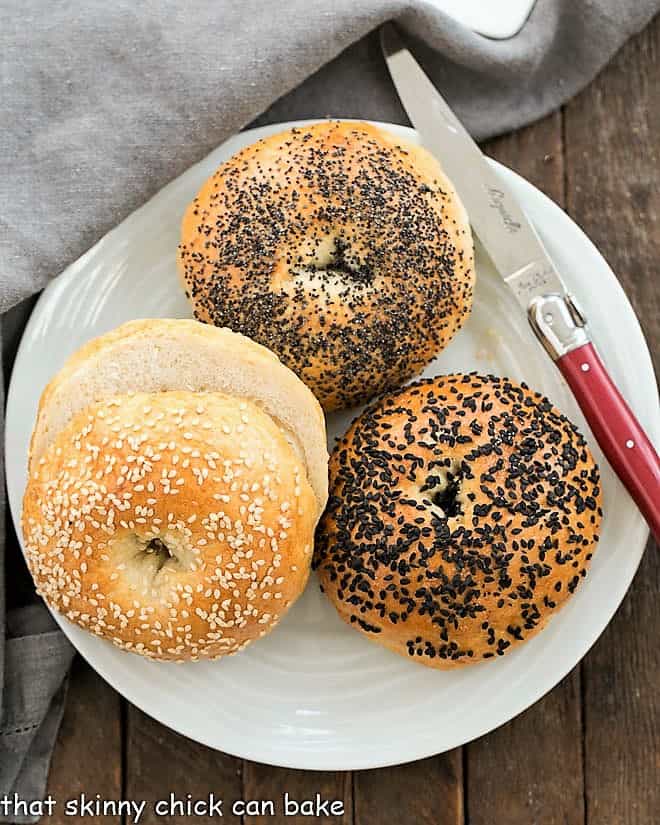
- I’m a sesame seed bagel fan, so that’s my first choice. You can also purchase black sesame seeds at retailers like Penzey’s. Poppy seeds and Everything Bagel Topping (affliate link) are also quite popular toppings.
- If you have an electric oven with a heating element on the bottom, you can add your ice cubes to a pan on a shelf below your bagels instead of the bottom of the oven.
How to Make Bagels
Kneading Bagel Dough
- I like using my KitchenAid stand mixer, fit with the dough hook, to knead the dough. I have the 7-quart mixer with the biggest motor available.
- If you use a smaller-sized mixer (and I bet almost all of you will), make sure to feel the motor as it kneads as it could easily overheat. Stop and let the motor cool down if it starts feeling hot or you smell the motor overheating.
- Alternatively, when making homemade bagels, you can knead by hand, which can be very therapeutic. Use the heals of your hands to press the dough, then fold the dough in half and press again.
- Repeat over and over until the dough is smooth and elastic. You’re activating the gluten. Kneading always reminds me of my mom who practiced kneading on her grandmother’s fleshy arm when she was a child!
Shaping Bagels
- I used my kitchen scale to divvy up my bagel dough. Each piece of dough ended up weighing approximately 150 grams. Consistent sizes help them all finish baking at the same time.
- Keeping the dough balls under a towel prevents them from drying out when shaping another bagel.
- The first goal is to get your dough into a round, tightly packed ball. This is attained by drawing the dough up from the bottom, stretching, and pinching it at the top. Repeat this process of pulling the dough up and pinching until you have a round ball with a little knot at the top.
- Next, you poke your index finger through that knot and out the other side, making the bagel hole.
- PRO-Tip: You’ll need to stretch the hole to a width of 2-2½ inches as the space will reduce during the boiling and baking process.
- PRO-Tip: Lauren Groveman describes this process as follows: Wiggle your finger around in the hole to stretch it, then lift the bagel, hook it over the thumb of one hand and the index finger of the other, and start rotating the dough, circling your thumb and finger to elongate the dough.
Baking Bagels
- Make sure not to overproof the bagels, meaning letting them rise too long or in too hot of a locale before baking. This will cause the bagels to collapse or only rise minimally after baking. They should just double in size. Any bigger means they were left to rise too long.
- Place the uncooked bagels on a cornmeal-lined baking sheet. This will give the bagels a slightly crunchy bottom crust.
- Adding ice cubes to the oven before you shut the door provides a steamy environment for baking.
Recipe Verdict
This was no quick recipe…in fact, the instructions took up three full pages in the cookbook. The second rise of the dough was another overnight stint for the best flavor development, then add in the shaping, boiling, and baking. I had two baking sheets covered in parchment and cornmeal, one with a kitchen towel, and another with a kitchen towel with a heavy coating of flour.
My dough rose beautifully (whew), and my only trepidation arose after pulling the lumpy looking dough out of the water bath. No need to worry, though, as these bagels baked up smooth with a gorgeous sheen from the egg wash. The instructions were right on about making large 2-2½-inch holes so that they would be visible after baking. Mine kept shrinking back on themselves so most just had a little dimple. No big deal; they tasted incredible and I was quite pleased! And my family devoured this wonderful bagels recipe.
Frequently Asked Questions
Boiling homemade bagels helps create the classic thick and chewy crust that you’d find at your favorite bagel shop. The longer you boil, the thicker the crust. 30-60 seconds per side ends up being the optimal time as you don’t want the crust too thick. This process also sets the size of the bagels as the boiling process gels the starch granules, and stiffens the exterior which then prevents any further expansion in the oven. Without any more rise, the resulting homemade bagels have the classic dense texture.
Usually, barley malt or lye is added to the water as both help brown the crust and add flavor. Baking soda is often substituted for lye. Sugar, honey, and/or malt are other common additives, also helping with browning in the oven and the distinctive bagel taste.
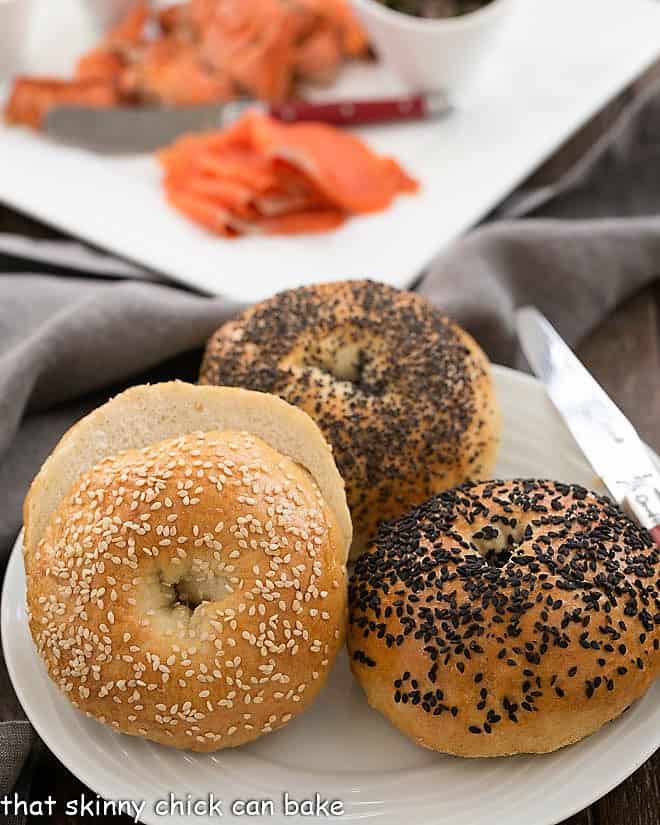
There are endless options from simply topping your sliced bagels with butter and jam or lox and cream cheese. Or make a version of avocado toast with your sliced bagels. Scrambled eggs and fruit will round out your breakfast nicely.
You May Also Like
- Dilled Gravlax
- Smoked Salmon Platter
- Whole Wheat Bagel
- Homemade Croissants
- All my Best Bread Recipes

This post was first shared in 2012. The text, recipe and photos were updated in 2019, 2024.

Homemade Bagels
Bagel shop quality bagels you can make in your own kitchen!
Ingredients
Bagel Dough
- 2 tablespoons butter, melted
- 2 ¼ teaspoons active dry yeast
- 2 ¼ cups tepid water
- 2 tablespoons sugar
- 3 tablespoons shortening
- 1 tablespoon salt
- 5 ½ cups bread flour, or unbleached all-purpose flour (may add another ½ cup if needed)
Water Bath
- ¼ cup sugar
- 1 teaspoon baking soda
The Glaze and Toppings
- Non-stick cooking spray and cornmeal, to coat baking sheets
- 2 large egg whites
- 1 teaspoon cold water
- Sesame, poppy, or black sesame seeds or Everything Bagel Topping
Instructions
- Brush the side of a large bowl with some of the melted butter; set aside. Reserve the rest of the melted butter for the top of the dough.
- Whisk the yeast into ¼ cup of the tepid water in the mixer’s bowl. Add a pinch of sugar and let the mixture rest until the yeast has dissolved and is creamy.
- Fit the stand mixer with the dough hook and add the remaining 2 cups of water and the shortening to the bowl. Add the yeast mixture along with 2 tablespoons sugar, and the salt. Mix on low to blend.
- With the machine still on low, gradually add 5 ½ to 6 cups of the flour, mixing for 2 to 3 minutes, or until the ingredients are blended.
- Increase the mixer speed to medium and knead for about 6 minutes, adding additional flour by the tablespoon until the dough is smooth and elastic.
- Transfer the dough to the buttered mixing bowl. Brush the top of the dough with a little melted butter, cover the bowl with buttered plastic wrap, and top with a kitchen towel.
- Let the dough rise at room temperature for about 1 hour, or until it doubles in bulk.
- Deflate the dough, cover as before, and refrigerate for 4 hours, or up to 2 days.
- When you’re ready to make the bagels, place an oven rack in the lower third of the oven and preheat the oven to 500° F. Spray two rimmed baking sheets with non-stick cooking spray and dust with cornmeal.
- While the oven preheats, fill a large pot with water and bring the water to a rapid boil. Line 2 baking sheets with kitchen towels, and rub flour onto the surface of one.
- Deflate the dough and place it on a lightly floured work surface.
- Divide the dough in half; cover and chill one piece of the dough while you work with the other.
- Cut the dough into 5 equal pieces, covering them with a towel, removing one at a time to shape.
- Take one of the dough pieces and draw up the dough from the bottom, stretch it, and pinch it at the top. Keep pulling the dough up and pinching it until you have a perfectly round, tightly packed ball of dough with a little topknot or pleat at the top.
- Turn the dough over so that the knot is against the work surface and push your index finger into the center of the dough.
- Wiggle your finger around the hole to stretch it, then start rotating the dough, opening the hole to a diameter of 2 to 2 ½ inches. The hole should look much larger than what you'd expect from a baked bagel.
- Put the bagel on the baking sheet with the floured towel, and cover it with another towel.
- Shape the remaining 4 pieces of dough into bagels. (Keep the other half of the dough in the refrigerator for now). Add the sugar and baking soda to the boiling water.
- With a large slotted spoon or spatula, lower the bagels, one at a time, into the boiling water. Do not overcrowd, they should have space between them. The bagels will sink, then rise to the top after about a minute.
- Once the bagels have surfaced, boil for about 1 minute on each side, carefully flipping them over with the spoon.
- Remove the bagels, letting the excess water drip through the spoon, and put them on the baking sheet with the unfloured towel, with the smoothest side of the bagel up. Keep the water in the pot for the next batch.
- Once they're all on the towel, start moving them to the cornmeal-covered baking sheet, keeping the smoothest sides up, and transfer the bagels to the prepared baking sheet. The bagels will stick to the towel if you wait too long.
- Whisk the egg whites and water together until the whites are broken up and brush each bagel with the glaze. Brush with another coat of glaze and, if you’re using a topping or more than one, sprinkle it, or them, evenly over the bagels.
- Your bagels will not be smooth at this time but will look much better after baking.
- Put 4 ice cubes in a 1-pint measuring cup and add ¼ cup cold water. Put the bagels into the oven and immediately toss the ice cubes and water onto the oven floor.
- Quickly close the oven door, turn the oven temperature down to 450° F, and bake the bagels for 25 minutes. If you have a gas oven, you may need to put a pan in the bottom of the oven so you don't put out the flame when you add the water.
- Turn off the oven and keep the bagels in the oven for 5 more minutes. Open the oven door and leave the bagels in the oven for another 5 minutes. Transfer the bagels to a rack and cool.
- Before baking the next batch of bagels, be certain to bring the oven temperature back to 500° F. Remember to lower the oven temperature when you put the last bagels in the oven.
- While the first batch of bagels is baking, cut and shape the remaining dough. Boil, glaze, and bake these bagels just as you did the first batch.
- Cooled bagels can be kept for 1 day in a paper bag. For longer storage, pack into airtight plastic bags and freeze for up to 1 month. Thaw, still wrapped, at room temperature.
Notes
Adapted from Baking with Julia by Dorie Greenspan.
Total time does not include proofing time.
Nutrition Information:
Yield:
10Serving Size:
1 bagelAmount Per Serving: Calories: 498Total Fat: 10gSaturated Fat: 4gTrans Fat: 0gUnsaturated Fat: 5gCholesterol: 8mgSodium: 845mgCarbohydrates: 88gFiber: 4gSugar: 9gProtein: 14g







19 Comments on “Homemade Bagels”
What a treat and they so professional. I’ll have to give these a try. Thanks for the recipe.
What a satisfying bake! These are on our list to make! Hoping we can make them with gluten free cup for cup flour or at least going to give it a try- might need to make a few tweaks as we soooo miss bagels! Thanks for all of your helpful baking hints.
Bagels are the best, these look absolutely perfect!
Beautiful bagels Liz. I have made bialys many a time but still not bagels. I better hurry up and do this before Passover hits!
Wow Liz, I am impressed . Those bagels look gorgeous. This is perfect cooking project for the mountains. Pinned.
Chewy, fresh and oh so delicious! The boys are already on us to make these asap! Wishing you a super weekend. Just pinned to a few of our favorite boards.
Very Impressive! We made them a couple of time at Culinary School and they never looked this good.
Nothing better than a homemade bagel! My favorite breakfast.
I saw your post on FB and immediately recalled our NY Bagel experience. We were staying at a Hotel in Manhatten (LES, I believe) that was attached to a hair place. We were hanging out in the lobby (waiting for friends) when a woman with a fresh bag of bagels comes in. The aroma was incredible. She spots us and darts over and quite excitedly asks if we’ve ever had a NY bagel? We said no, and she immediately pulled out a bagel and handed it to us. She chatted with us for a bit and left. We never saw her again.
Your bagels look just as good and I just love that the hole is so small. Montreal bagels (a direct competitor to NY Bagels) has a huge hole, making it difficult for sandwiches. Your bagel would be absolutely perfect for sandwiches.
PS Trader Joes also has an “Everything” topping in their spice section, it’s so good.
My very first time trying my hand in making bagels and it worked perfectly. Your tips were head on. Thanks for yet another amazing recipe.
Homemade bagels are the best! Thanks for the fabulous recipe and such great detail on making bagels!
Well I used to own a coffee shop were we made our own bagels daily, so I’m so over making bagels ????. Lol but I love your easy instructions
I only attempted bagels once in my life, and while they didn’t look impeccable they still tasted great. Those bad (good) guys look fantastic, and the crust is so lovely. Excellent job, Liz!
I cannot wait to try to make these!
Lizzy these bagels look wonderful and yummy! xo
THese look amazing. Ive yet to make homemade bagels but look forward to trying them now. Thans for sharing these. They’re beauties!!!
These look bakery perfect, Liz!
Yum. I’m having a hard time finding whole wheat bagels, maybe I should whip some up the next time it’s a rainy day:@)
Are you opening a bakery soon, Liz? These look so pro! xoxo