Red Velvet Checkerboard Cake
Katie combs Pinterest all year long for the perfect birthday cake. This year was a challenge. She selected a Red Velvet Checkerboard Cake to celebrate her special day. I was hoping for something easy!
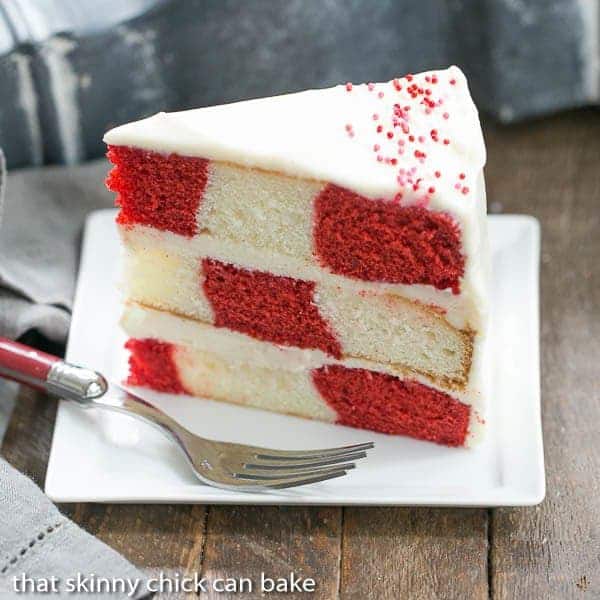
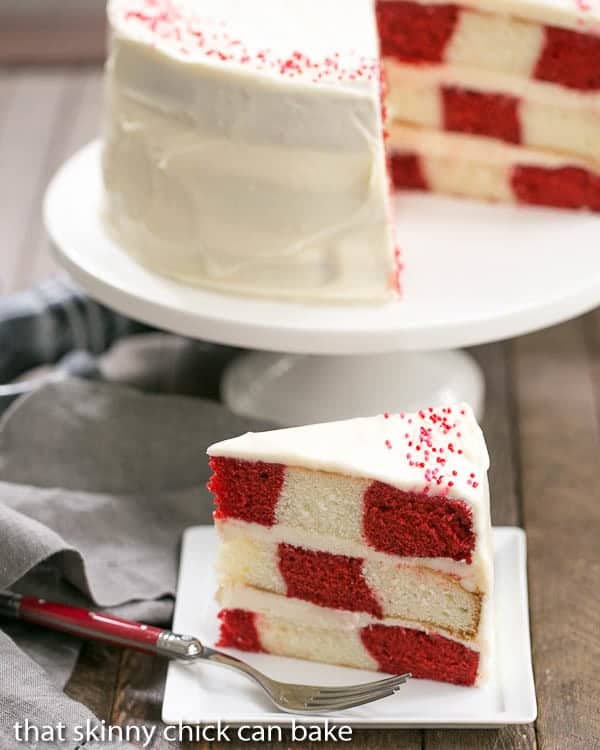
A Checkered Cake, especially one with both red velvet and white cake plus cream cheese frosting is going to be memorable for anyone who gets a bite!!! This Red Velvet Cake Design is a winner.
Why You Must Make
We were in Jo-Ann Fabrics for some reason or another, and Katie spotted a Wilton Checkerboard Cake Pan Set. I needed all the help I could muster, so it was added to our shopping cart.
This was my first (and maybe only!) attempt at this sort of cake. Though not perfect, I was pleased that this red velvet checkerboard cake wasn’t a complete disaster. The birthday girl was thrilled and that’s what counts!
- If you love to bake, this is definitely a fun recipe to make.
- It is one of the most impressive cakes to come out of my kitchen. If you have an upcoming celebration, this checkerboard cake recipe makes a beautiful statement when sliced.
- You can try other flavors and colors depending on the occasion.
Expert Tips
- Put each of your batters (don’t overfill) in either a large piping bag or a gallon or two-gallon zip-top bag. Clip off the end and use it to fill the sections of the plastic divider ring. Fill pans only 2/3 full.
- After adding the batter, pull the divider straight up so that the blocks of cake will be square instead of wavy. I need some practice with this step! There’s no way to correct the batter after this step, so just do your best.
- Wash and dry the divider before filling the second pan, then again before filling the 3rd pan.
- Your cakes may be slightly rounded after they’re baked. You can slice a bit off the top to even out the cakes, but to make them perfectly flat, you might end up with very thin layers.
- You are welcome to use two different flavored box mixes to make the process easier. Use any excess batter to bake cupcakes.
- Make two of your layers the same: dark outer ring, light middle ring, dark center ring. Make one of your layers opposite: light outer ring, dark middle ring, light center ring.
- The layers that are the same will be the top and bottom layers while the different patterned layer will be in the middle.
Helpful Tools:
- Wilton Checkerboard Cake Pan Set (All Amazon links)
- Norpro Checkerboard Cake Pan (Updated with this link as this pan seems to be sturdier with better Amazon reviews)
- OXO Offset Spatula
- Cooling Rack
- Vanilla Bean Paste
Now that I own the equipment, I may have to try another checkerboard cake. But it will take a while for me to recover from the disaster zone I created in my kitchen with this project!
Frequently Asked Questions
There are two popular methods. First, you can purchase a checkerboard cake pan set that helps to divide the batter into sections. Alternatively, you can bake 3-4 cake layers with 2 different colored batters. Then use 2-inch, 4-inch, and 6-inch round cutters to remove a small round from each center, and then use the larger cutters to make two rings. Reassemble each layer with alternating colors. Then frost and stack making sure to alternate the layers when you stack so that the two matched patterned layers are separated by the unmatched layer.
I took the easier route and bought a Checkerboard Cake Pan Kit, which has a divider that helps you separate the different colored batters as you fill each pan. Once you fill each layer, pull out the divider and move on to the next layer. Make sure that you shake up the color arrangement so that all 3 cakes aren’t exactly the same pattern.
The cake pans are standard cake pans. But the kit comes with a plastic divider that enables the different colored batters to be added in blocks. The divider is pulled up and out after the pan is filled, then this technique is repeated for the remaining layers.
You May Also Like:
- Red Velvet Marble Cake Recipe from Grandbaby Cakes
- Gooey Red Velvet Brownie Cake from Beyond Frosting
- Red Velvet Crepes from Tidy Mom
- Easy Red Velvet Fudge
- Red Velvet Thumbprints
- Red Velvet Brownies with White Chocolate Icing
- More of the Best Dessert Recipes
- More of the Best Cake Recipes

Red Velvet Checkerboard Cake Recipe
With the right equipment and a few tips, you can make this impressive Red Velvet Checkerboard Cake at home!
Ingredients
Red Velvet Cake:
- 3 cups cake flour
- 2 tablespoon unsweetened cocoa
- 1 teaspoon baking soda
- 1 teaspoon baking powder
- 1/2 teaspoon salt
- 1-2/3 cups sugar
- 1/2 cup butter (4 ounces), at room temperature
- 4 egg whites
- 2 cups buttermilk
- 1 (1 oz) bottle red food coloring
- 1 tsp vanilla
White Cake:
- 2-1/4 cups cake flour
- 2 teaspoons baking powder
- 1/2 teaspoon baking soda
- 1/4 teaspoon salt
- 1/4 cup whole milk
- 1/2 teaspoon vanilla bean paste
- 1/2 cup buttermilk
- 1 tablespoon fresh lemon juice
- 1-3/4 sticks butter (7 ounces), at room temperature
- 1-1/2 cups sugar
- 4 egg whites, lightly beaten
Cream Cheese Frosting:
- 16 ounces cream cheese, cold
- 12 tablespoons butter, at room temperature
- 4 teaspoons vanilla
- 6 cups powdered sugar
Instructions
- Preheat the oven to 350º. Grease 3 9-inch cake pans (I used the ones in the checkerboard cake kit). Line bottoms with parchment and grease the top of the parchment. Set aside
- Make red velvet cake.
- Combine the flour, cocoa, baking soda, baking powder, and salt in a medium bowl. Whisk to combine thoroughly. Set aside.
- - In the bowl of a stand mixer fitted with the paddle attachment, beat granulated sugar and butter at medium speed for 4 minutes or until well blended.
- Add egg whites to sugar mixture; beat at medium speed 5 minutes or until fluffy.
- Combine buttermilk, food coloring, and vanilla in a small bowl. Stir well with a whisk.
- With the mixer on medium, add a third of the flour mixture, then half of the buttermilk mixture, another third of the flour mixture, then the rest of the buttermilk mixture. Add the remaining flour mixture and mix just until moistened.
- Spoon batter into a gallon-size zip-top bag or pastry bag. Seal. When you're ready to pipe the batter, cut off about ½-inch from one corner.
- Wash your mixer bowl and beater.
- Make the white cake.
- Whisk together the flour, baking powder, baking soda, and salt in a medium bowl. Set aside
- Mix together the whole milk, vanilla bean paste, buttermilk, and lemon juice. Set aside.
- In the bowl of a stand mixer fitted with the paddle attachment, beat the butter on medium speed until it lightens in color, about a minute.
- Add the sugar in a steady stream, stopping to scrape down the sides of the bowl after all is added. Continue to beat on medium speed until the mixture is very light in color and fluffy, 3 to 4 minutes.
- With the mixer on medium speed, add the egg whites, about a tablespoon at a time, beating after each addition until incorporated before adding more. If the batter ever looks watery, stop adding the egg whites, increase mixer speed and beat till the batter looks smooth again. Continue to beat, scraping down the sides and bottom of the bowl once or twice, until all of the egg whites are added and the mixture is fluffy.
- With the mixer on low speed, add the flour mixture in three additions, alternating with the buttermilk mixture in two additions, beginning and ending with the flour mixture. Stop the mixer after each addition to scrape down the sides of the bowl.
- Transfer enough batter to fill a pastry bag about halfway full.
- To make the frosting, beat together cream cheese and butter just until blended. Add the vanilla and mix till combined. Mix in the powdered sugar, 2 cups at a time. Beat until smooth.
- To make cakes, place the divider in one cake pan. Start with the red batter and pipe in the outside and middle ring, filling only ⅔ full.
- Pipe the white cake batter into the middle ring. Pull the divider straight up, then wash and dry it and repeat with the second cake pan.
- Remove the divider, wash and dry it then pipe the white batter in the outside and middle ring and then the red in the middle ring. Remove the divider.
- Use extra batter for cupcakes (bake about 20 minutes).
- Bake the layers for about 28 minutes or until a toothpick inserted in the middle comes out clean. Cool for 10 minutes, then remove to wire racks to finish cooling.
- To assemble, place one of the two matching layers on a cake plate (level by cutting off rounded top if needed).
- Spread layer with frosting then top with the non-matching layer.
- Spread top with frosting, then top with the last layer.
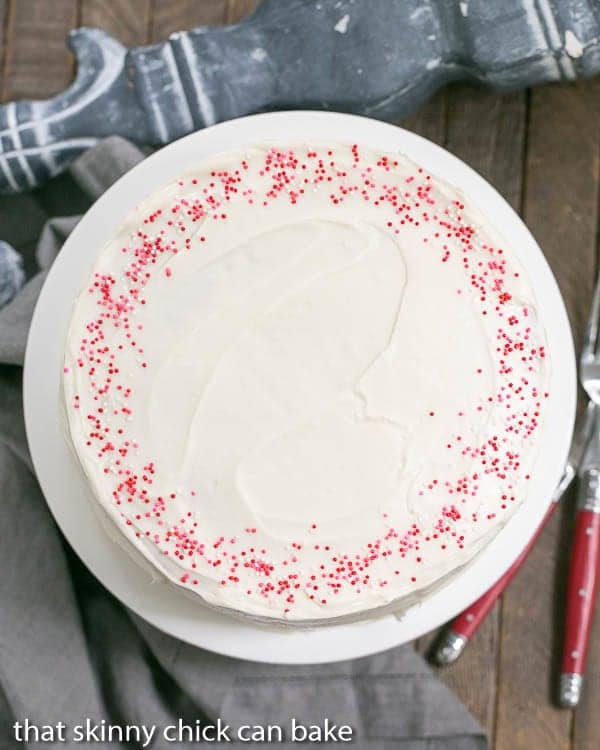
- Frost top and sides of cake. Garnish with sprinkles if desired.
- Store in the refrigerator.
Notes
This recipe is adapted from Cookie Baker Lynn.
Nutrition Information:
Yield:
16Serving Size:
1 sliceAmount Per Serving: Calories: 1227Total Fat: 48gSaturated Fat: 30gTrans Fat: 2gUnsaturated Fat: 14gCholesterol: 129mgSodium: 798mgCarbohydrates: 193gFiber: 1gSugar: 144gProtein: 10g



25 Comments on “Red Velvet Checkerboard Cake”
Wow! This looks great, I have seen chocolate checkerboard cakes but this is something new. Definitely gonna try this.
such a creative cake especiallly for Valentines Day
You amaze me! You are on top form! 🙂
You did a great job and just think of the holidays/color combos you can use this for. I’ve made one checkerboard cake and not you have me wanting to dust off my pans!
you make it look so easy and delicious!
Katie’s birthday cake looks sublime…Very much appreciate the tips…Sounds a bit challenging but yours sure does look beautiful =)
I’ve always wanted to buy one of those pans! Talk about temptation in the fanciest form 😉 I have not done so yet, but I’m keeping this recipe on file anyway for the inevitable moment when I do!
This is THE most beautiful checkerboard cake I’ve seen!
It looks soooooooooooooo professional and soooooooooooo tasty
Definitely a masterpiece
Well Liz we are our own worst critic, because I think you did a fantastic job and the result is gorgeous. Can’t wait to see what you make next..once recovered. But Brava!
The cake turned out to be beautiful. I bet it was a big challenge, I am not sure if I would be up to it. Your cakes are always so beautiful. A belated happy birthday to Katie
What a gorgeous cake!! I bet it tasted fab too.
I love the checkerboard pattern, so pretty!
Looks pretty perfect to me! Beautiful cake. Love the red and white.
How wonderful are you to bake this for Katie, looks like this took quite of bit of time and experience, good for you Liz!!
Wow! This is a show stopper, Liz. Love how spongy and delicious this cake has turned out. Your baking skills are wonderful. And I love that cream cheese frosting. DELICIOUS.
It is an impressive looking cake. Kudos to you for buying new equipment. I am a sucker for cream cheese frosting.
I love this for election season! Sure, it could use some blue, but that’s the first thing I though of when I saw your amazing pics 🙂
You are being too harsh on yourself, this is an amazing cake. I’d never have the patience to make something like this. I’d get too stressed trying to get it right. Glad the birthday girl loved it 🙂
I’ve ALWAYS wanted to make one of these, this one is glorious!
Liz, what a gorgeous cake!
Gosh, I’m in love with the checkered cake! How did you do that?? Hahaha! Enjoy your coming weekend, dear! xoxo
So dreamy and beautiful! I love the simple red sprinkles garnish.
That is stunning! And how on earth did you do that? I will have to read the recipe in detail to find out 🙂
It turned out great Liz! I made one of these cakes for Mardi Gras years ago and agree with you, pulling the insert out 100% straight is difficult. But it’s still a fun cake to make:@)
My goodness, Liz. What a sweet challenge and wonderful Mum you are! I bet Katie was over the moon with her cake. That looks an interesting pan set and ideal to take the stress out of baking it. Well done you for cracking the checkerboard cake and sharing your tips.
Lots of birthday hugs from Paris to Katie x