Homemade Potato Bread
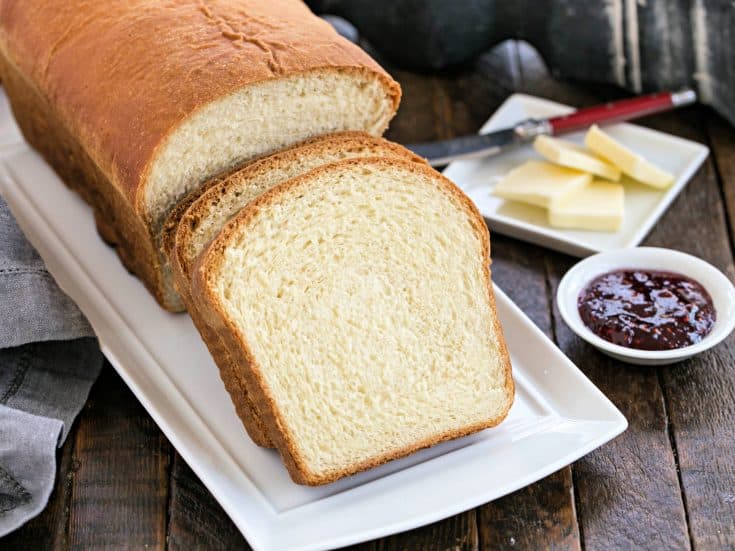
Light, tender, and totally irresistible, this Homemade Potato Bread is the perfect sandwich loaf! Save some mashed potatoes and bake a couple of tasty loaves!
My parents went on a health kickback in the ’70s. Carob and whole grains came into the kitchen. My sisters and I begged for mushy Wonder bread; we didn’t understand this phase. We longed for good ol’ white sandwich bread, like this soft, sliceable Potato Bread Recipe.

Why You Must Make
On occasion, though, my mom would pick up a loaf of fluffy potato bread from the market. Those memories were my inspiration for this homemade potato bread made with mashed potatoes. And it was seriously one of the best bread recipes I’ve made in years.
- Mashed potatoes replace some of the flour in this bread recipe, and from there some magic happens.
- It’s soft, and fluffy with a yellow tinge from the addition of potatoes and even a subtle potato undertone.
- The addition of mashed potatoes allows this bread to stay softer and fresher longer than ordinary wheat bread.
- Potato bread is delicious for sandwiches or simply smeared with butter and jam for breakfast or snacks.
Ingredient Notes:
Add these ingredients to your shopping list. You’ll be set to make this marvelous loaf!
- Kitchen Staples – Sugar, Table Salt, Butter
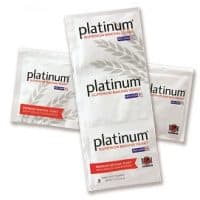
- Instant Yeast – I prefer Red Star Platinum yeast
- Potatoes – Use a potato you’d use for mashed potatoes like russet or Yukon Gold, reserving the potato water to use in the recipe, too.
- Eggs
- All-purpose flour – I use King Arthur Flour brand

How to Use
This is the ultimate sandwich loaf. Soft and slightly sweet, it’s perfect for any fillings: pb and j, ham and cheese, whatever. Hubby got home from work early and I told him he had to sample a slice. I knew he’d confirm my review.
- Smear with soft butter.
- Use it for your morning toast.
- Try slices for French toast!
How to Make
Once you make a loaf of yeast bread, you’ll know the drill. Here are the abbreviated steps to making these loaves.
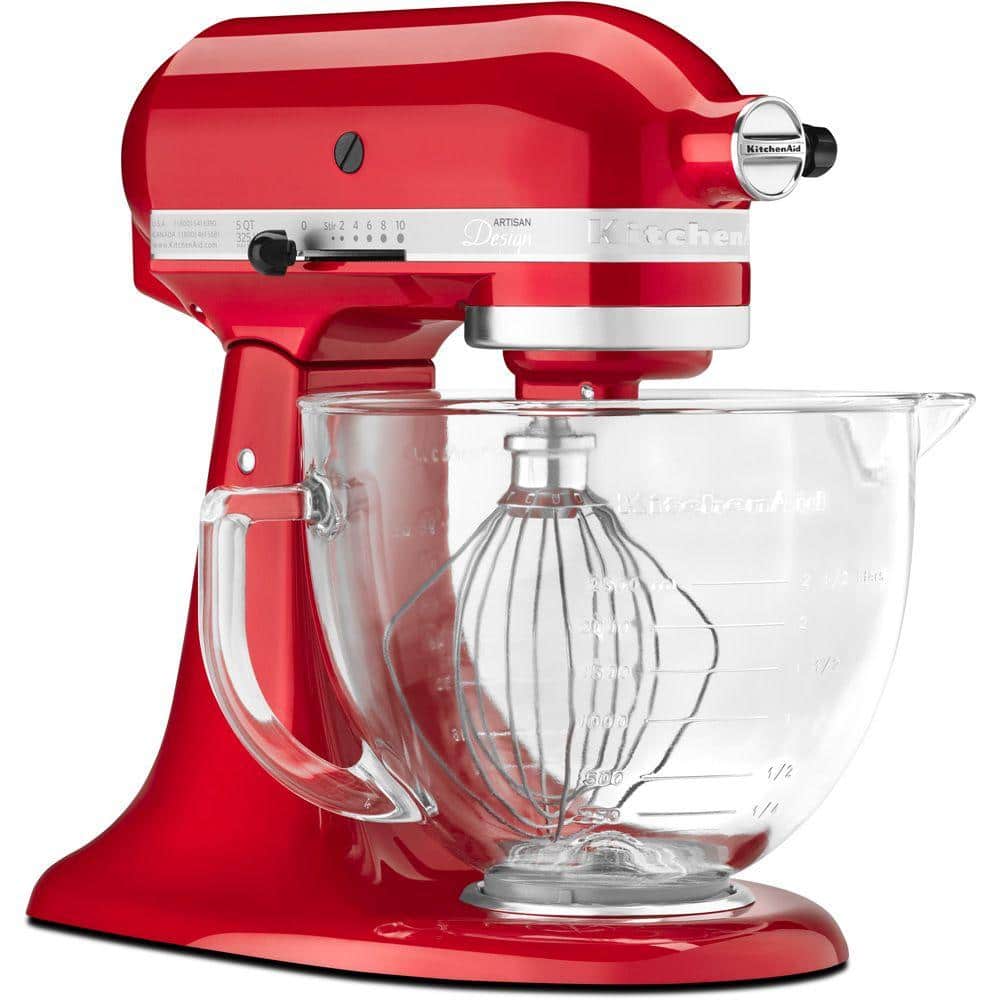
- Using your stand mixer (or by hand), mix together all of the dough ingredients.
- Knead with the dough hook.
- Scrape the dough into a greased bowl, cover and let rise in the refrigerator.
- Divide dough in half, shape into loaves and place in prepared loaf pans.
- Cover with plastic and let rise.
- Preheat the oven to 350°.
- Bake as directed or until the internal temperature of the bread reaches 190°F.
- Remove from the oven, cool for a few minutes, then release from the pans onto a cooling rack.
Expert Tips
If you’re new to making yeast bread, there’s a little trial and error, but an even less than perfect loaf can taste fabulous! There’s the kneading, proofing, and baking. You’ll be captivated by the smell of bread baking in the oven, so it’s definitely worth a try!
- First, and foremost, you must use fresh yeast (not expired). If the yeast is old or inactive, your bread will not rise properly.
- PRO-Tip: To test if your yeast is active, put some warm water (110-115º, no hotter) in a small bowl. Add a little sugar, mix, then add a small amount of your yeast and mix again. Let it rest and in a few minutes, you should see the yeast become foamy. If this doesn’t happen, you will need to purchase fresh yeast. Most packets and jars have expiration dates, but yeast can “expire” before the date if not stored properly.
- Once you know you have fresh yeast, you can start the mixing process. Follow your recipe’s directions on what order to add and mix your ingredients.
- PRO-Tip: If you need to proof the yeast in water (a typical instruction unless you’re using instant yeast), the water temperature should be 105-115º. Hotter than that will kill some or all of the yeast. Use a cooking thermometer to double-check the temperature. Since instant yeast is mixed with the flour and other ingredients first, the water can be a bit hotter, 120-130º according to Bob’s Red Mill, but I still aim for 120º or less.
- Bread can definitely be mixed and kneaded by hand, but if you have a stand mixer, using the paddle attachment, then the dough hook to knead, saves time and effort. Just keep an eye on your mixer so it doesn’t overheat.
- PRO-Tip: Plus, this dough is sticky so a stand mixer makes it easier to knead.
- Usually, bread needs rising periods, also known as “proofing.” The times listed are suggestions, most times you’ll want the dough size to double. It’s important not to overproof or underproof!
- Proof in a warm spot in your kitchen. If it’s too hot, your bread will rise too fast and the texture may not be ideal and the flavors that occur with a slower rising will be lacking, too. PRO-Tip: 85º is the ideal temperature for proofing.
- Bake according to your recipe’s instructions.
- PRO-Tip: If you’re unsure if your loaf is done, use an instant read thermometer and look for an internal temperature of 190º.

Frequently Asked Questions
Potato bread is a bread recipe that has mashed potatoes or even potato flour worked into the dough. The potatoes replace some of the flour in the recipe.
It’s quite similar to a loaf of white bread but a little softer and fluffier. With less flour in the recipe, there’s less gluten and that results in a more tender loaf of bread.
The name of this bread might be misleading, but since regular, all-purpose flour is one of the main ingredients, this bread is not gluten-free.
Yes, you can definitely use Instant Potatoes to make the mashed potatoes needed in this recipe. Don’t add butter or buy a flavored variety. You won’t have any potato water to add to the recipe, so just use plain tap water.
Plus, check the amount of sodium per serving as you may need to decrease the salt in the recipe if the instant potatoes are salty.
Potato bread has more fiber and protein when compared to whole wheat bread due to the addition of potatoes. Plus, it’s also a source of zinc, iron, and potassium.
But the addition of potatoes also increases the number of carbohydrates in the loaf. Check the recipe card below for detailed nutritional information per slice when each loaf is cut into 16 slices.
The slower rise or retarding of the bread dough in the refrigerator allows the yeast to build deeper flavors and provides a better texture than proofing at a warm room temperature. Refrigerate for 12-18 hours for the best results. The dough should be covered with plastic while in the refrigerator so the surface does not dry out.
Once it’s cooled, it will keep for 3-4 days at room temperature, in a plastic bag. If there’s a cool, dry, dark space in your kitchen, that would be ideal.
Any longer than that, place the bread in a freezer-grade Ziploc bag or wrapped in plastic, then foil for up to 3 months. Let your bread defrost in the bag so it doesn’t dry out.
You May Also Like:
- Beautiful Whole Wheat Sandwich Bread from Barefeet in the Kitchen
- Rosemary Olive Bread
- Classic Oatmeal Bread
- Whole Wheat Challah
- Pretzel Rolls Recipe
- More Bread Recipes
- More Side Dish Recipes
Homemade Potato Bread
A delectable Potato Bread Recipe that's ideal for sandwiches or anytime you want a fabulous fresh loaf of yeast bread.
Ingredients
- 1 tablespoon instant yeast (I love Red Star Platinum yeast)
- ½ cup sugar
- 1 ¼ to 1 ½ cups lukewarm water or potato water*
- ¾ cup (12 tablespoons) butter, at room temperature
- 2 ½ teaspoons salt
- 2 large eggs
- 1 cup mashed potatoes (from about 1/2 pound of potatoes)
- 6 ½ cups all-purpose flour (King Arthur preferred)
Instructions
- Beat together all of the dough ingredients, using the paddle attachment of your stand mixer for 4 to 5 minutes at medium-high speed, stopping the mixer to scrape down the sides and bottom of the bowl as needed. The mixture should start to become smooth and a bit shiny.
- Switch to the dough hook, and knead the dough at medium speed (only if your mixer will tolerate it) for 7 minutes, stopping to scrape the dough into a ball a couple of times during the process.
- Scrape the dough into a ball (it will be sticky), and place it in a lightly greased bowl, then cover with greased plastic wrap. Refrigerate overnight or for up to 24 hours.
- Remove the dough from the refrigerator, divide it in half, and shape each into 9-inch logs. Place into greased 9 x 5-inch bread pans.
- Cover the pans with lightly greased plastic wrap, and allow the dough to rise until it comes about 1" over the rim of the pan. Since the dough is cold, this will take anywhere from 2 to 4 hours. Preheat the oven to 350°.
- Bake the loaves for 25 minutes. Tent with aluminum foil, and bake for an additional 15 to 25 minutes, until the bread is a deep golden brown, and a digital thermometer inserted into the center of one of the loaves registers at least 190°F.
- Remove the bread from the oven, and let rest a couple of minutes in pans before removing the loaves from their pans to rack to finish cooling
Notes
*Potato water is the boiling water used to cook the potatoes. Use the larger amount of liquid in drier, winter months.
Note that total time to make this bread must consider how long you refrigerate your bread dough. It's well worth doing for at least 12 hours!
Adapted from King Arthur Flour
Recommended Products
As an Amazon Associate and member of other affiliate programs, I earn from qualifying purchases.

Nutrition Information:
Yield:
32Serving Size:
1 sliceAmount Per Serving: Calories: 123Total Fat: 1gSaturated Fat: 0gTrans Fat: 0gUnsaturated Fat: 0gCholesterol: 12mgSodium: 194mgCarbohydrates: 25gFiber: 1gSugar: 3gProtein: 3g


76 Comments on “Homemade Potato Bread”
Hello!
I’m loving this recipe and have already made 12 or 14 loaves! I been testing the over 1” rise and the finger poke rise but it seems the finger poke rise doesn’t work on this recipe? So first question is do recommend only going by 1” over? I’m scared of over proofing.
Also this is only my second recipe I ever tried for potato bread and I don’t want to try any other!
But I am new to bread making so I have more question. How do I know if the dough is done in the mixer since it’s sticky?
Also, although the bread is delicious, I find it soft moist, but also the slices break apart easily when I bend or slice sometimes.
Any idea what the issue could be?
I am trying 1/4 c less flour now with the 1 1/2c tator water, since i usually need some flour to flatten and roll it together to see if that helps but I’m not sure if thats what’s causing? Could I be over or under mixing?. Or could I be under or over proofing?
Thanks so much in advance and thanks so much for sharing this delicious recipe!
Yes, I think I’d proof just to 1-inch over to avoid overproofing. It will still rise more when it’s baked. It’s sticky, but it sounds like you could use a little more flour so you can shape the loaf more easily. There are so many variables—the humidity of your kitchen, the room temperature. If your loaf has big open crumbs it’s overproofed. If the crumb is tight and gummy, it’s underproofed. I’m so glad you’re enjoying the recipe!
I love this recipe. The texture was perfect. My question is do you have to let us raise overnight the fridge? What if just let us raise to double on the counter for about an hour after mixing it up?
I’m so glad you enjoyed this recipe, Debbie! Yes, you can proof at room temperature if you want. Flavor and gluten development are supposed to be better with a slow rise, but I’m not sure I’d notice a huge difference!
I love this bread Liz and your tips are great. I’ve never made potato bread but since my daughter is in the mood for making bread maybe she will want to tackle this. Stay safel!
Stunning loaf Liz! She is a beauty. Can’t wait to give your potato bread a try. We do have yeast and we are running low on bread.
My grandmother would always utilize her leftover mashed potatoes for bread. I need to make some sandwich bread today for the weekend isolation outing. 🙂
Potatoes always seem to enhance baked goods. This recipe is calling to me. 🙂 ~Valentina
I love potato bread! And I (for some inexplicable reason) haven’t been making bread during this pandemic, even though with all the home time, I should be. I see potato bread in my future!
I love this bread Liz and your tips are great. I’ve never made potato bread but since my daughter is in the mood for making bread maybe she will want to tackle this. Stay safel!
I’ve had potato rolls and they were amazing, and this bread was the same! Seriously delicious!
The texture is spot on – we all love this bread!
This homemade potato bread looks so perfect! I have a gluten free version that’s a favorite in our house!
this bread has a fabulous texture and I love how potato bread stays fresh longer than other delish!
This is one of those times when I wish I wasn’t eating keto! Potato bread is a favorite bread of mine. Yours looks perfect! I’ll save this for when I’m ready for a delicious treat.
If you don’t have real mashed potatoes you can use instant potatoes. I’ve used garlic flavor or cheese flavored instant potato packs. I omit the salt in the recipe, since the instant potatoes have so much salt. The pack makes 4 – 1/2 cup servings so I get 4 loaves of bread. Family and friends loves when I make potato bread.
By ar our favorite bread! Never made it at home before!!!Pinned for later
What a gorgeous loaf! You know I could make a meal out of this, right? I’m a carboholic!
I remember when my grandma would bake bread and how it would smell HEAVENLY!! I know this has got to be goooood! Thanks for posting!
Jett
This is a perfectly made loaf of bread! Mashed potatoes have many unexpected usages in food and sweets!
Whoa, this is one of those things I have to try baking one day, just to say I’ve done it.
Sounds incredibly good, Liz. My DH would not be able to keep his paws off your bread. 🙂
Potato Bread is theee best, Liz! I must admit, I was one of the those mothers from the 70s who packed my kids lunches with carob chip cookies and a whole host of “healthy” foods. Little did I know that most times they were tossing them and getting lunch money from my husband!
I have taken a vow to bake bread this winter, yours look heavenly! We’ll see how far I get…
Thank you so much for sharing…
Just curious, would this be the same kind of dough one would use to make potato rolls too? Also, I’m having a Pasta Party over at my blog, is Linky Tools dependable? Of course you’re invited to join in on the festivities if you have any of that stuff called free time:)
I used to love Wonder Bread! Now? Well, I can’t remember the last time I had it – decades and decades ago (probably close to 40 years!). I love potato bread. My all time favorite hamburger buns are potato buns – hard to find in St. Louis (they’re pretty widely available in the east – Martin’s is the brand I remember enjoying). This looks like such a great recipe – definitely something I should make. Thanks.
I could seriously eat that entire loaf with some butter. Looks perfect and amazing. 🙂
Wonderful loaf of bread – so tall and proud!
Mary x
Potato bread is SO good and so comforting. This looks great!
Very soft and fluffy! Your potato bread looks perfect, Liz.
Lizzy, now I don’t have to search for a great Potato Bread recipe…yours tops any potato bread that I’ve seen, or the ‘store bought’ one that I’ve tasted! I love potato bread, potato rolls; something about the texture, and the taste is sooo comforting, and amazingly good!
Thanks for sharing your beautiful bread with us, and for the superb recipe! xoxo
Liz!!!
I love this bread! love the story about your being deprived of wonder bread but you didn’t miss anything. . . omg, I would love to have a slice or 2 of this! great recipe and pinned this for later to try!
Glad I have a stand mixer with a dough hook so I can make this bread. My husband will love it.
I just want to bury my face in it.
I keep hearing about potato based breads, but never got around to trying one. Love the look of it!
Looks gorgeous. Love the butter. Thinking of you.
What a beautiful loaf! I’ve never made a potato bread, so I am pinning your recipe for future reference. 🙂
This just the kind of bread i want to wake up in the morning.
I hardly eat any bread these days, but when I do it has to be really GOOD bread. This one is definitely in that category- it looks perfect! 🙂
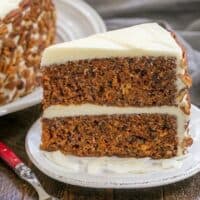
What an absolutely picture perfect loaf of bread, Liz! My younger son was so disappointed that I made a bread with carrots….because no matter what kind of bread I keep in the house for myself, I always have to have potato bread for them. Your home baked version is just amazing….and I’m bumping it up on my to do list! (My kids thank you in advance!) : )
Love the root vegetable theme for twelve loaves, Liz. Completely cracked up at your parents going on a health kick and you kids begging for wonder bread. Looking great as usual.
Your bread looks perfect! I love the challenge you’ve put out to use root veggies in bread …. I might have to link in on this one? If not, I will certainly try your’s and the many other’s recipes! This is totally my “weakness” – eek!
How funny. I used to want that white Wonder bread too. This potato bread, however, looks and sounds delicious. Thank you for sharing it with us Liz!
its amazing that you can use potatoes for bread but it makes complete sense and i love how it turned out
I have started making extra mashed potatoes just to have an excuse to make potato rolls. your loaf of potato bread looks worlds better than anything at the grocery store. I hope I have similar success in baking it. I’ll let you know!
What a beautiful loaf, it looks perfect. I love bread but try to avoid it, although you wouldn’t know from some of my recent posts. Occasionally I’ll go into The Breadsmith to get something and just love it when they invite me to try a slice of one of their breads smeared with their nice creamy soft butter. Oh man, it’s like I died and went to heaven. This loaf looks like it could be a contender when slathered with the fat too or without!
I made potato rolls a while back…potato bread is what I buy in the store, but the homemade version, at least mine didn’t rise as much as I would have hoped. I think it was the yeast but I was still frustrating. I think it might be time to try again. I am in Indianapolis tonight and was thinking of you.
Wow, Liz, this bread is absolutely perfect! I can see why you both enjoyed it so much.
I hope Katie & your dad are both feeling better. I’m sorry we didn’t have a chance to meet her or your husband. But, now that we’ve met, I know we’ll try to do it again. Maybe we can have an end of FFWD celebration in NYC! It was so wonderful to meet you – I only wish we’d had more time to talk.
Beautiful loaf of bread Liz…looks so light and fluffy…nothing like a freshly baked bread…yum!
Have a great week 😀
I just printed this recipe out and I’m aiming to make it this weekend, Liz. Wow, is that ever a perfect loaf of bread! Just reading about you slathering your piece in butter made my mouth water. I’ve always wanted to make bread using mashed potatoes!
Here’s another delicious reason for me to break out the dough hook for my mixer. Warm bread and butter; heavenly!
Liz: I am such a fan of bread…This one looks so fluffy!!!! I could not be nearby that loaf, definitely!
Ahhh carob and whole grains…Reminiscent indeed of the 70s…Some good times with my health conscious sister…Anyway, back to the present and your scrumptious looking potato bread. I do have a bread machine. And am looking forward to my own heavenly loaves of potato bread…Nothing like the aroma of baking bread to make a home – homier =)
Oh my. Bread can’t get any more perfect than that!
I’ve always wanted to try potato bread and now have the perfect recipe 🙂
Yum!
Cheers
Choc Chip Uru
You poor thing having to eat so well so young 😉 I never made a potato bread, not sure i have tried it. I am curious. have you had potato donuts? This bread looks great and will add it took my list of things to make.
My parents did the exact same thing and when we’d have French toast for breakfast (a very rare treat) my father would tell us that a sprinkle of salt and pepper on the toast was so much better than a good pour of maple syrup. And when we had weet-bix for breakfast he’d tell us to put a spoonful of wheatgerm on them instead of sugar! We were not impressed. I love the sound of your potato bread served warm with lots of butter. I hope you’re having a good time with your parents xx
We used to get that packaged potato bread too Liz. I thought it was wonderful because my mom always made all of our bread and, like you, I thought I’d died and gone to heaven when I got packaged bread, so crazy! This potato bread looks just wonderful, I would have eaten way more than two slices …………
Twice? I adore freshly baked bread smeared with butter…but I dare not do it too often! Your bread looks absolutely perfect Liz, I’d definitely love to make this but alas I have no potatoes at home…
Oh wow! 🙂 I’ve never made potato bread, but looks like I need to!
That’s such a beautiful and perfect loaf of bread! Would love a slice or two of this slathered with butter. Thanks for sharing Liz:)
I always wonder how potato bread is made, and now I see you put mashed potatoes. We usually buy same kind of bread, but I’m very interested in homemade potato bread. Looks so delicious. I love potato and can’t resist the thought. 🙂
Oh I have not had potato bread in a while. Oh gosh, I remember that carob phase in the 1970’s. My mom tried to say it was a substitute for chocolate – but it didn’t come close!
I love this recipe! I’m a huge bread baker and often eat far too much of it, admittedly – but I’m ok with that. I’m definitely adding this to the arsenal of recipes. Thanks, Liz. Can’t wait to try it.
This bread…is beautiful! It looks soft and delicious!
I will go into an immediate carb coma when I bake this, because it will be irresistable! Nice TwelvesLoaves choice!
What a beautiful loaf! We love potato bread so I’m putting this on my ever-growing list of recipes to make. Thanks for sharing Liz!
I love potato bread it is always so moist and tasty. I haven’t made any in a very long time. Maybe I should get with the program!
Just yesterday, my daughter and I were debating buying a loaf of potato bread, she wanted it as it looked so good – but yours looks better – so light and fluffy! WOW!!!
My parents were on that health kick too and I remember going to get Wonder bread from the neighbors, lol, who wanted that nasty whole wheat bread!?!
Your bread looks perfectly baked Liz!
I really enjoyed meeting you in Seattle, how fun was that weekend ;). I hope our paths cross again some day soon!
Oh, yes indeed. Slathered with butter even better. Gorgeous and perfect loaf. It’s sitting there so perfectly just beckoning me. why are you so far away, my fabulous friend?:)
Yep, I’d slather mind with butter….twice….too! It looks amazing. I’ve never in my life made a loaf of bread that came out that beautifully, Liz. You are so very gifted. Did you see that Wonder Bread’s back? Flower Foods bought them and are putting the loaves back on the shelves. Ah, the memories. 🙂
Potato bread is a perennial favorite in our house, as well…this loaf would make 5 people I know very, very happy. It looks wonderful, Liz. 🙂
The bread sounds amazing. I have been holding on to a bread recipe with potatoes and your post now beckons me to bake a bread 🙂
what a beautiful loaf of bread.. i love to try it too
A beautiful loaf of bread! Good to remember when there are some leftover mashed potatoes:@)
You convinced me: I’ll borrow a bread machine to try your potato bread.
Your loaf looks amazingly fluffy, who knew potatoes were capable of such magic? 😉 It’s easy to see why you enjoyed this bread so much!