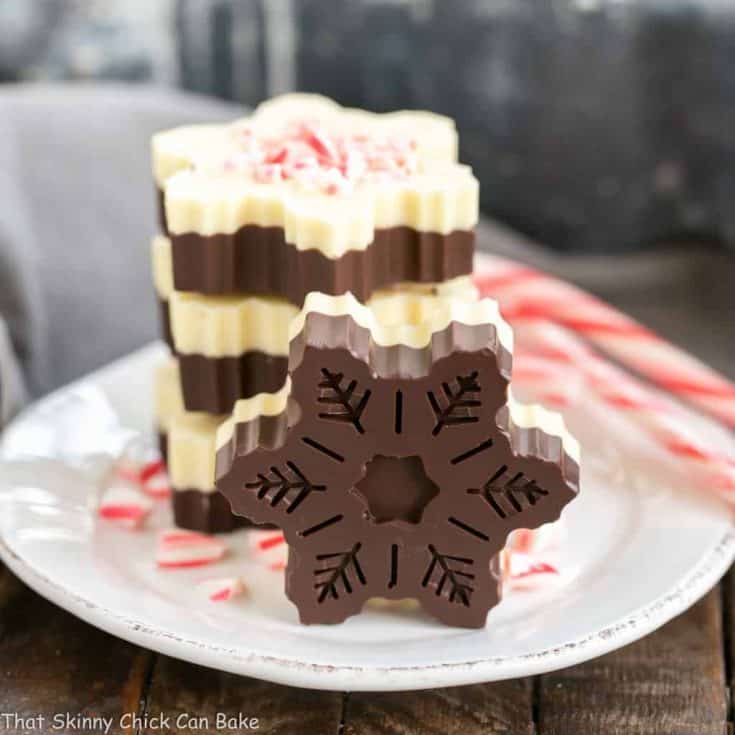
Peppermint Bark Snowflakes
Make your peppermint bark in fun snowflake molds for a holiday treat! Jaws will drop when your friends see these festive Peppermint Bark Snowflakes, but only you will know how easy they were to make!
This unique Peppermint Bark Recipe makes an easy hostess gift. Just wrap one in cellophane with holiday ribbons and you’re set!

Why You Must Make
- Peppermint bark is one of the holiday treats I dole out to the neighbors at Christmas and this is a fun version.
- It’s pretty much a no-brainer: melt dark and/or white chocolate, add crushed candy canes, and peppermint extract and it’s basically finished.
- A snowflake version is extra festive!
But years ago, I saw the coolest image on Pinterest, and I knew I had to make these beautiful snowflakes. Mari, of Once Upon a Plate, executed them perfectly. Plus seeing an even older version at Baked by Rachel, made me update this post from 2011!
PRO-Tip: I recommend making thinner layers like Mari’s (make 12 instead of 6). Though these thicker snowflakes are very pretty, there’s a lot of bark in each, besides being a bit unwieldy to eat. I found these snowflake molds at Target in those dollar bins eons ago, but they’re readily available on Amazon.

Ingredient Notes:
- Kitchen Staples – Vegetable Oil
- White Chocolate – I use Ghirardelli bars, chopped for easier melting
- Semisweet Chocolate – I use Ghirardelli bars, chopped for easier melting
- Peppermint Extract – Don’t add too much as it’s potent!
- Candy Canes – Crush into ¼-inch pieces and remove the dust, using just the small pieces of candy cane.
How to Make
I adapted this from the white chocolate peppermint bark recipe I make every Christmas. I made half of a batch of white chocolate bark and a half batch of semi-sweet chocolate bark without the added candy cane bits. The yield will vary depending on the size of your molds and the depth of your bark. Isn’t this layered peppermint bark festive????
- Start with a layer of melted mint-flavored dark chocolate at the bottom of the molds, followed by a sprinkle of candy cane pieces.
- Chill until firm.
- Repeat with a white chocolate layer and more candy cane bits.
- Chill, then remove from molds to eat or give away as gifts.

Recipe Tips
- This recipe will make six of these thick peppermint bark snowflakes.
- I recommend making thinner layers than those pictured as they will be easier to eat. Plus, your yield will be greater.
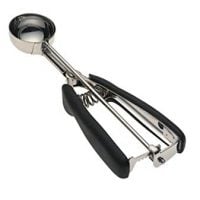
- PRO-Tip: Use a cookie disher to divvy up the chocolate. It will help you add a similar amount to each snowflake.
- If you’d like thinner snowflakes, make the full recipe and divide the melted chocolates between two molds.
- PRO-Tip: Place the molds on a half-sheet pan for an easy transfer to the refrigerator to chill.
- Give the molds a little shimmy to even out the chocolate layer before it starts to set.
- Chill well before adding the second layer.
- Add the crushed candy cane pieces before the top solidifies.
- Wrap a few in a cellophane bag with a pretty ribbon for a hostess gift.
Frequently Asked Questions
Since Peppermint Bark is typically thin and often rustic looking, it was thought to resemble tree bark.
Typically chocolate bark is a simple recipe that is made of dark chocolate, white chocolate, or layers of both, and peppermint extract or flavoring.
If stored properly in an airtight container in a cool, dry location, it will stay fresh for up to 6 months. Once opened, it’s best to consume within 2 weeks.
You May Also Like
- Thin Mint Cheesecake Brownie Cake from Inside BruCrew Life
- Mint Chocolate Fudge from Wine and Glue
- Pretty Peppermint Bark from Love from the Oven
- Swirled Peppermint Bark
- Grasshopper Pie
- White Chocolate Candy Cane Cookies
- Peppermint Patty Candy
- More of the Best Dessert Recipes
Peppermint Bark Snowflakes
Peppermint bark snowflakes for the holidays
Ingredients
- 8 ounces white chocolate, chopped
- 8 ounces semisweet chocolate, chopped
- 2 teaspoons vegetable oil, divided
- ½-1 teaspoon peppermint extract, divided
- 6 candy canes, crushed into ¼-inch pieces (remove dust)
Instructions
- Place your mold on a baking sheet.
- Gently melt the semisweet chocolate and 1 teaspoon vegetable oil in a large microwave-safe bowl, stopping and stirring at 30-second intervals until melted and smooth. Add ¼-½ teaspoon of peppermint extract.
- Pour into your silicone molds (my layers were slightly under a half-inch deep). Gently shake the pan back and forth to level the chocolate.
- Sprinkle with some candy cane bits.
- Refrigerate while making the white chocolate layer.
- Melt the white chocolate and 1 teaspoon vegetable oil as you did the dark chocolate and add extract.
- Pour white chocolate over dark chocolate (about the same depth), gently shake the pan to level the white chocolate, and sprinkle the tops with candy cane bits before the chocolate hardens.
- Chill, then remove from molds to serve.
Notes
Recommended Products
As an Amazon Associate and member of other affiliate programs, I earn from qualifying purchases.


Nutrition Information:
Yield:
6Serving Size:
1Amount Per Serving: Calories: 474Total Fat: 25gSaturated Fat: 14gTrans Fat: 0gUnsaturated Fat: 9gCholesterol: 8mgSodium: 45mgCarbohydrates: 65gFiber: 2gSugar: 55gProtein: 4g


80 Comments on “Peppermint Bark Snowflakes”
Such an elegant treat for the holidays!! Everyone at my house loved it!
I love your snowflakes! I didn’t have snowflake molds, but I did have bells and they worked just fine. This was so much fun to do with my daughter, we are on the lookout for more molds!
Do these need to be refrigerated until right before serving? I made these for a cookie exchange. So I need to know how long I can keep them out. It usually lasts about 3 hours.
Hi, Vandana,
These do not need to be refrigerated, so they’ll be fine at your cookie exchange. I made some for my book club this year and they sat on my kitchen counter for a week 🙂 Hope your friends enjoy!
These are so beautiful, Lizzy! I could not believe that it’s home made. You are a pro!
These are so beautiful! I’m speechless… Almost… I’m considering decorating next year’s tree with these. Yea, I think I can get away with it.
These are just so gorgeous! Beautiful holiday treats 🙂
Love these and they would be so fun to make for friends! Thank you for sharing 🙂
Oh how fun, I just bought the different styles of these muffins pans at Target! Your peppermint barks looks stunning, love them:-)Beautiful, Hugs, Terra
this looks so good. thanks for sharing
http://momdaughterstyle.blogspot.com/
These are stunning! Will definitely be giving these a go when I get home from university and have access to all my baking equipment, ha!
They are very festive and so perfect!
Lizzy! These are so festive and gorgeous. They would make wonderful gifts. Wow!
I can’t get over how beautiful these are! WOW!
these are beautiful!! what a great addition to a holiday gift!
These are so cool! They look so professional too!
these look lovely and would make such a nice addition to any cookie tray. great work!
Liz, They are gorgeous! What a wonderful idea to use a mold for peppermint bark. These would make a perfect gift!
this one looks fantastic and yummy too on the christmas tree lizzy 😀
tq for sharing 😉
Thank you for this recipe! Simple, yet effective. Easy to make especially when my kids start to nag about some homemade sweets.
Very beautifully ready for christmas
Oh my… I would buy those in bulk and then just sit in the corner of my room, feeding my face until I collapse.
My goodness so pretty. Looks like these beauties came from a store, but they are much better in terms of taste because they are actually from your home! I’d love them as edible ornaments too. =)
Adorable Liz! These are so pretty and your presentation is on point. Way to go Girl!
so pretty!
You make it look so easy and your recipe is definitely easy but I suspect I would have blobs and a very messy kitchen.
Great pics, great recipe, and great idea. 🙂
Beautiful! I am sure my daughters and me will LOVE these peppermint barks. Thanks!
Yummy and what a cool mold! I bet the mold cupboard is busting at the seems at your house lol
I would have never thought of making peppermint bark in molds…and yes I love Pintrest.
That snowflake shape is so pretty! What a great gift these would make.
OMG Liz…these are gorgeous! I wish I were your neighbor! Going to keep my eyes out for different kinds of molds now…how cool! : )
Those look straight out of a magazine! Beautiful!!
Wow! Liz, they are absolutely stunning! Isn’t it amazing the ideas you can gather at Pinterest? I’m a huge fan!
Wow! I made bark yesterday but not nearly as pretty as this! I love the snowflakes!
These are gorgeous!! Wow, I would be honored to receive something like this…lucky neighbors! 🙂
These are beautiful.
This looks like something even I can do! :O So pretty!
These must be some of the prettiest treats ever! 🙂 Gorgeous.
I tuoi fiocchi di neve sono meravigliosi.. e golosi!!!
Ci prepariamo al Natale!!!!
Un bacio grande!!!
Those are just beautiful! I’m sure your neighbors are very appreciative.
Fantastic! I hovered over the photos for about 5 minutes trying to figure out how you made them look so perfect! Of course a quick read explained that. I’ve not seen bark this beautiful Lizzy! I too have a version upcoming but it’s far more ‘rustic’ than yours!
Looks perfect. Hard to tell that these are so simple to make, well simple for you:)
What absolutely gorgeous treats, Lizzy!!!!
The shape is just perfection
These are AWESOME Lizzy!!! What a fantastic gift idea! And they are so easy to make… yet very impressive!!! I have never seen those moulds around here… I will check them out though! 🙂
So lovely. I couldn’t resist these.
What a fun treat for the season. These are awesome, Liz! I hope you have a wonderful week!
oh wow they look so perfect
Lizzy,
Your Peppermint Bark Snowflakes are pure perfection. Lovey presentation.
there are just so many cookie recipes, and so little time!
I am speechless. They are so perfect.
Those are beautiful holiday treats, Liz! Love it! I better check Target for those snowflake molds!
😮
I have no words.
Those snowflakes look absolutely perfect. I had to take a 2nd look because I wasn’t even sure they were food.. they were that perfect! I need a snowflake mold! I realize now after seeing Jen (3littlepigs) cookie cutters and your molds–I’m so not prepared for holiday baking. 🙂
Awesome!
These look so pretty , I wish I was your neighbour , they sure are a lucky lot to have you as their neighbour :).
wow you always surprise me Lizzy look amazing and beautiful dear:)
So pretty! I love peppermint bark. Too bad we’re not neighbors! LOL
Loved these at Rachel’s site. Looks awesome here too! I really want to gift some of these this year.
The snowflake shapes are so perfect!
do you even realize just how beautiful these look! I mean they look straight out of a magazine gorgeous! Love them
Now, you have me running to Target. Peppermint bark never was so fanciful! Or inviting.
awesome Liz!! I love chocolate bark, especially peppermint kind. This mold is awesome! So cool – I need to see if I can find this up here in Canada. I am not gonna hold my breath though – no targets here
Love that you did these in a snowflake pattern. The effect is wonderful.
These are so festive and stunning! It would be hard to eat these artistic goodies until after the holidays. Well done Lizzy-have a great day!
awwww, I wish I had a snowflake pan like you, Lizzy, these are drop dead gorgeous! You can wrap them and sell them for a good price 🙂
Impressing- those snowflakes look so attractive.
Those are too pretty to eat! They have to sit around on counters looking awesome for Christmas 🙂
Beautiful looking treats.
These are beautiful, Lizzy – they look professional!!
Wonderfully amazing and superb Lizzy and yes, very festive you bet.
Lindíssimos estes bolinhos, adorei!
Beijinhos
Just too pretty to eat, Lizzy!
Just gorgeous! Also on my list this year!
you have a bloody brilliant blog! 🙂 Really top notch!
These are just lovely! Almost too pretty to eat…almost. 🙂 Very beautifully done!
I have had silcone molds for years and never knew what to use them for… if i ever get a minute to breath this season, this is genious idea I cant wait to make them now! thanks Lizzie these are gorgeous!
They are so beautiful and well presented!
These are so adorable! Not your average bark…
The Peppermint bark was amazing and so beautiful looking! Thank you!!
So pretty! I hope to make peppermint bark this year.