Homemade No-Churn Ice Cream Cake with Oreo Crust
Summer is the perfect time for frozen desserts. This Homemade No-Churn Ice Cream Cake with Oreo Crust requires no ice cream maker, is rich and ultra-creamy, and is a sensational hot weather treat!
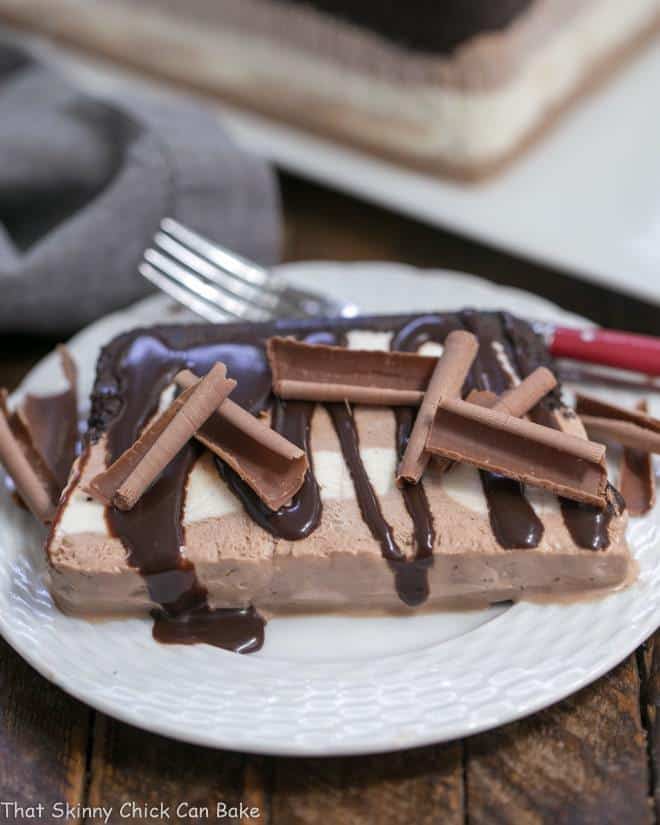
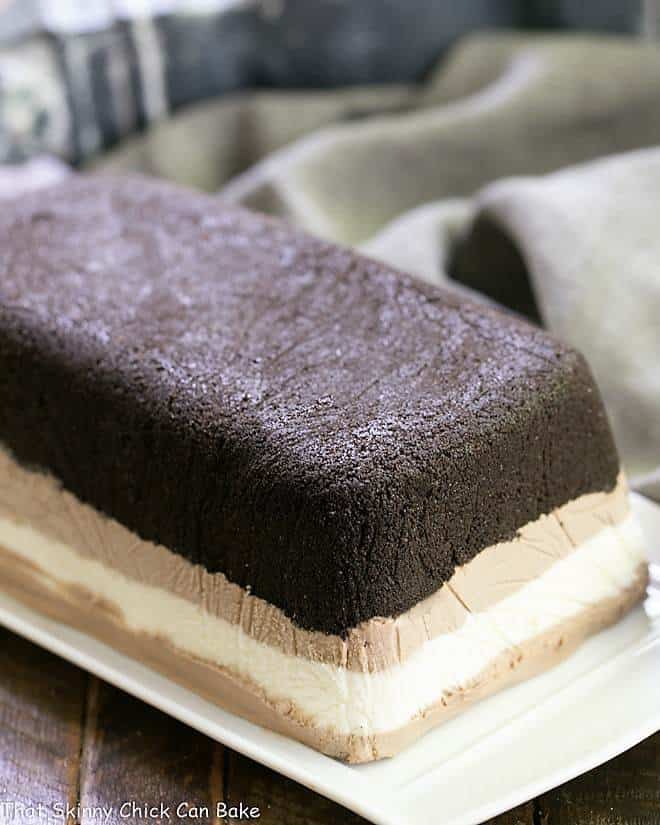
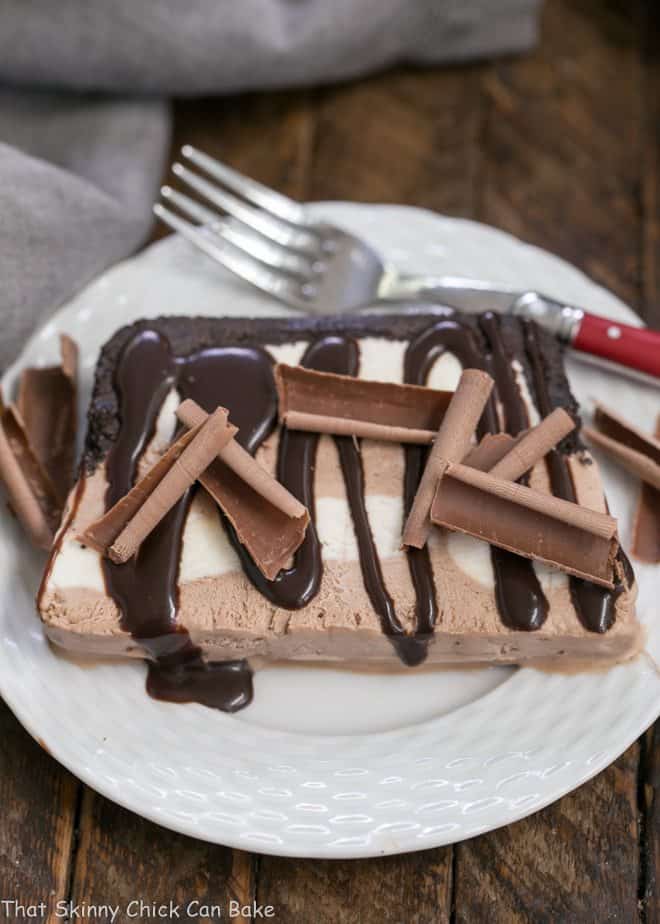
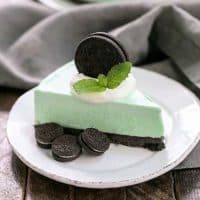
This layered vanilla and chocolate ice cream cake starts with an Oreo crust pressed into the bottom of a loaf pan. Fudge sauce is added to half the “ice cream” mixture and the two flavors are alternated on top of the cookie crust.
Why You Must Make
It’s been one crazy hot summer so far, and with a non-functional kitchen at the moment, an easy ice cream cake sounded like an ideal dessert for the family.
- No-churn ice cream is easier than using an ice cream maker, but a little more work than just using softened ice cream. But I think this luscious ice cream is worth the extra effort.
- This ultra, and I do mean ultra, creamy ice cream starts with softened cream cheese beaten with sugar before sweetened condensed milk is added. Vanilla and billowy whipped cream are folded in to make a blissfully delicious base.
- Fudge sauce is added to half for the chocolate no-churn ice cream and the rest is left plain for the vanilla no-churn ice cream. Is your mouth watering yet?
Expert Tips
Ice cream cakes are perfect for summer birthdays, entertaining, or just when you need something cold after dinner on a sultry summer day. They can range from a simple layering of store-bought cookies and ice cream to a multi-layered dessert completely from scratch. It’s all up to you! Here’s how to make an ice cream cake:
- Start by deciding on what size of ice cream cake you’d like to make. I used a loaf pan for this cake, but a round, springform pan would provide even more servings and makes for easy release when it’s time to serve.
- Next, choose your flavor palate. We tend to go chocolate around here, so I started with an Oreo crust, then chocolate and vanilla no-churn ice cream. Crushed cookies, chocolate or fudge sauce, or even a layer of cake or candies could be added between the ice cream layers.
- Line your pan with non-stick foil or heavy duty foil (affiliate links). I’ve tried plastic wrap, but the sturdier foil makes removal much easier. Trust me on that!

How to Layer an Ice Cream Cake
- If you’re using store-bought ice cream, let it soften without becoming totally liquid. You’ll want to be able to spread the ice cream evenly in the pan. If it’s completely melted, unwanted ice crystals could develop as it refreezes.
- If you’re topping ice cream over ice cream, you may need to freeze each layer before adding the next to help keep them level and separate. My no-churn ice cream was fluffy enough that this step was not necessary.
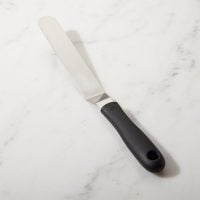
- Use an offset spatula to spread the ice cream. It helps make for even layers, even in the corners.
- Freeze the ice cream cake overnight before serving so that all layers are frozen solid.
How to Cut and Garnish an Ice Cream Cake
- First, remove your cake from the loaf pan by using the foil as a sling. Remove the foil. If you used a springform pan, release and remove the exterior ring.
- If your ice cream cake is rock hard, you will want to let the cake sit out at room temperature for about 10 minutes to soften slightly.
- I like using a serrated knife to cut through the crust and ice cream. PRO-Tip: If needed, you can run your knife under hot water and dry it before slicing. The bit of heat will help the knife slide through the ice cream layers.
- Store leftovers well wrapped in plastic in the freezer.
- To garnish a slice of this no-churn ice cream cake with chocolate curls, I took a slab of chocolate, warmed it very gently in the microwave on low power, and used a vegetable peeler (affiliate links) to scrape off curls. Drizzle with room temperature fudge sauce (affiliate links) first, if desired. A drizzle of any leftover fudge sauce is a nice touch, too!
Frequently Asked Questions
Back in the day, ice cream was made either in an old-fashioned ice cream maker requiring ice, rock salt, and hand churning. Then came the electric ice cream makers with a container that needed to be frozen, then inserted into the appliance. Within 20-30 minutes, without breaking a sweat, the ice cream was frozen. I’ve made a No-Churn Peach Ice Cream, but there are so many other delicious options.
No-churn is the latest ice cream-making technique. Made with whipped cream, sweetened condensed milk, and flavorings, it can be placed in a freezer-safe container and frozen without any special equipment.
The basic ratio is 2 cups heavy cream, whipped, one 14-ounce can of sweetened condensed milk, and a teaspoon of vanilla. Additional flavorings and ingredients can be added from there, including chocolate, fruit, cookies, candies, other extracts, and more.
This no-churn ice cream can then be frozen in a 5 x 9-inch loaf pan for 6 hours or more until firm.
If it doesn’t contain frosting or whipped cream, an ice cream cake will keep well for up to 2 months if kept airtight in the freezer. Otherwise, it may start forming crystals, so frosted ice cream cakes or those with a whipped cream layer should be eaten within 7-10 days.
You May Also Like
- Vanilla Bean Cheesecake No-Churn Ice Cream from Cupcakes and Kale Chips
- Chocolate Ice Cream with Fudge Sauce
- Homemade Coffee Ice Cream
- Homemade Ice Cream Round Up
- All my Best Dessert Recipes
Homemade No-Churn Ice Cream Cake
A delicious, dreamy layered no-churn ice cream dessert with an Oreo Crust
Ingredients
Crust:
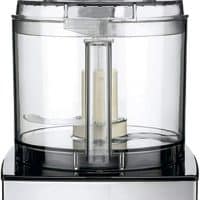
- 20 Oreo cookies, ground into crumbs in food processor, about 2 cups
- 3 tablespoons melted butter
Ice Cream:
- 8 ounces cream cheese, at room temperature
- 1 can sweetened condensed milk, 14 ounces
- 1 teaspoon vanilla
- 2 cups heavy cream, whipped
- 1/2 cup good quality fudge sauce, I used Graeter's
Instructions
- Line a 9 x 5-inch loaf pan with non-stick foil. In a bowl, combine the cookie crumbs and butter. Press onto the bottom and about 1 1/2 inches up the sides of the pan.
- In a large bowl, beat cream cheese until light and fluffy. Add milk and vanilla and mix well. Fold in the whipped cream.
- Spoon half of the mixture into another bowl. Add fudge sauce to one of the bowls and fold in until well combined.
- Spoon half of the chocolate mixture over the crust. Smooth with an offset spatula to level. Top with half of the plain vanilla mixture. Repeat, smoothing each layer as you go.
- Your pan will be very full. Cover with plastic wrap and freeze overnight.
- To serve, use the foil to lift out of the pan. Remove foil and slice to serve.
Notes
Adapted from Taste of Home's Frozen Mocha Marbled Loaf Recipe.
Recommended Products
As an Amazon Associate and member of other affiliate programs, I earn from qualifying purchases.

Nutrition Information:
Yield:
12Serving Size:
1 sliceAmount Per Serving: Calories: 590Total Fat: 36gSaturated Fat: 20gTrans Fat: 1gUnsaturated Fat: 14gCholesterol: 87mgSodium: 340mgCarbohydrates: 61gFiber: 1gSugar: 46gProtein: 8g


11 Comments on “Homemade No-Churn Ice Cream Cake with Oreo Crust”
I wanna grow up to be able to do what Liz does too~!! LOL, my kind of dessert, THANKS.
You are such goals. I wanna be like you when I grow up lol
This looks absolutely delicious! No-churn ice cream is so good!
Homemade ice cream is so yummy! This looks delish!
Baby Boy and I will be fighting over the last slice of this!!
This really turned out neat! I love the way it looks:@)
I love easy summer desserts. I have made a variety of no-churn ice creams and they are always so yummy. This ice cream cake looks like the perfect summer treat.
Im kind of in love with the tips to making a layered ice cream cake youre sharing… I have never once thought to freeze the first layer of ice cream a little before adding the next… I can hardly wait to try that. Im also really intrigued at how creamy this is going to be with that cream cheese! Another great recipe that is on the list to make !
Hi Liz,
Love that you used a loaf pan for this! Not like I’m opposed to special kitchen gadgets — you should see inside my cabinets!– but I love that this is something I could make today with not a lot of special prep! Can’t wait to try it!
Such a great and refreshing way to beat this heat wave. I especially liked that it was no bake. Not having to heat up the oven or stove was key!
wow this is seriously creamy and tempting with all the cookies and cream :-))