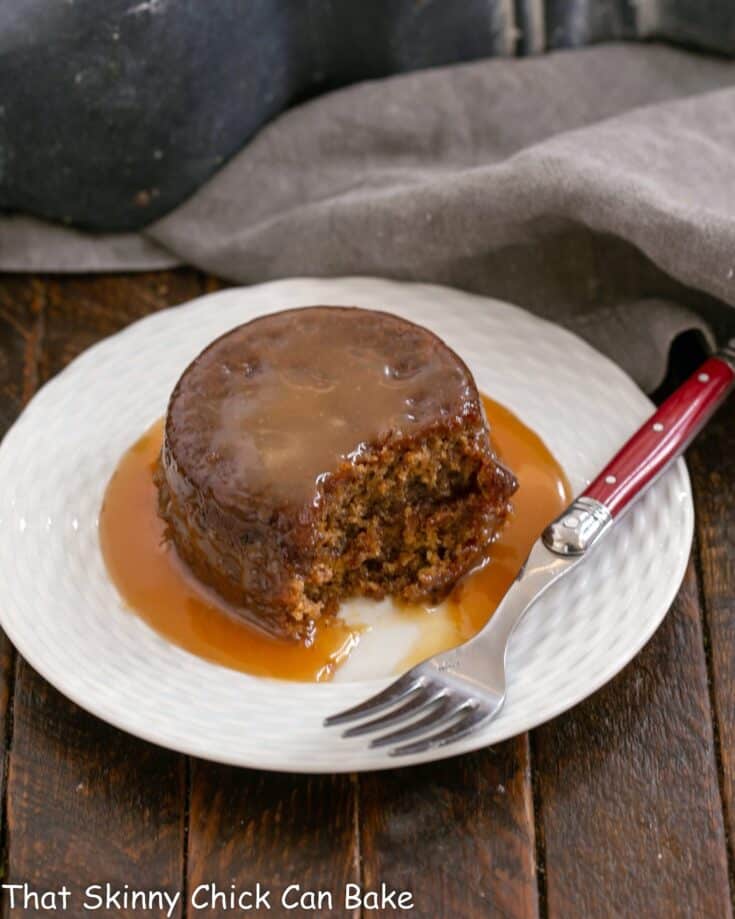
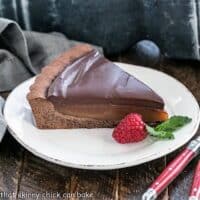
Caramel Topped Date Cakes
These decadent Caramel Date Cakes are better known as Sticky Toffee Puddings, an outrageously rich and gooey British dessert.
Who wouldn’t want their own individual Date Cake drizzled with caramel?

Why You Must Make
My mom loved to bake with dates. I remember the date bread and cookies. Since she was more likely to cook up paella or moussaka, any sweet treat was memorable. Though she never made us a sticky toffee cake, it would have been right up her alley!
- If you love caramel, you’ll adore every bite of these mini desserts.
- These rich cakes are portion controlled!
- If you think you don’t like dates, don’t worry. They’re cooked and blended and add a rich sweetness without the texture of and obvious taste of dates.
Ingredient Notes
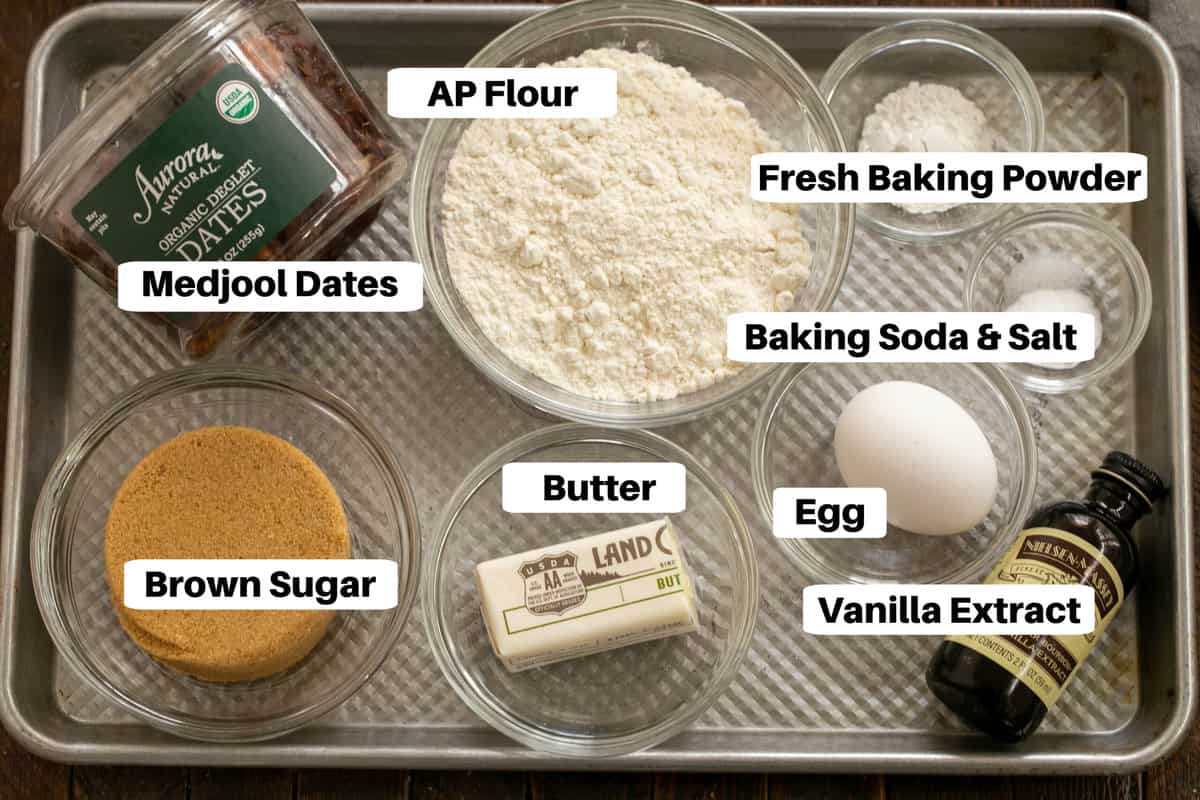
- Kitchen Staples – All-purpose Flour, Baking Soda, Salt, Brown Sugar, Egg
- Heavy Cream – 36% Butterfat
- Butter – I use salted butter since a touch of salt enhances dessert recipes
- Corn Syrup – Light Karo Syrup
- Pitted Dates – Look for Medjool dates. Use a kitchen scale to make sure you get about 6 ounces.
- Vanilla Extract – Real vanilla, not artificially flavored

How to Make
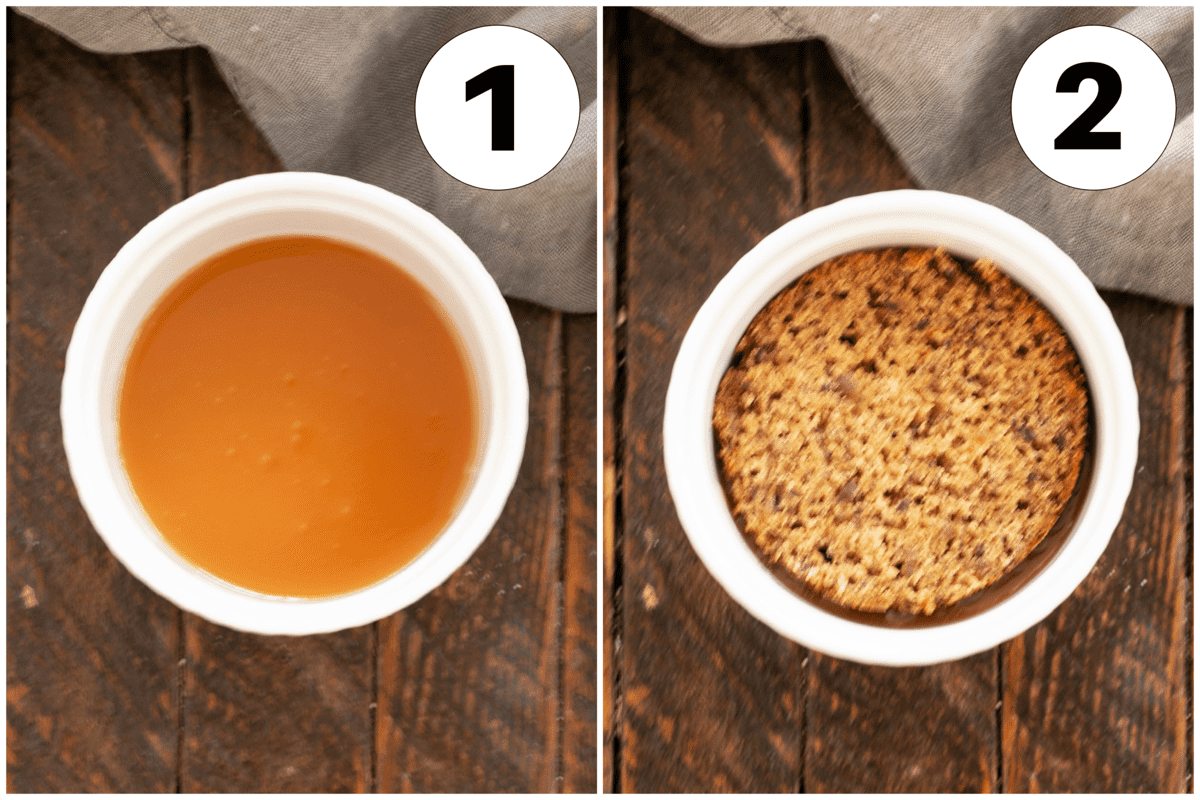
- Made the caramel sauce and add 1 tablespoon to each of the prepared ramekins.
- Bake the date cakes, cool and slice them in half horizontally. Place the bottom layers of the cakes, cut side up on top of the caramel
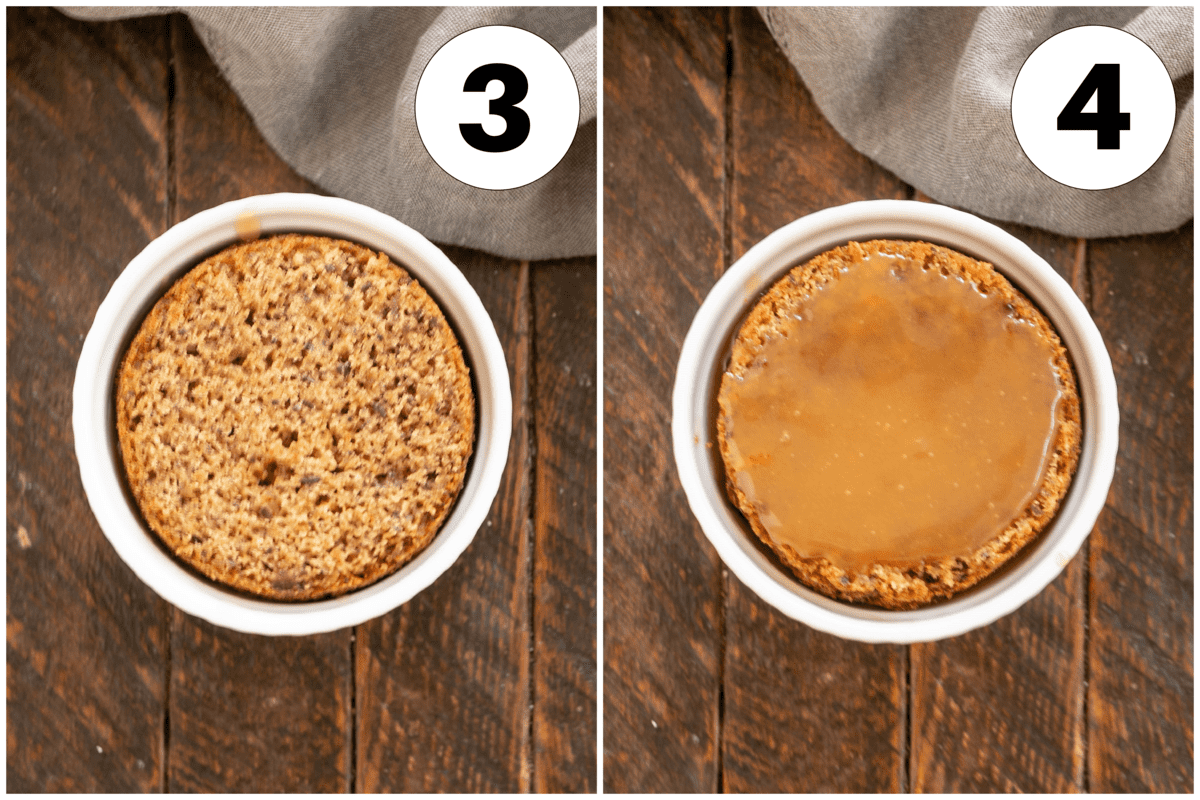
- Spoon another tablespoon of caramel on each cake, then top with the other cake halves, cut side up.
- Top each cake with a final tablespoon of caramel sauce and spread it across the top. Bake again until the toffee is bubbling around the exterior, cool for 5 minutes, then invert each cake onto a dessert plate.
Expert Tips
- Use Medjool dates if you can find them. They are soft and chewy with a slight caramelly taste. They are perfect for this dessert.
- PRO-Tip: Check your baking powder to make sure it hasn’t expired. Unlike baking soda, it most often expires well before you use it all. To test it, you can put a spoonful into a bowl of very hot water. If it’s still active, it will bubble vigorously.
- Be careful when blending the hot date mixture. It’s best to let it cool down a bit before processing.
- Don’t toss the water used to soften the dates as it will go in the food processor, too.
- PRO-Tip: Let your baked cakes cool slightly on a rack before releasing them. Don’t wait too long or they will stick. But wait at least 5 minutes to allow the exteriors to firm up so the cakes will keep their shape when unmolded.
- Make sure to butter and flour your ramekins to minimize sticking. I used Baker’s Joy, a flour and oil baking spray.
Frequently Asked Questions
No, they are two different desserts. Figgy pudding dates back to Medieval times and Sticky Toffee Pudding was developed in Scotland in the 1960s. Figgy pudding contains dried fruit, but normally no figs. It also is made with suet, bread crumbs, and brandy and is known as Christmas pudding.
Sticky Pudding is a rich, soft, super moist cake with a caramel or toffee flavor.
Serve it slightly warm or at room temperature with a dollop of whipped cream or a scoop of vanilla ice cream.
Adding alcohol to this dessert doesn’t seem to be traditional, but adding some rum to the caramel (toffee) sauce would be delicious.
It will keep well for 3-4 days. Cover and store in the refrigerator and gently reheat in the microwave for 30+ seconds or until it’s warmed through to the center.
You May Also Like
- Date and Nut Balls from Bellyfull
- Bacon Wrapped Dates
- Sticky Caramel Toffee Cheesecake
- Date Squares
- Fried Sticky Rice Balls
- More of the Best Homemade Cake Recipes
Sticky Pudding Cakes
Rich and gooey Sticky Pudding Cakes made with pureed dates and topped with an exquisite caramel sauce.
Ingredients
- Baker's Joy or butter and flour to prep the ramekins
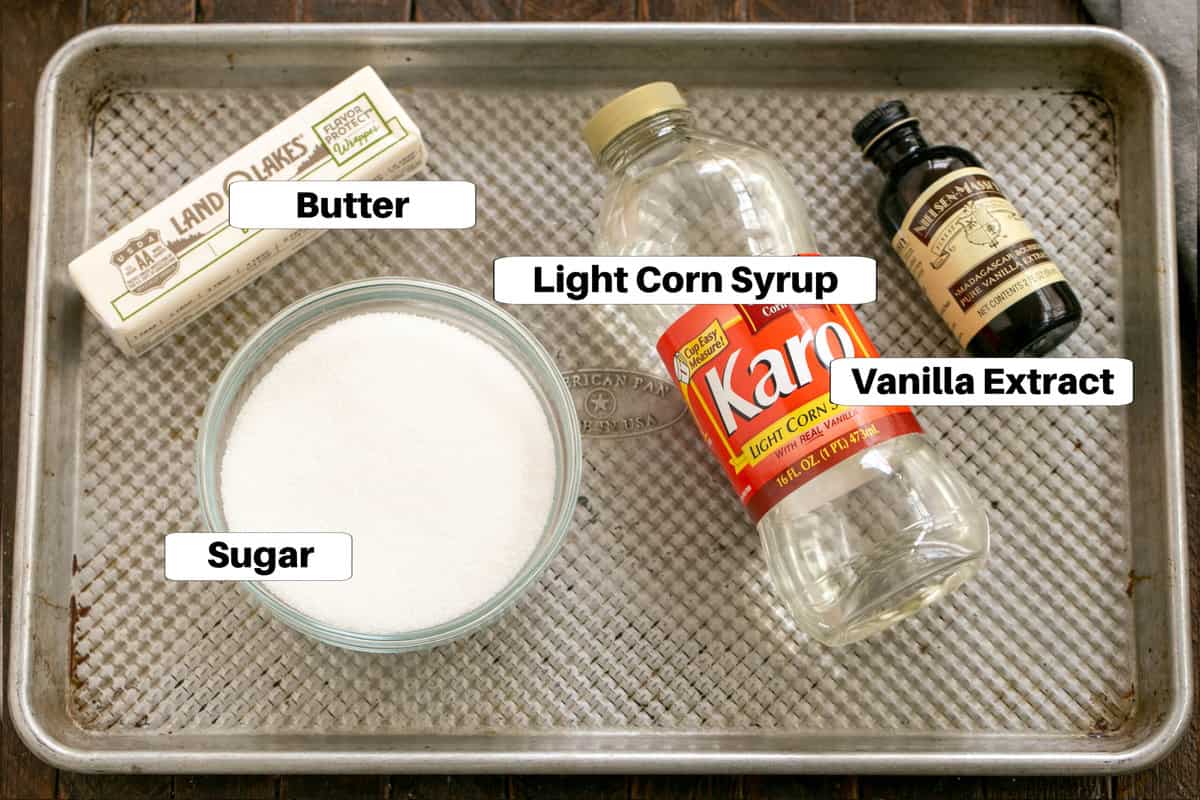
Caramel (toffee) Sauce
- 1 ¼ cups heavy cream
- 4 tablespoons butter
- ¼ cup light corn syrup
- ½ cup sugar
- 1 teaspoons vanilla extract
Cakes
- 6 ounces Medjool Dates, pits removed (I needed about 20, but this will depend on the size of your dates)
- ¾ cup water
- ¾ cup plus 2 tablespoons flour
- 1 teaspoon baking powder, make sure this is fresh
- ¼ teaspoon baking soda
- ⅛ teaspoon salt
- 4 tablespoons butter, at room temperature
- ¾ cup packed brown sugar
- 1 egg, at room temperature
- ½ teaspoons vanilla extract
- Vanilla ice cream or sweetened whipped cream to serve, optional
Instructions
- In a saucepan, combine about half the cream with the butter, corn syrup, and sugar.
- Bring to a boil and cook over medium-low heat, stirring frequently, until the mixture is a deep amber (caramel) color. This could take 30+ minutes.
- Carefully mix in the rest of the cream and the vanilla extract. The molten hot mixture will bubble vigorously.
- Strain the caramel into a large Pyrex measuring cup or bowl and set aside.
- Spray six ½-cup capacity ramekins with Baker's Joy or butter and flour. Set aside.
To make the cakes:
- In a small saucepan, simmer the dates in the water until the water is nearly absorbed and the dates are soft, about 15 minutes. Put the dates and any liquid into your food processor and puree until very smooth.
- Preheat the oven to 350°. Spray six ½-cup ramekins with Baker's Joy (a flour and oil nonstick baking spray).
- In a small bowl, whisk together the flour, baking powder, baking soda, and salt.
- With a mixer, beat the butter with the brown sugar until light and fluffy. Mix in the egg and vanilla, then the date puree. At low speed, mix in the dry ingredients.
- Divide the batter between the ramekins. Smooth the tops if needed.
- Bake for 20-30 minutes, or until a toothpick inserted into the centers comes out clean. Cool for about 5 minutes. Leave the oven on.
- Unmold the cakes and invert them onto a cooling rack. Wipe the interiors of the ramekins to remove any crumbs. Spoon a tablespoon of caramel sauce into each ramekin.
- Slice the cakes in half horizontally.
- Return the bottom layers of the cakes to the ramekins, cut side up. Spoon another tablespoon of the caramel sauce into the ramekins and top with the remaining cake layers.
- Spoon another tablespoon of the sauce over the cakes and spread evenly. Place the ramekins on a baking sheet and bake for 10 minutes.
- Let the puddings cool for 5 minutes, then run an offset spatula or knife around the insides of the ramekins and invert each pudding onto a dessert plate.
- Spoon some of the caramel around each cake if desired. May serve with a dollop of sweetened whipped cream or a small scoop of vanilla ice cream, if desired.
Notes
Recipe adapted from Food & Wine.
Make sure your baking powder has not expired. It usually expires before you use it up and you'll need it to be fresh to help your cakes rise.
Recommended Products
As an Amazon Associate and member of other affiliate programs, I earn from qualifying purchases.

Nutrition Information:
Yield:
6Serving Size:
1 cakeAmount Per Serving: Calories: 581Total Fat: 11gSaturated Fat: 6gTrans Fat: 0gUnsaturated Fat: 4gCholesterol: 85mgSodium: 839mgCarbohydrates: 119gFiber: 4gSugar: 90gProtein: 7g


20 Comments on “Caramel Topped Date Cakes”
I enjoy making desserts with dates, esp. Medjool. This looks delicious, rich yet healthy.
These are so much better then my version! To make a long story short I bake the whole cake and then cover with caramel which cannot be compared to this beauty!
You had me as soon as you mentioned dates! These look very tasty and you know how I love individual portions!
You may have wanted to try my fudge, but I’d gove anything for this cake. One of my faves and I still have not made it. My mouth is watering and I just can’t wait anymore!
Good thing these are “mini” so I can justify having many of them. The look sooo good! 🙂 ~Valentina
I absolutely love your blog, would it be possible for you to substitute toffee sauce for anything else in this recipe or is it an essential ingredient?
Hi, Mary,
Thanks so much for your nice comment! You could certainly leave it off the cake. It won’t be as decadent as a sticky toffee cake, but a more simple date cake. I think it would still be tasty! Hope you enjoy.
What a delightful combination and I think it’d be a hit with my family. Although I have several full-size Bundt pans, I don’t mind running out to buy a smaller one.
I love dates and usually have a small container of Medjools on hand but my ability to use them in recipes is limited. For me, a date or two is a “snack reward.” This cake sounds delicious. Again, thank you for all the tips and suggestions you give in your posts. Just measured my bundt pans sizes (Who does that at 5am in the morning?) They jump from 4″ to 8-cup and up!
Your trial and error certainly paid off as this cake sounds terrific.
This cake reminds me of the date bars I used to love years ago. It looks so good.
This truly is a picture perfect cake, Liz! I love dates and, of course, love caramel! Putting this on my list of treats to try! Have a wonderful Easter, my friend!
Yum! I love the idea of a smaller cake and am hopelessly smitten with Sticky Toffee Pudding so I know I’d love this!
Wow, this looks so good. Yes, please!!
Wow! Liz, this looks like decadent dessert! *caramel drizzle* It’s really pretty and worthy of a special occasion. Dates are a treat I don’t enjoy nearly often enough, but this post has me inspired to go get some!
I tried baking with dates for the first time this year… Moist, sweet and yummy! Your cake looks great:@)
Your mom really cooked. I know someone that must have inherited the talent! This cake sounds fabulous and can’t wait to give it a go!
This beauty literary calls for sharing 🙂 Happy Easter !
So beautiful Lizzy, I love bundt cakes !! This looks wonderful !!
Happy Easter dear Lizzy!! have a nice weekend!
The bundt date cake looks splendid with that caramel drizzle!