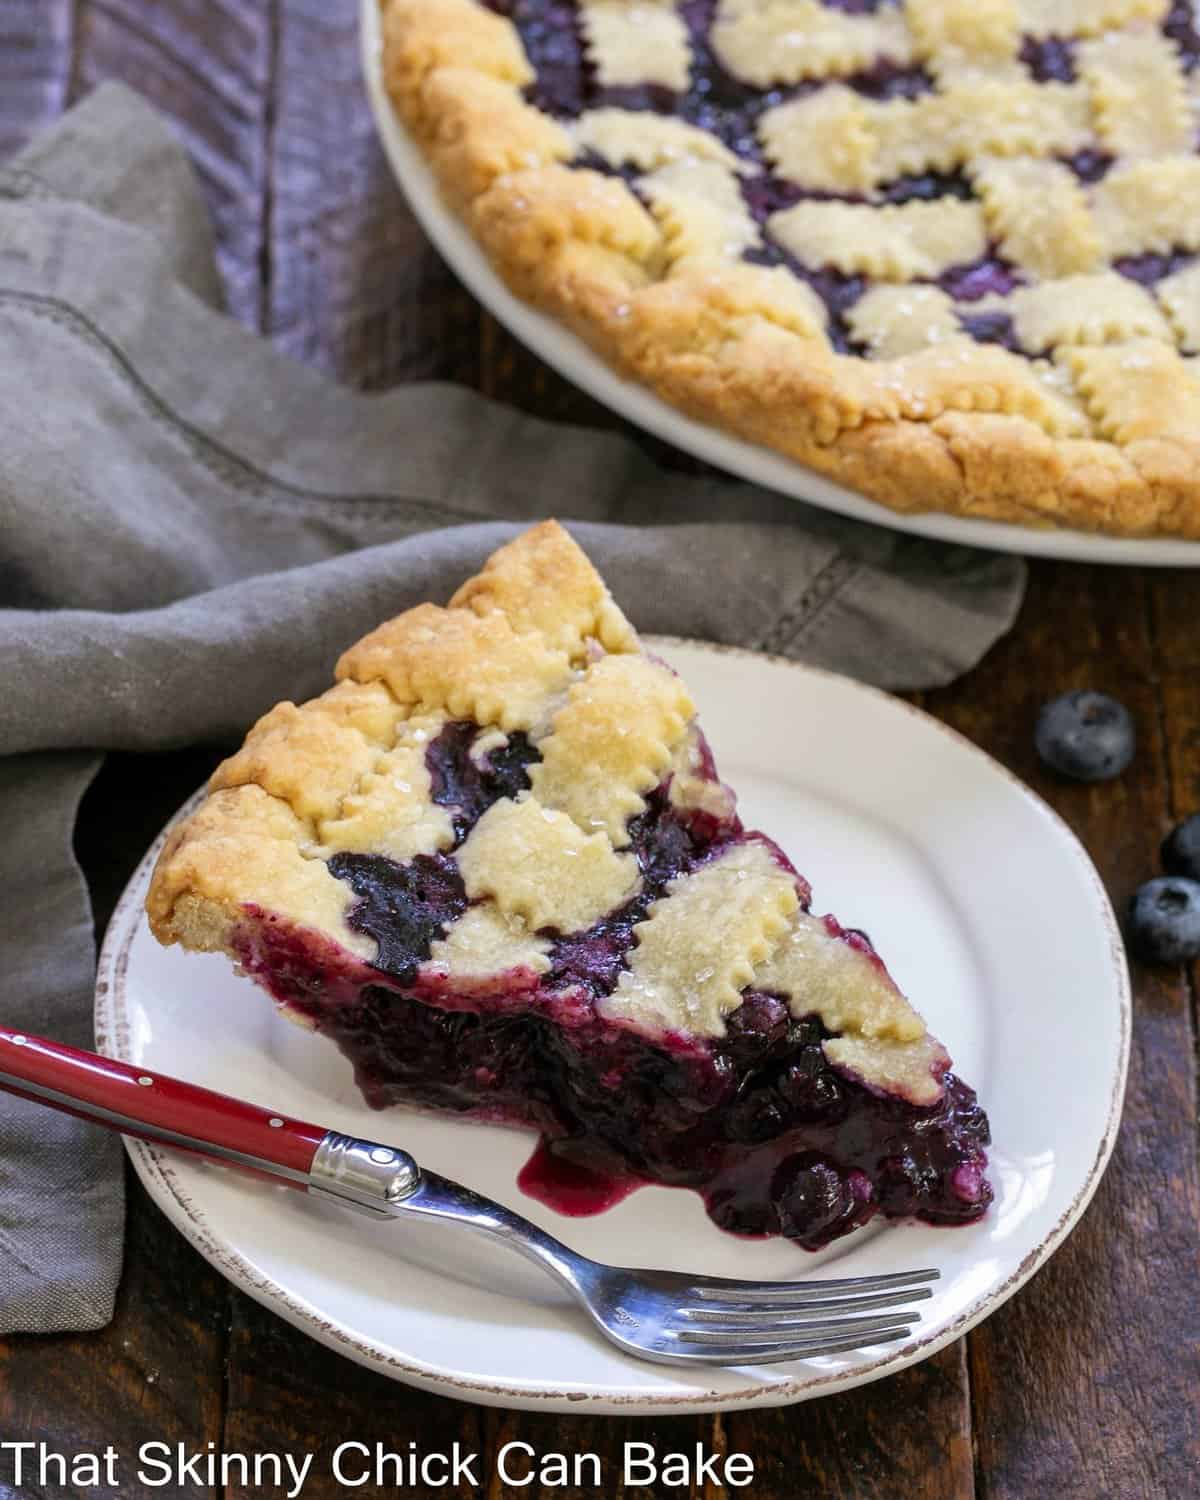
Lattice Topped Blueberry Pie
This Lattice Topped Blueberry Pie is full of sweet summer berries flavored with lemon zest, cinnamon, and a few grates of nutmeg.
The decorative crust paired with a homemade Blueberry Pie Filling makes this Lattice Pie a show-stopper!
Why This Recipe Works
- The filling is cooked first using only part of the blueberries to allow the cornstarch to thicken the mixture.
- The crust is made with butter for flavor and shortening for easy rolling and cutting.
- Simple flavorings of lemon zest, cinnamon, and fresh nutmeg enhance the taste of the pie filling.
Bill has been dropping not-so-subtle hints this summer about his love of blueberry pie. So finally, on the 4th of July, I baked up one of his favorites. Now why I thought July was the perfect time to fiddle with pie crust is beyond me. Pie crusts are not my forte and, as you bakers know, the dough needs to stay cold. And then I decided a lattice crust would be pretty. But weaving over a deep blue filling was also an insane idea. But being the sweet wife (no snickering, family), I trudged ahead and whipped up a top-notch blueberry pie.
Ingredient Notes:
- Double Pie Crust Recipe (see my favorite below)
- Blueberries – Rinse and dry right before using. Look for fresh, plump blueberries with smooth unbroken skins.
- Sugar – Granulated white sugar
- Cornstarch – Thickening agent that gives the classic glossiness to the blueberry filling
- Water – Mixed with the cornstarch to make a “slurry.” This prevents lumps of cornstarch in the filling.
- Grated Lemon Zest – Always use freshly grated, never zest from a jar
- Cinnamon – Cassia cinnamon, like in McCormick’s cinnamon
- Fresh nutmeg – Grate a small amount into the blueberries. If you don’t have fresh nutmeg, use a pinch of dried.
- Butter – Salted butter is fine.

Recipe Tips:
- PRO-Tip: Cooking the part of the filling ahead of time ensures your pie won’t be too juicy.
- Using a homemade pie crust pushes this pie over the top. My recipe has butter for flavor and shortening for flexibility. An egg also helps make the dough pliable.
- If you’ve never made a lattice crust, give it a try! I have the procedure listed below.
- Summer is the perfect time to make any berry pie. They aren’t as expensive when in season and you might be lucky enough to find local berries at your farmers’ market.
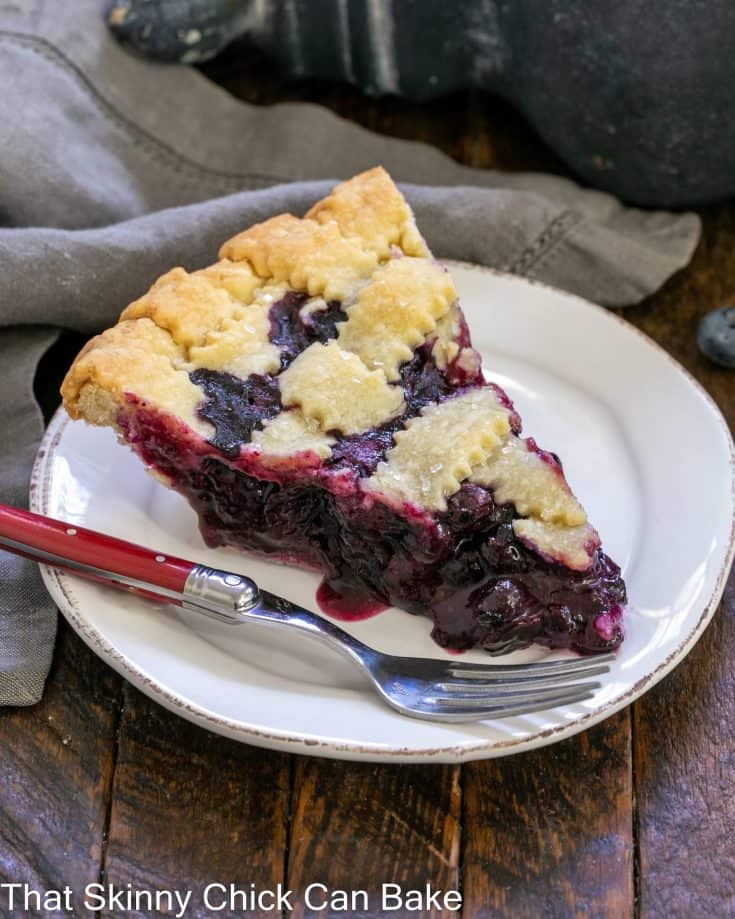
- Served with a scoop of vanilla ice cream or a dollop of whipped cream will make you swoon. And swoon they did! I served this to a group of neighbors who were over on Independence Day. The pie was basically wiped out despite the other desserts. I love when that happens.
How to Make a Lattice Crust
- Make a double crust pie crust recipe
- Once your dough is chilled, line your pie plate with half the dough, trimming as needed. Add the filling.
- Roll the second half of the dough into a 12+ inch circle on a lightly floured surface.
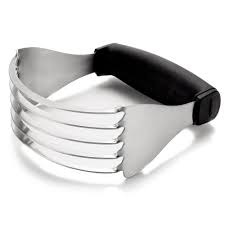
- Using a pizza cutter (or a knife) slice 12-14 strips, about ½ – ¾ -inches wide. I like this fluted pastry wheel (Amazon affiliate link) for decorative strips.
- Use half the strips to lay out over the filling in one direction with the longer strips in the center.
- Fold back half the strips (every other one) on top of each other.
- Take one of the longest remaining strips and lay it perpendicular to the folded strips and butt it up to the folded edges (you’ll start in the middle and work outwards).
- Fold back the strips you had folded. Then fold up the strips that were not folded the first time.
- Repeat by laying another strip next to the first, then fold back this set of strips.
- Keep going, using slightly shorter strips as you continue.
- Once half the crust is done, repeat on the other side.
- Trim the ends as needed and pinch to seal the edge crust. Crimp the edges if desired.
- If you’d like, brush the crust with an egg wash and sprinkle with coarse sugar.
- Bake as directed.
- If I’ve totally confused you, here is Simply Recipes‘ photo tutorial so you can visualize the process.

Frequently Asked Questions
Yes, you may use frozen berries to make a blueberry pie, but they generally release more juice as they cook. Your pie may need some additional thickening agents if using frozen blueberries.
Yes, but don’t do it too far ahead of time as berries are extremely perishable and the moisture can accelerate spoilage. Plus, make sure you spread them out on a towel or paper towels after washing to remove any moisture which can dilute the filling.
First, use the proper amount of thickening agent for the number of berries in the recipe. Then after the pie is baked, let it cool completely before slicing. The filling will thicken as it comes to room temperature.
Some recipes use flour and others cornstarch or even both. It’s a matter of preference. Cornstarch makes a glossy filling and flour creates a more cloudy filling. Both need to be cooked to thicken and cornstarch requires higher heat than flour to thicken.
Flour works better with less juicy fruit like apples. The first time you make a recipe, it’s best to follow its recommendation.
You May Also Like:
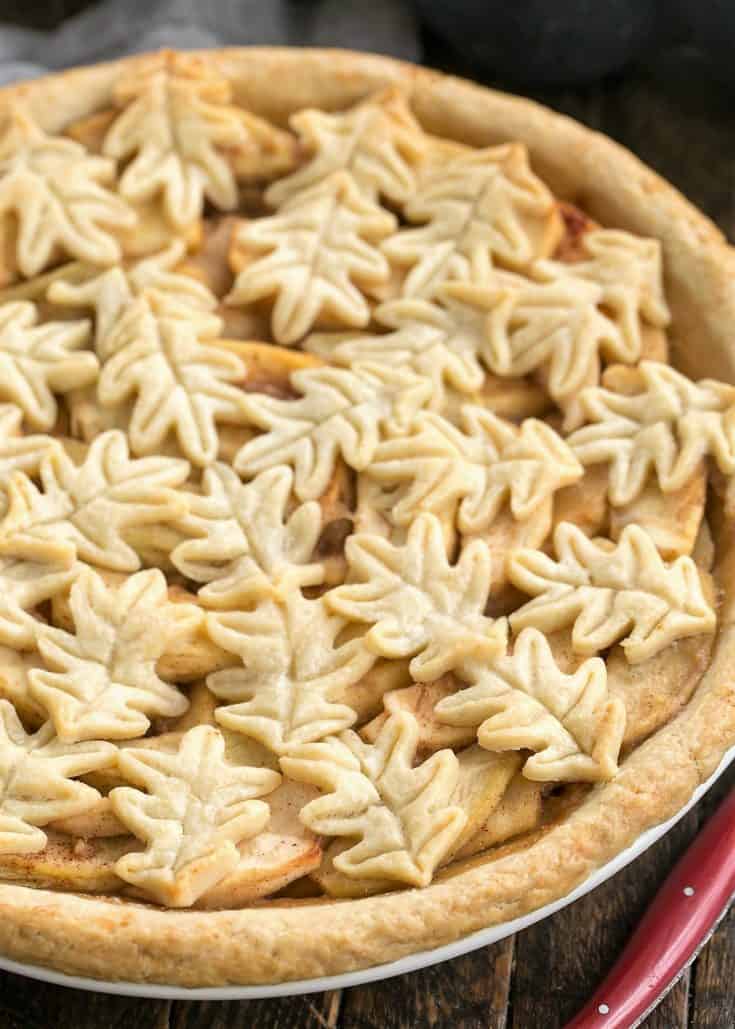
- Peach Raspberry Pie Recipe
- Lattice Topped Raspberry Pie
- Fresh Peach Pie
- More of the Best Pie Recipes
Lattice Topped Blueberry Pie Recipe
A delectable blueberry pie recipe for your summer berries!
Ingredients
Filling:
- 2 pints blueberries (4+ cups), rinsed
- ¾ cup sugar
- 3 tablespoons cornstarch
- 3 tablespoons water
- 1 teaspoon grated lemon zest
- ½ teaspoon cinnamon
- A few gratings of fresh nutmeg
- 2 tablespoons butter
- Homemade or store-bought double pie crust
Egg wash:
- 1 egg well beaten with a pinch of salt
- Sugar to sprinkle over top before baking
Instructions
- Make your favorite double pie crust recipe. Divide the dough in half, wrap each in plastic wrap, and chill as directed in 2 disks.
- To make the filling, combine 1 cup of the blueberries with the sugar in a saucepan. Bring to a simmer, stirring occasionally, until sugar is melted, about 5 minutes.
- Combine the cornstarch and water in a small bowl and whisk into the blueberry and sugar mixture. Return mixture to the heat and cook, constantly stirring, over low heat, until it boils, thickens, and becomes clear.
- Pour into a large bowl and mix in the lemon zest, cinnamon, nutmeg, and butter. Mix in the rest of the blueberries. Cool.
- Preheat to 400º.
- Roll out the bottom crust and fit it into the bottom of the pie plate.
- Trim the edges, then add the blueberry filling.
- Roll out the top crust into a rectangle and into 8-10 strips to make the lattice topping. You can get fancy and weave the strips or just place half in one direction and top diagonally with the other half.
- Seal and crimp the edges as desired. Sprinkle the top of the pie with sugar.
- Place the pie on a parchment-lined baking sheet (to catch drips) and put it on a lower shelf of your oven.
- Immediately reduce the temperature to 375º.
- Bake for about 40 minutes, until the crust is golden and the filling is bubbling. Cool the pie on a rack.
Notes
If you don't want to make a lattice crust, add a solid crust, but make sure to cut some slits for the steam to escape as the pie bakes.
Recipe adapted from Nick Malgieri.
Recommended Products
As an Amazon Associate and member of other affiliate programs, I earn from qualifying purchases.


Nutrition Information:
Yield:
8Serving Size:
1 sliceAmount Per Serving: Calories: 165Total Fat: 4gSaturated Fat: 2gTrans Fat: 0gUnsaturated Fat: 1gCholesterol: 31mgSodium: 50mgCarbohydrates: 33gFiber: 2gSugar: 27gProtein: 1g
Thatskinnychickcanbake.com occasionally offers nutritional information for recipes contained on this site. This information is provided as a courtesy and is an estimate only. This information comes from online calculators. Although thatskinnychickcanbake.com attempts to provide accurate nutritional information, these figures are only estimates. Varying factors such as product types or brands purchased can change the nutritional information in any given recipe. Also, many recipes on thatskinnychickcanbake.com recommend toppings, which may or may not be listed as optional and nutritional information for these added toppings is not listed. Other factors may change the nutritional information such as when the salt amount is listed “to taste,” it is not calculated into the recipe as the amount will vary. Also, different online calculators can provide different results. To obtain the most accurate representation of the nutritional information in any given recipe, you should calculate the nutritional information with the actual ingredients used in your recipe. You are solely responsible for ensuring that any nutritional information obtained is accurate.
Best Pie Crust Recipe
This is the best pie crust for decorative toppings. The egg and combination of butter and shortening make it easy to work with.
Ingredients
- 3 cups all-purpose flur
- 1 teaspoon salt
- 1 tablespoon sugar
- 1 cup cold butter, cut into pieces
- ¼ cup cold shortening, cut into pieces
- 1 egg, slightly beaten
- 5 tablespoons ice cold water
- 1 tablespoon cider vinegar
Instructions
- In a food processor, pulse together the flour salt, and sugar.
- Add the butter and shortening and pulse until the mixture resembles cornmeal.
- Whisk together the egg, water, and vinegar
- Add the egg mixture to the food processor and pulse until the mixture just comes together, pulling away from the sides.
- Divide the dough into two discs, wrap them in plastic, and refrigerate for about an hour.
- When chilled, use as directed.
Notes
Keep a stick of shortening in the freezer to always have ready for making pie crust.
If you like lard in your pie crust, replace the shortening for lard.
This recipe makes 2 crusts. It's enough for one double-crust pie or two single-crust pies.
Recommended Products
As an Amazon Associate and member of other affiliate programs, I earn from qualifying purchases.

Nutrition Information:
Yield:
8Serving Size:
1Amount Per Serving: Calories: 277Total Fat: 30gSaturated Fat: 17gTrans Fat: 1gUnsaturated Fat: 11gCholesterol: 88mgSodium: 457mgCarbohydrates: 2gFiber: 0gSugar: 2gProtein: 1g
Thatskinnychickcanbake.com occasionally offers nutritional information for recipes contained on this site. This information is provided as a courtesy and is an estimate only. This information comes from online calculators. Although thatskinnychickcanbake.com attempts to provide accurate nutritional information, these figures are only estimates. Varying factors such as product types or brands purchased can change the nutritional information in any given recipe. Also, many recipes on thatskinnychickcanbake.com recommend toppings, which may or may not be listed as optional and nutritional information for these added toppings is not listed. Other factors may change the nutritional information such as when the salt amount is listed “to taste,” it is not calculated into the recipe as the amount will vary. Also, different online calculators can provide different results. To obtain the most accurate representation of the nutritional information in any given recipe, you should calculate the nutritional information with the actual ingredients used in your recipe. You are solely responsible for ensuring that any nutritional information obtained is accurate.


55 Comments on “Lattice Topped Blueberry Pie”
I was just thinking about making a pie, I haven’t made one in ages! Your blueberry pie is beautiful. I just love your pro tips. Being of European descent, my Mom never made North American pies so a really good crust still eludes me. Will definitely give this beauty a go.
how pretty! how delicious. i love blueberries.
Your pie turned out so pretty with the lattice top! My son’s blueberries are done now, but maybe we’ll whip up a pie next year:@)
This pie is absolutely the best! An absolute show stopper that we loved!
We loved this blueberry pie! I had some blueberries I needed to use so this was perfect timing!
This pie is so delicious and tasty! My family and I love this pie. We enjoy this recipe!
I can see why this is Bill’s favorite! It could easily become my favorite. What a perfect pie!
You are very sweet to make a lattice in this heat! It look absolutely gorgeous & I can only imagine how good it would be with vanilla ice cream! Pinning!
One day I will get over my fear of pie making, but until then I’m just going to admire this one. It is so pretty looking!
This looks delicious! I love blueberries. They’re one of my favorite summertime fruits. Thank you for linking up with Foodie Friends Friday. I shared your pie with my Walking on Sunshine FB page today!
The pie looks fantastic Liz ! I wish I was your neighbour. They must have had such a treat !
I’ll bet it tastes as good as it looks!
What a BEAUTIFUL pie!!!! Looks just beautiful and absolutely delicious, too!
If I looked up blueberry pie in the dictionary… this is what I would see… it looks perfect!
Gorgeous! That sounds so good!
Blueberry pie is my all-time favorite dessert. Hands down. I grew up on wild blueberry desserts from blueberries we’d rake not far from the national park near Bar Harbor. (That would be Bah Hahbah in Maine-speak). My father loved blueberry pie for breakfast and so did I. My mother wasn’t so sure it was a good idea.
Your pie is beautiful!
The lattice top is perfectly woven. The pie looks divine.
Of course this would be a hit, no doubt! Who can resist such a lovely pie?
Hi Liz,
Thanks so much for participating in this months Behind The Curtain Dessert Challenge. Your recipe pie looks delicious! See you next month for Peaches and Cream! YUM! 🙂
such a stunningly beautiful pie! it is 10 pm and now all I want is pie!
Amazing lattice top!
What gorgeous photos!
That is one perfect lattice top, Liz! This is gorgeous all around. Blueberry pie is so-summer!
Oh this is a beautiful pie, Liz. And you are right….the blueberries are so good right now. It would be criminal not to bake with them! I just never get tired of blueberries! And your crust turned out so pretty! I really need to bake a blueberry pie soon!
This pie is Americana at its best, Liz! And yes, you are a sweet wife & mother =)
I love blueberries, your pie turned out beautifully! 🙂
Liz, this pie is gorgeous. I adore blueberry pie.
I love blueberries always! and love this tart Lizzy!!
My comment just vaporised! I’ll try again. That’s a lovely looking pie and well done with the lattice – I can imagine that took some patience! When my father went to the USA as an exchange student (way back in the 1950’s when the only way to get there from NZ was to go by ship), he was served his first ever blueberry pie. It has been his favourite dessert ever since!
I love the look of your pie and well done with the lattice work – I can imagine that took some patience! When my father was an exchange student in the USA (way back in the 1950’s when you had to travel by ship to get there), he was served his first ever blueberry pie. It has been his favourite dessert ever since xx
Gorgeous, Liz! Yes, pie dough needs to be cold and it’s freaking hot around here! Brian is perpetually in the mood for blueberry pie. 🙂 I’ve never tried pre-cooking my filling. I just mix whatever it is with sugar, lemon and flour and dump it in to the crust. Lazy pie maker, here. 🙂
Beautiful. This looks like the kind of pie I would dive straight into! Love the lattice top!
Wow and yum! Your pie is beautiful and I’d like one of everything linked in the bake-along too:@)
That is such a pretty blueberry pie Liz. I love the lattice top crust. We recently had our fence rebuilt and it also has a lattice top. 🙂 Looks delicious! I wish I had a big slice right now. Have a great Thursday!
I couldn’t wait to see what you made! Looks yummy and your lattice is perfect!! I was late to the party, but Sheryl added my post.
Blueberries and Lemons, a gay “marriage” indeed! I just made a ton of room in my freezer because I plan on loading up on blueberries this season. The crop seems to be extraordinarily good! Perfect for July because as we all know, July is National Blueberry Month and I can’t think of a better way to celebrate than with a requested Lattice Topped Blueberry Pie!
Thank you so much for sharing, Liz…
Your pie is gorgeous and it’s been years since I’ve had blueberry pie – I know. I have to change that!
This pie looks brilliant, Bill is so lucky 😀
Cheers
CCU
You did good girl! I hope Bill did the dishes or something nice for you! It looks wonderful and would not say you stink at pie crust, on the contrary it looks very professional and VERY delicious!
Beautiful pie. Thanks for the tip reminder too. I always forget what a great idea it is to pre-cook the filling. You have told Bill recently how awesome his wife is, right? 🙂
Your pie looks so pretty and I bet it was delicious! I am terrible at pie crusts any time of the year so I applaud you for trying one during the heat of summer.
I can’t seem to get enough of blueberries lately too and what I wouldn’t give for a taste of that gorgeous blueberry pie of yours 🙂 I love that you loaded the filling with so many blueberries! Yum!
Beautiful! I would love of slice of this pie. I can see why it was wiped out!
You are a good wife! Braden can hint as much as he wants on something but I need to be in the mood to make it, not when he wants it! Beautiful pie.
When I see blueberry pie I always think about this famous quotation from “My blueberry nights” movie. “What’s wrong with the blueberry pie? There’s nothing wrong with the blueberry pie, just people make other choices. You can’t blame the blueberry pie, it’s just…no one wants it.” It is absolutely not true and your pie is a proof:)
Liz, you truly are a sweet wife..This lattice is very beautiful. Hope enjoyed your hard work..
I have never made a blueberry pie, but this looks pretty delicious. I am always intimidated by making pie crust. I love the lattice crust on yours and this looks so yummy.
I saw this beautiful pie on the challenge and of course it is yours! Your creations are always so beautiful. I so want a bite!
Blueberries and lemons, what a great combination for a dessert challenge-love your lattice topped blueberry pie and I can just see it going very fast on the 4th of July!
I haven’t had blueberry pie in soooo looong! Thanks for the knock out recipe, Liz!
What a beautiful pie! It may be breakfast time…but starting the day with dessert sure does appeal to me…one slice and a cup of coffee, please!
Stopping by from LBC Dessert Challenge, this pie looks amazing!
Such a great choice, I adore blueberry pie and totally agree on no skimping. I made a pie too but quite different.
I’ve been obsessed with blueberries this summer!!!
Your pie looks beautiful, Lizzy. Save me a slice 🙂
Toodles,
Tammy<3
I’m sure there isn’t much proof (if any) that that pie ever existed – lol!